Home Inspection Geeks
  • Home
  • Your Inspection
    • Single Family Homes
    • Condo Inspections
    • Multi-Unit Inspections
    • Commercial Building Inspections
    • Radon Testing
    • Your Report
  • Pricing
  • About
  • Areas We Serve
    • Aurora, IL
    • Chicago, IL
    • Evanston, IL
    • Naperville, IL
    • Northbrook, IL
    • View All Service Areas
  • Blog
  • Contact
  • Book Now
  • Menu Menu

Tag Archive for: mold

How To Get Rid Of Mold Spores In The Air

mold

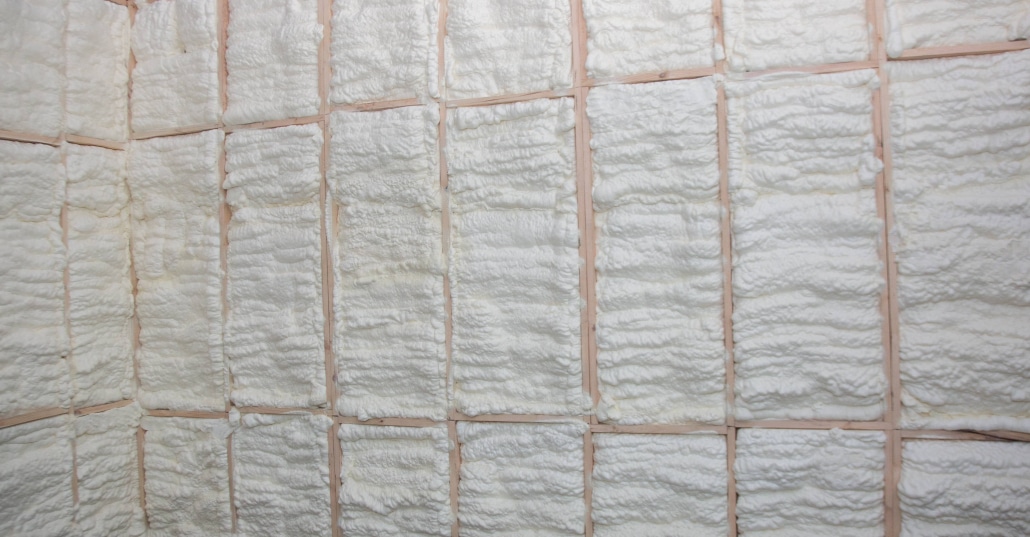
Most homeowners neglect the area of air quality. This is not an area typically thought about. If you begin to notice mold growing in your bathrooms or kitchen, you might have a mold problem. Keep your ac air filter changed regularly. A dirty ac air filter can become a source of mold in your home. How to get rid of mold spores in the air? Install HEPA air purifiers in various rooms of your home. This increases air quality.

Let’s take a look below at what mold spores are and how we can reduce their impacts in our homes.

What Are Mold Spores

Mold spores are not fungi that you would typically see. In fact, they travel as tiny particles throughout the air that we breathe in. Unless a situation of high moisture arises, you would typically not know if any mold spores were near you. Mold spores need very precise conditions to grow and reproduce. Keeping your home free from high moisture and darkness is key. Keep in mind that every home and building in the world has mold spores. You can attempt to reduce the numbers in the air that you are breathing in, however, you cannot get rid of them!

Getting Them Out Of The Air

The goal is to make sure that you are breathing in the cleanest air possible. Unfortunately, it is impossible to get rid of all mold spores in the air so you need to replace the air filter in your ac unit regularly. In addition, use an air purifier that contains a high-efficiency particulate air (HEPA) filter. These air filters are known to remove up to 99.7% of all mold spores from your air.

Purchasing a small HEPA air purifier will allow you to clean the air in a standard bedroom. If you feel the need to clean a larger area in your home, then you will want a larger HEPA purifier. Most large HEPA air purifiers can clean the air of a room that is 400 sq. ft. The larger the home the more HEPA air purifiers are needed.

Water leak in bathroom can lead to mold spores.

How Do I Prevent Them

There are a variety of ways that you can prevent mold spores from floating around in the air of your home. Dehumidifiers can keep the humidity in your home substantially reduced. It is also a good idea to increase the ventilation of your home where the moisture is high.

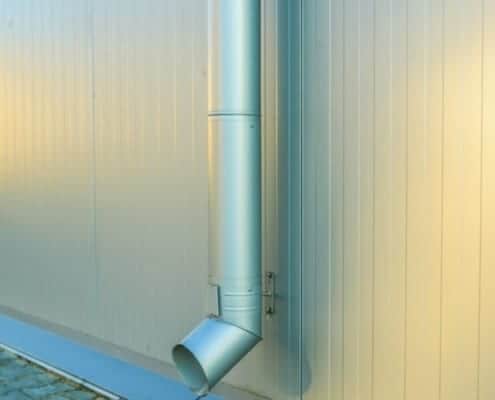
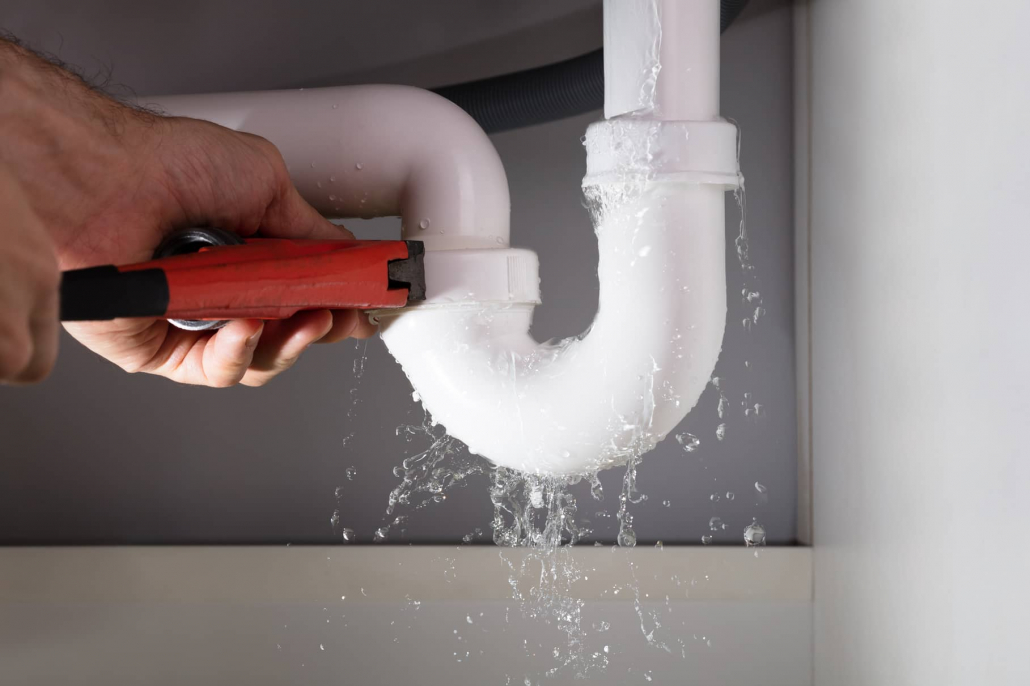
  • Repair any water leaks that lead to mold in your bathroom or home.
  • Clean your humidifier and replace the filter to prevent mold growth.
  • Keep a nose open for musty smells.
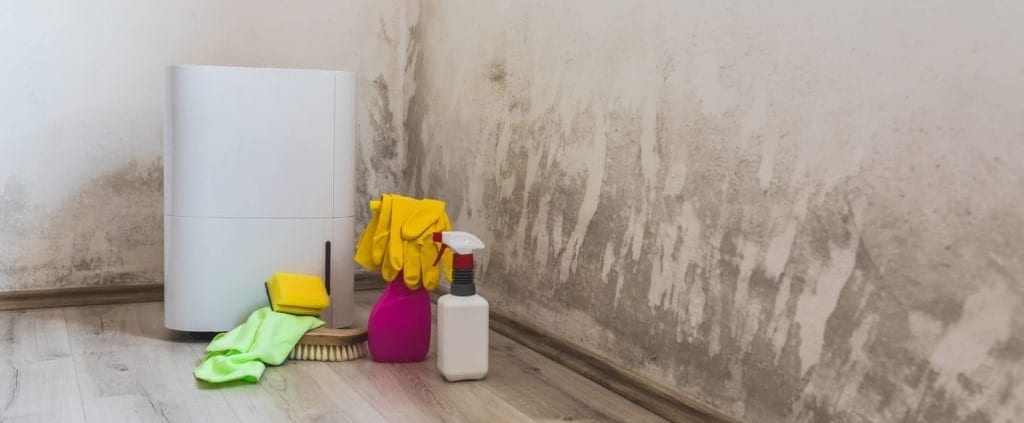
  • Immediately remove any mold that might appear. Use a scrub brush and liquid detergent to scrub off the mold that appears on your walls.

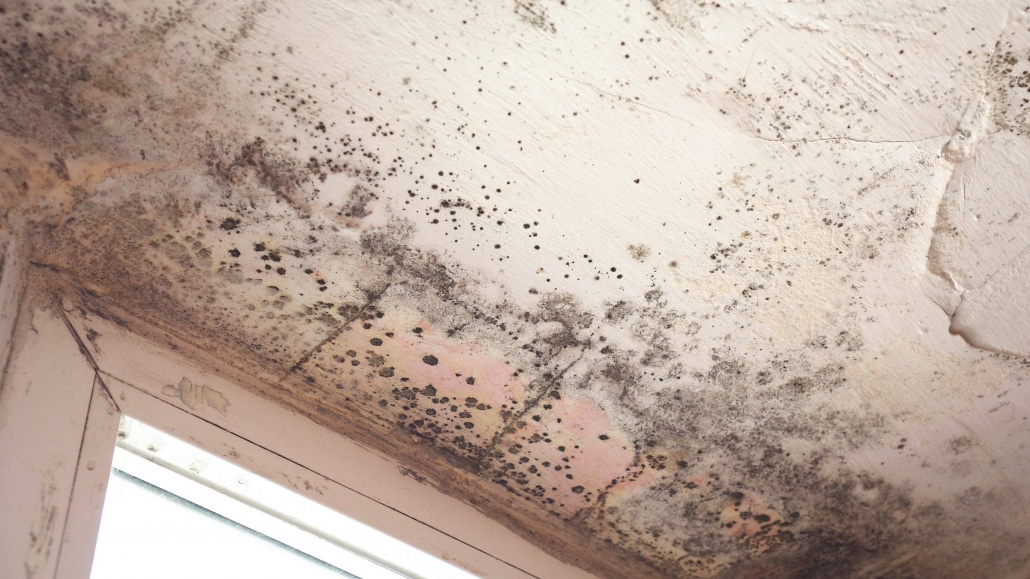
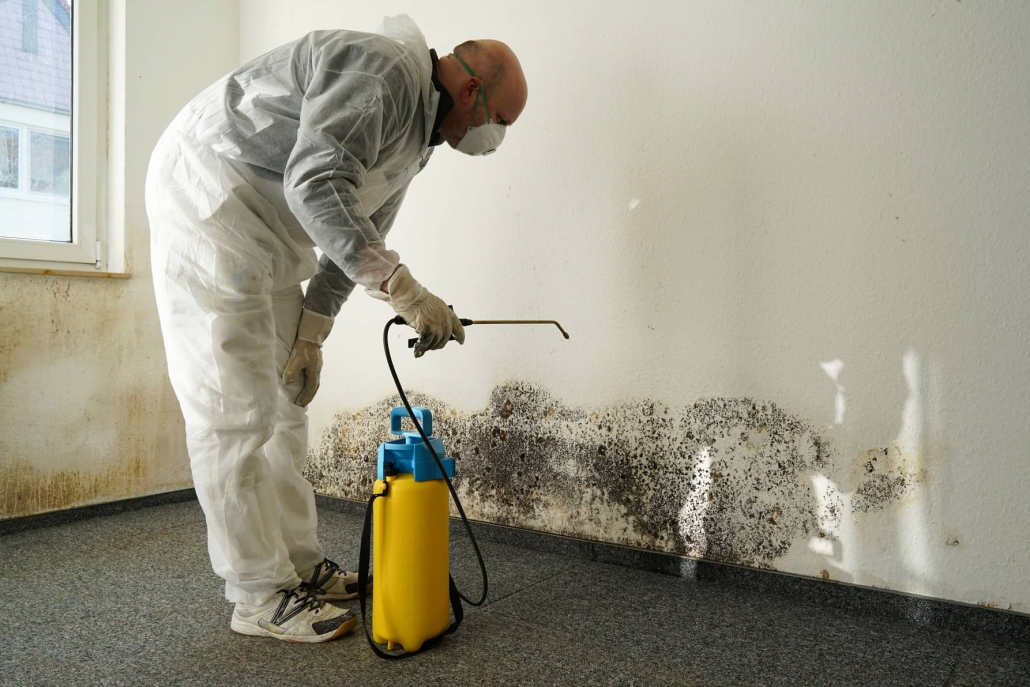
If you notice mold in an area larger than 10 square feet, you should call on a professional mold remediation company to remove the mold safely.

How Much Does It Cost

Mold removal can usually cost you $1,380 to $3,500. Also, removing mold spores from your air can cost you the price of a HEPA air purifier. Those can range from the smallest unit around $45 to a large unit to clean 1,250 sq. ft. costing you $600. When mold remediation is needed in your home, be prepared to spend a minimum of $475 and upwards of $6,400. Lastly, we can do an air quality test for $345 but cheaper if you also have a home inspection.

Other Recommended Maintenance

Now that you understand more about mold spores, read up on how to stop mold growth in your home. The more you understand mold growth the easier it is to prevent it.

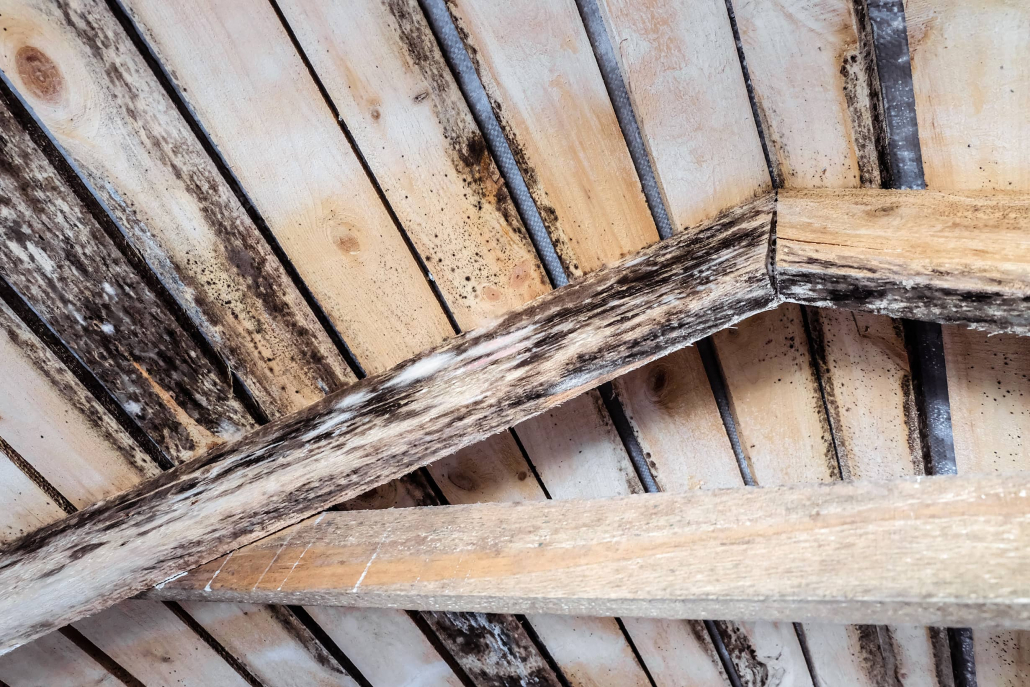
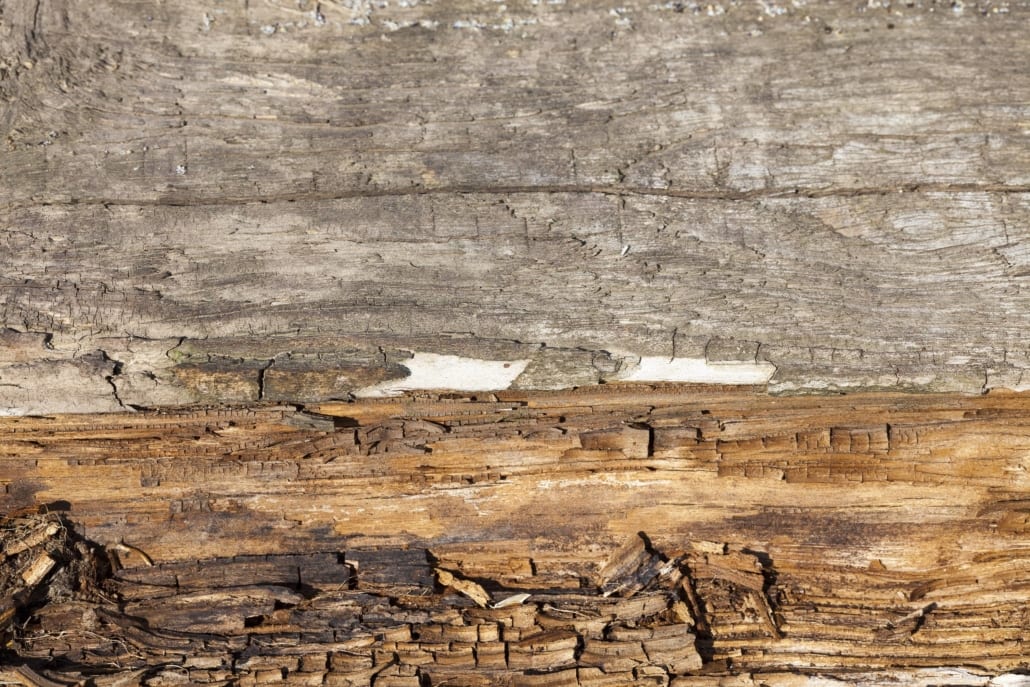
One of the most common molds is black mold. Oftentimes you will see black mold in your attic space. This is caused by a leaking roof or skylight, or even ventilation issues in your attic. If you notice mold on your attic plywood, there are ways to remove it so read up on this process and call on a mold remediation company to assist.

Lastly, finding out if mold is in your home is vital to your family’s health and safety. Having an air quality inspection can occur in addition to your full home inspection.

Mold remediation by a professional.

When Do I Call On A Professional

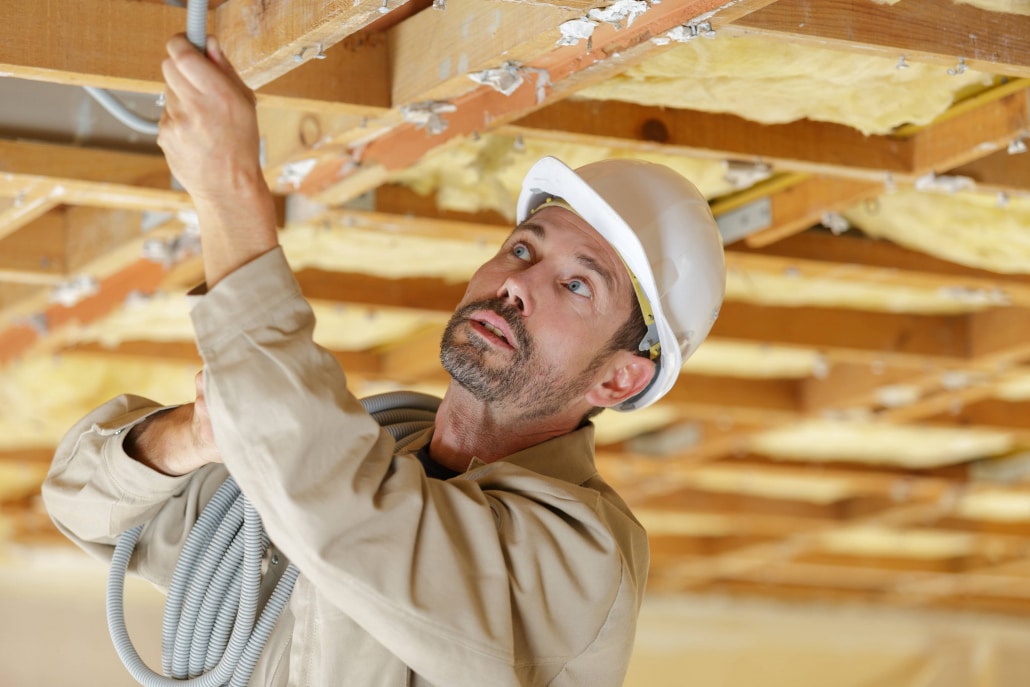
Taking the precautionary steps to ensure that mold is not prevalent in your home is key. If you or your family begins to experience health issues, you should immediately call on a mold remediation company. Your local mold remediation company can inspect your home to determine how far the mold has spread. If the mold is covering a large area of the home, you may need to move your family out of the home while the mold is removed. Keeping your family safe and healthy is key. Also, consider reaching out to your local home inspection team. They can inspect the home for all mold scenarios as well as recommend a reputable local mold remediation company.

Conclusion

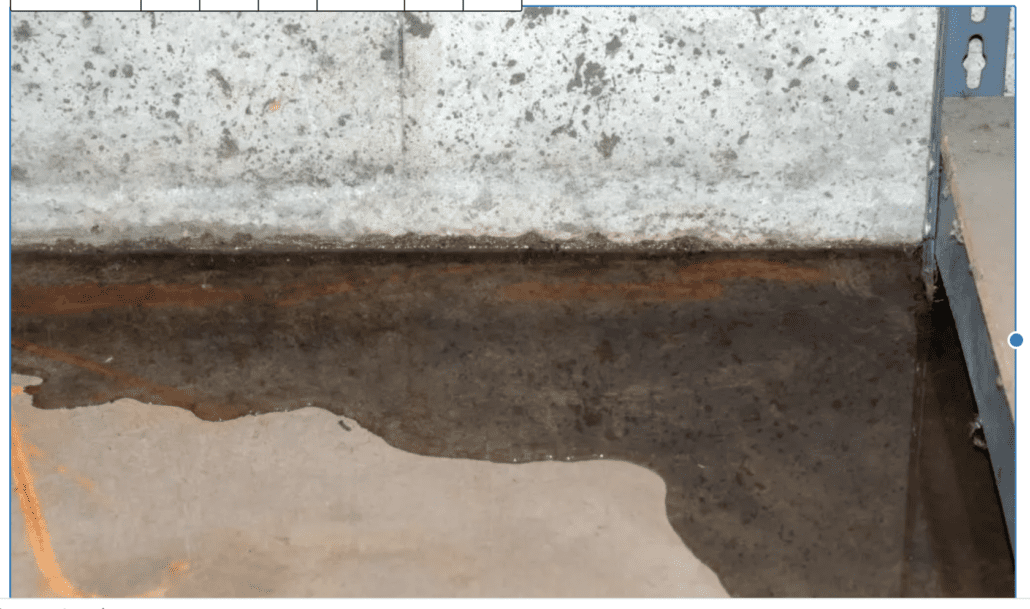
To keep mold spores out of the air in your home, keep your home as dry as possible. High moisture and damp areas are breeding grounds for mold. Also, mold is typically more prevalent in your bathroom or basements. Do your best to ensure that all exhaust fans in your bathroom are working to suck out all moisture from your bathroom. Also, check the basement for water.

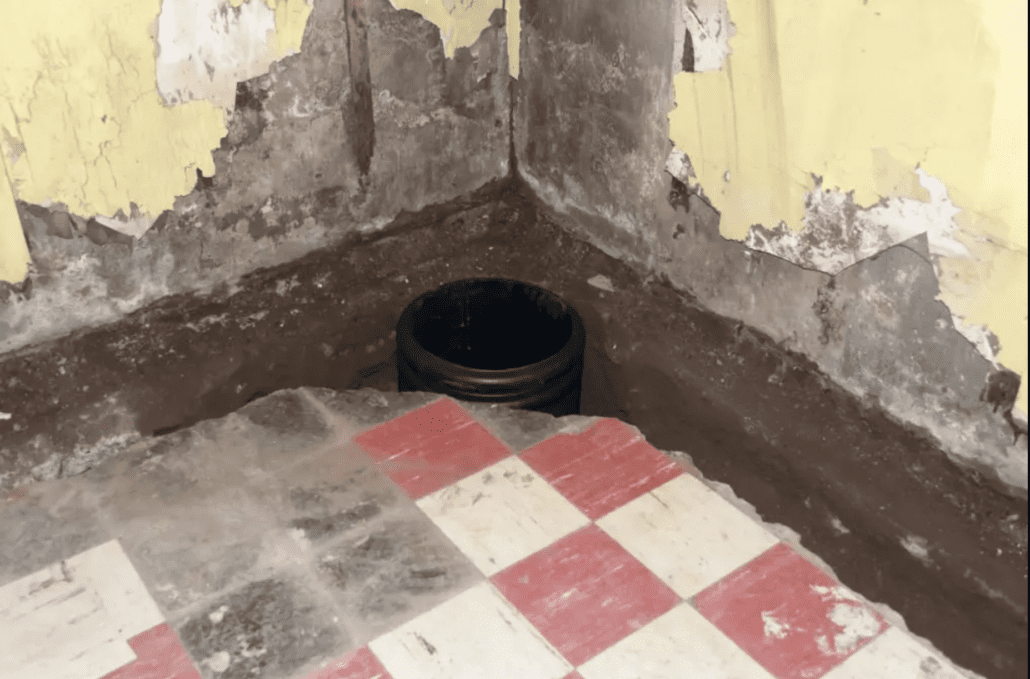
If your basement drain is clogged or runoff from your landscaping allows water into your basement, mold can thrive. These conditions are clear invitations to mold spores settling out of the air and onto the basement walls. If you notice mold in any area of your home, call on your local home inspection team to conduct a full home inspection. This allows you to know all of the moldy areas of the home. Call on Home Inspection Geeks can take a look at your mold needs when we come out for a home inspection Cook, Lake, and DuPage Counties, IL

March 22, 2022

Do You Need Attic Ventilation With Spray Foam Insulation

Attic

It is winter and you are feeling a draft coming from your attic. Attics keep our home warm in the winter months and cool in the summer months. However, it is not just the attic that does this job but the insulation. There are different types of insulation and you want to choose what is right for your home. One of those is spray foam. Do you need attic ventilation with spray foam insulation? No, spray foam insulation is applied to the ceiling and creates an air-tight seal.

Let’s take a look at spray foam insulation.

What is Spray Foam

Basic spray foam is created when you combine isocyanate and polyol resin. This makes polyurethane. Spray foam materials have been used as insulation in homes since the 1970’s. Let’s take a look at the differences of the spray foam types.

  • Open Cell Spray Foam-this allows air into the cells, which makes the foam softer and less dense.
  • Closed Cell Spray Foam-this creates an air seal and is the best insulator.

Is It Eco-Friendly

The Environmental Protection Agency (EPA), states that the curing of spray foam means that there is a chemical reaction that produces the polyurethane foam. It is recommended by manufacturers, that those who use spray foam insulation wait 24 hours after the application of the high-pressure material, before exposure. The term “off-gassing” refers to the curing or releasing of chemicals from spray foam. The chemicals from the spray foam are released into the environment as it dries. Anyone that is not wearing personal protective equipment, should not come into contact with the spray foam process. This could cause serious illness and health complications.

Is Ventilation Needed

Believe it or not, attic ventilation for spray foam insulation is not needed. The simple reason is that spray foam is applied to the attic ceiling and not the attic flooring. The idea is that the attic is now insulated from the outside weather and able to keep the temperature inside the attic and living spaces the same. Due to this aspect, the disadvantage of an unventilated attic is canceled out. However, you now need to condition your attic space with heat/AC to match the house.

The varying differences between a spray foam attic space and an attic space with cellulose and fiber layers on the attic floor are quite obvious. When laying cellulose and fiber insulation to the attic floor, there is no real sealing and this creates a layer of cold air from the roof and warm air from the home. However, when you seal your attic with spray foam this keeps the warmth from the sun from penetrating the attic space and allows it to stay cooler longer. Unvented attic spaces are more comfortable to the homeowner, even during the cooler months.

spray foam insulation

Types of Insulation

  1. Spray foam insulation-a very popular and reliable type of insulation. Once it is sprayed in, it does not move unless cut out or disturbed by animals. Life span is not exactly clear and it is likely not very eco-friendly.
  2. Cellulose insulation-very effective at blocking air movement and eco-friendly. Life span is not that long and will start to break down after 15 years. You might see a range of 20 to 30 years with this recycled insulation material.
  3. Fiberglass insulation-this type can last 80 to 100 years if not disturbed or damaged by water. If moisture is present, this insulation can fail in as little as 15 years to 20 years.
  4. Mineral wool insulation-available in all three ways of rolls of insulation, blown-in insulation, or batt insulation and lasts 30 to 80 years depending on the environment that it is exposed to.

How Much Does Spray Foam Insulation Cost

The cost of spray foam insulation is relatively inexpensive. You are looking at an average of $.44 to $1.50 per board foot. This is a one-inch thick or one square foot of insulation covering. If you were to request expanding foam insulation, you are looking at $.50 to $.2.50 per square foot.

Other Recommended Maintenance

Taking a look around your attic when trying to figure out the type of insulation you need is a good idea. One maintenance idea is to look at the plywood to see if there is mold growing. If there is, the good news is you can clean it off with a chemical solution, spraying, and scrubbing. However, after you do this, you will need to find out the culprit.

Electrical wires over insulation.

Another area in the attic you want to look at is your electrical wires. If you have electrical wires, then the insulation you need that can lay over them is fiberglass. This is because fiberglass is non-flammable. You won’t be able to use spray foam insulation for attic ventilation or areas where there are electrical wires. Something to think about when you are adding more insulation to the attic and debating between the type of insulation to use or using electrical wires in the attic.

Lastly, if you notice that your electric bill is higher and it seems you may be losing air in the home, you may need to air seal the attic. This can be done by a contractor or homeowner.

When to Call a Professional

When dealing with attic ventilation or anything in your attic space, you should contact a professionally licensed contractor. Calling on a professional to add to your attic insulation, change the attic insulation, or add a ventilation unit, is a great idea. As the homeowner, you do not want to get involved with the safety concerns of replacing attic insulation. In addition, you might not have the right tools or knowledge to ensure a safe attic space. Call your local home inspection team to inspect your attic and have them recommend the best professionally licensed contractor for your project.

Conclusion

When working on an attic project like insulation and ventilation it is always best to contact your local home inspection team. They can refer you to a professionally licensed contractor that has a high rating of workmanship in your area. In addition, the home inspection team can check for mold in your attic space and other small issues that could arise before installing spray foam. Getting the home inspection can save you money on your home upgrades and ensure that you are getting the best workers for your project. Give Home Inspection Geeks a call. Home Inspection Geeks can take a look at your attic needs when we come out for a home inspection in Cook, Lake, and DuPage Counties, IL.

December 29, 2021

How To Remove Mold From Attic Plywood

Home Maintenance

Inspecting for mold can be a tricky task. Getting into an attic space can be easy for some and difficult for others. Knowing what to look for when searching for mold in the attic is important. It is always best to call on professionals to assist you with this task. Keeping your family safe and healthy is the most important part. Mold removal is not something that every homeowner can do. Better yet, not every homeowner knows how to remove mold. How to remove mold from attic plywood? There is a process of mixing a chemical solution, spraying, and then scrubbing the unsightly mold.

Let’s take a look below at the process for cleaning mold off of attic plywood.

Mold on wood in the attic

What Is Mold

Mold is a type of fungi that contains spores. These spores find areas of high moisture content and show themselves in various colors of black, brown, white, orange, green, or purple. Most molds are harmless, however, it can be rather unhealthy to breathe them in. So, their removal is vital to your health and safety.

What Is Needed

In order to remove mold from your attic plywood, you need the following tools and items to be successful. Let’s take a look.

  • Box fan-this ventilates the attic space.
  • KN95 mask-this is the best face mask to wear so that you do not inhale mold spores while cleaning.
  • Old Clothes-you are going to throw out whatever clothing you wear while cleaning the mold spores.
  • HEPA filter wet/dry vacuum-you need this in order to safely vacuum up the loose mold spores as you clean the area.
  • RMR Mold/Stain remover-specialized chemical that cuts into the mold and safely removes it from the wood surface.
  • Protective plastic gloves-allow you to handle the scrub brush and keep your skin safe.
  • Scrub brush-needed to loosen the mold spores so that you can vacuum them off the surface of the wood.
  • Spray bottle-used to spray the specialized mold remover onto the mold.

How To Prevent Mold Growth

The easiest way to ensure that mold does not grow in your attic space is by making sure that moisture is not present in the attic. Inspect the following areas to ensure that nothing leaks in or allows moisture in.

  • Roof leaks-inspect your roof to ensure there are no leaks that cause dampness and moisture buildup.
  • Raised shingles-make sure that the shingles are secured keeping water from getting trapped and creating an increase in moisture.
  • Ventilation-proper ventilation in the attic allows air to flow evenly throughout and all moisture causing hot air to escape.
  • Air gaps-check to ensure that the attic is sealed and not allowing energy from the home to flow into it. Also, this can create a hotbed of damp heat and a breeding ground for mold.

Checking these areas and making sure that the attic is sealed as tight as it is supposed to be, can keep you from ever having a mold growth issue.

How Much Does It Cost

The cost to remove mold from the attic plywood will be expensive. The area of the attic and the space of the attic determine how much you will pay. Additionally, the national average cost ranges from $1,000 to $5,000 depending on those factors.

Other Recommended Maintenance

While you are up in the attic and looking into the removal of mold on your drywall, you are likely to need to remove mold from your trusses. Understanding how to accomplish this is key to keeping your home healthy and safe. Learning how to remove mold from your trusses is a topic that you will want to learn about.

Considering that you are up in the attic looking at mold removal, you might want to research how the mold has shown up. Parts of the roof might be damaged or exposed to the elements allowing moisture buildup, which in turn, can promote mold growth. Also, check the roof and all of its working parts for your answers. You might find that installing a roof scupper is something that you need to do. Roof scuppers can help the flow of water off your roof and ensure that pooling doesn’t occur.

Chances are that if you are searching for ways to clean mold out of your attic, you should also look into ways to clean mold out of your basement. Moisture levels in the home can cause mold growth in both the attic and the basement, so while you are working to clean the mold off of your attic plywood, this would be a great time to see if the mold has reached your basement.

Mold on the attic ceiling

When Do I Call A Professional

Calling on a professional is necessary when dealing with any type of mold. You want to ensure that all mold is removed properly and the area where the mold has taken over is cleaned and disinfected. Protecting your family and the investment of your home is the biggest priority here. If you are planning to convert your attic into an additional living space or even a space of storage, it is always best to call on an inspection team to ensure that the space is free of any possible mold.

Conclusion

Inspecting your attic can be a simple project. Most attics are readily built with plenty of crawl space and even the opportunity to convert it into a room. Before upgrading your living space, you should call for a home inspection to make sure that the attic is free of mold. Getting the home inspection saves you time and money as you invest in home upgrades. Give Home Inspection Geeks a call. Home Inspection Geeks can take a look at your moldy attic needs when we come out for a home inspection Cook, Lake, and DuPage Counties, IL.

November 30, 2021

How Much Does It Cost to Waterproof a Basement

Basement

Having a basement in a home is really nice. The extra storage space is great, or if you finish the basement there is another place for people to gather or to have guests to entertain. However, if your basement is not waterproof, then you risk issues of water leaking in and mold growing. Waterproofing the basement is something to think about. How much does it cost to waterproof a basement? It ranges in price from $1000 to $6000 and more. It depends on the size of the basement, age of the home, and the foundation type to name a few.

Let’s take a look at why you should know how much it cost to waterproof a basement, reasons to do this, results, factors that affect this, cost to waterproof a home, and when to call a professional.

Why You Should Know How Much It Cost to Waterproof a Basement

Any time you are having improvements made to your home, you need to know how much the cost will be. This is because you need to budget for it. For some people, budgeting is easy and the money is readily available. For others, it may take moving some things around or saving the money for the work to be done. When we have an idea of how much something will cost, it will help us determine if we think we can afford it, do we need it, and how long we need to save the money.

Reasons to Waterproof a Basement

If you are having some of the issues below, you will want to think about waterproofing your basement.

Issues such as:

Missing Downspouts or Gutters

It is important to have downspouts and gutters on your house so the water diverts away from the home. Unfortunately, when you don’t have these, you risk water pooling near the basement window or foundation. This can then seep into the home. If possible, steer the downspouts 4-6 feet away from the home and 6 feet is best.

Negative Grading in the Yard

Negative grading can also be a factor. This is when the yard slopes towards the home. Unfortunately, then water enters the home and through the basement. Instead of digging up the yard, you can put in plants and shrubbery that will help keep the water away. Also, you may need to think about a drainage system in the yard if there are issues with the runoff.

Water Pipes That Leak

Take a look at the water pipes and see if these are the culprit. If they are leaking, this could be what is causing the moisture in your basement. If your home was built between 1978-1995, you may have polybutylene pipes. These are seen in the walls in the basements and also across the ceiling in unfinished basements.

Do you have pex plumbing? This closely resembles polybutylene but is a good material for piping. However, rodents do like it as well, and cause them to spring a leak. It is important to find out what type of plumbing you have and consult a professional to take a look. Even if you have copper pipes or another material, anything can burst and spring a leak. It is always best to have a professional check it out.

To find a water leak in the walls, hire a professional who uses a thermal imaging scanner. This will show thermal anomalies and help the inspector figure out where the moisture is coming from.

Groundwater Sits in the Basement

If you have groundwater in the home and need a way for it to get out, installing a french drain may be necessary. Sump pumps collect the groundwater and pump it away from the home. However, if it is an existing house, then a french drain is expensive to add.

Window Leaks When it Rains

When it rains, you may notice that the window is leaking. This is a perfect time to find out if there is a sealing or caulking issue. You may also notice that there may be missing flashing as well as clogged gutters. Flashing is usually installed near the chimney, vents, and skylights. If it is missing, then water will get into the home through any place that it can.

Results of Water in the Basement

Mold

Mold will form in the basement and cause health and structural issues. There are various ways to clean the mold in the basement and you will need to use an N95 mask, protective eyewear, protective clothing, and gloves. You will be stopping the source of the mold, cleaning the area, and drying the surfaces.

You may even find mold on the concrete in the basement because the mold spores will land on it and spread.

Rotting Wood

There will be rotting wood in the basement from the water. Just like with cleaning it above, you will need to wear protective gear to take care of any mold or mildew issues. Contacting a professional will be a good idea to see if anything structural was affected.

Damaged Walls and Floors

Walls and floors in the basement will be damaged from any water that comes in. You will need to contact a professional to survey the damage and find out what can be saved and what needs to be fixed.

Three Factors That Will Affect the Cost to Waterproof a Basement

Size of the Basement

Professionals usually calculate the cost for drainage by linear footage. If the previous owner didn’t waterproof the basement, then you probably have water in there and will need to calculate tearing down drywall and putting in new flooring as well. This will almost be like a demolition and you will need an estimate.

Age of the Home Determines Cost to Waterproof a Basement

A home built after the 1960’s will probably have footing that will allow water to drain into it. It usually costs $50-60 per linear foot. Homes built before the 1960s will have a fast track drainage that needs to be installed and range from $70-80 per linear foot.

Foundation Type

The concrete block will allow water to seep in and the hollow cavities will become full. You or a professional can drill weep-holes in the lowest block to allow drainage.

Cost to Waterproof a Basement

Companies will charge $1000-$6,000 and up to waterproof a basement. Some of that charge will also be on repairs and additions to the home as outlined below as well as it will vary depending on the factors mentioned above.

Dehumidifier

For a minor issue and small space, you can use a dehumidifier. This can be for moisture that occurs when drying laundry in the home. However, it won’t work for a larger area.

Cost: A dehumidifier can cost about $150 or more for a small space. For a large area, over $2000 is possible to pay for one. Consult a professional before you spend the money to see if it will help.

Waterproofing Products

Did you know that there are waterproofing products such as paint, sealants, and others that will stop moisture in the walls? They may work in small places but may not last as long as they should.

Cost: About $20 – $200 per can of paint and then add in labor charges.

Install Downspouts or Gutters

As mentioned above in the issues section, missing downspouts or gutters from the home can cause moisture in the basement. Also, if you already have gutters, maybe you only need repairs (or to clean them out) and that is a lot cheaper.

Cost: Downspouts and gutters can cost between $500-$1400 or more depending on the size of the house.

Weep Holes in Windows

Make sure that the windows have a good well drain or weep hole. If it doesn’t, the water comes in and sits on the windowsill, and causes wood rot. If your windows don’t have a weep hole, it means they are older and need replacing.

Cost: Replacing a window can cost $100 and up depending on size and style.

Grading in the Yard

The other option is to find different landscaping that can help keep the water away from the home and also from pooling like various types of vegetation, gravel, swale, pavers, and a rain barrel.

Cost: Leveling out the land can cost about $1000-$3000, however, adding vegetation, gravel, swale or a rain barrel will be cheaper. Pavers would be a nice addition for aesthetics as well.

Install a French Drain

This is expensive to add to a pre-existing home because it requires using a jackhammer to break up the concrete. However, if you are building a home, it may add about $1500 to the cost of the foundation so it is better to do it at that time.

Cost: A french drain can cost $7,000 to install on a pre-existing home.

Exterior Weeping Tiles

These are outside of the home and are plastic pipes that collect the water before it reaches the wall.

Cost: $100 per foot for the pipe, gravel, and exterior membrane.

Sump Pump (outside of the state of Florida)

In homes that have a basement, a sump pump is very effective for getting the groundwater out. It removes the water that collects in a water collecting basin and sends it out to the yard. If this combines with a subfloor pressure relief system, then it is even more effective. This channels the water to multiple sump pumps.

Cost: A sump pump costs between $500 and $1100 depending on how many pumps are needed in the home.

Crack in Foundation

If you think there may be a crack in the foundation, contact a professional to check it out. There are some that you can fix and some that will require a professional to fix. Additionally, there are various reasons why these happen so a professional can help with the diagnosis.

Cost: Between $500-1000 depending on the size of the crack

Missing Concrete Vapor Barrier

What if the concrete vapor barrier is missing? Unfortunately, this will be an expensive repair. There are some people who will tear up the flooring and add an epoxy vapor barrier to the concrete, called CrownCote. On the other hand, others may cut out the floors, install a moisture barrier, and then re-pour the floors. This of course requires the involvement of a professional.

When to Call a Professional

Call a professional to help you with a plan for waterproofing the home. When we buy a home, we assume the previous owner put things in place to prevent issues such as water in the basement. Unfortunately, it doesn’t always work that way and we are left holding the bill. This is also why a home inspection before the purchase of a home is important.

Conclusion

Waterproofing a basement can be an arduous task and time-consuming. Patience will be needed as the best solution for the home is explored. Not sure where to start or what you need to do? Home Inspection Geeks will inspect your basement during your home inspection in Chicago, IL., and surrounding areas.

June 9, 2021

Deck Inspection: What You Need to Know

Deck

A deck on a home is a luxury as not every home has one. It is the place for families to gather and entertain as well as relax. However, they do need to be inspected to make sure they are durable and strong. There are 45 million decks and about 45% of them are safe. This means 55% of them are not. The last thing you want is for a deck to collapse. What do you need to know about the deck inspection? Make sure that you have the permit and building it correctly. Follow the order of events to get you to the inspection and what to check on your own after you pass the inspection.

Let’s take a look at why you need to know about deck inspections, the cost, what inspectors look for when building a deck, homeowner deck inspection, deck maintenance, other maintenance, and when to call a professional.

Why You Need to Know About Deck Inspections

Do you have a deck? If yes, listen (or read) closely. Sometimes we don’t think that inspecting the deck is important. If you are building a deck, you need to have it inspected and approved. However, if you have one you need to keep up the maintenance. The spring is a perfect time here in Illinois and colder states. After the winter storms and as spring is starting to begin is great so you can get the deck ready for your summer cookouts and parties.

Cost of a Deck Inspection

A deck inspection can cost from $25 to $200 depending on the length of time needed for structural, safety, and common building code violations check.

Building a Deck? Here is What the City and Home Inspectors Will Check

City Inspector

  • The city inspector is in charge of making sure that the plans you submitted are in compliance with local and zoning codes and regulations
  • You will want the inspector to check the framing before the decking is installed so he/she knows it is in compliance and also for safety
  • Schedule footing inspection before pouring the concrete foundation as footings must pass inspection before you pour the concrete!
  • Lastly, the inspector will check the base sizes and depths of the holes against the plans you submitted to make sure they are in compliance

When the entire project is complete, the inspector will need to be called for a final inspection to close out the permit. It is always a good idea to attend the inspection, however if you can’t, post the plans in a place where the inspector can see it to sign

If you get a failure notice for the deck, find out what needs to be fixed and have it re-inspected by a professional.

Home Inspector

The home inspector will inspect the deck after the city inspector has approved it and check for:

  • Proper joist hangers
  • No missing fasteners
  • Good connections for beams
  • All hardware connections.
  • As with the city inspector, try to attend the inspection so you can find out if there are any issues and anything the city inspector might have missed.

The idea is to make sure the deck is in compliance and safe.

Here is a great video below about the 6 warnings of an unsafe deck:

Deck Statistics From InterNACHI

  • Many deck collapses happen while people are on them or have heavy snow on them.
  • Decks collapse more in summer than other times of the year.
  • 90% of deck collapses happen because of separation of the house and the deck ledger board. This allows the deck to move away from the house causing it to collapse.

Keep these things from happening by also doing your own maintenance inspections.

Homeowner Deck Inspection

When checking out your deck, pay attention to the following:

Insect Damage

The wood used to build the deck is treated to keep the ants and termites away. However, sometimes this step is skipped or the deck was built before the 1980’s. In this case, there could still be damage from ants and termites. Take a look around the outside of the deck and where it is attached to the home. If you live in a more humid climate, there is a better chance you will have termite issues. If you notice when you walk on the deck that it sways a little, this is a good time to call a professional to check it out.

Under the Deck

Going under the deck is the next area to check. You are looking for any rusting of fasteners, connectors, and joists. These should be in good shape. Bolts, screws, nails, and metal connector plates should also not be rusting and should be in place. If there are any areas you have concerns about, contact a professional. It is better to be safe than sorry.

Is your deck 10 years old or older? If it is, you will want to contact a professional who knows about the codes to make sure it is in compliance.

Cracks and Rotting

If you notice a crack on the floorboard, watch it over the next few months. If it starts to grow, you will need to replace it. Also, if you notice any wood rotting and it has spread across the beams replacing them is a good idea.

Checking the Railing

According to InterNACHI, there are more injuries because of rail failure than deck collapse. Also, deck stairs are known for not having handrails that are graspable. It is important to make sure the handrails are on the deck to help those who need them when going up and down the stairs.

Mildew and Mold

It can be difficult to avoid mildew and mold depending on the climate and also weather patterns. However, you can monitor it and make sure you treat it when you see it. Mildew can make the steps very slippery so you need to check often to make sure it isn’t there. If it is starting to form, wash down the deck.

Mold can grow on the deck, especially on the wood. However, mold can also grow on concrete. This happens in humid climates but also when trees and branches cover the ground or the deck. Often, there is concrete near the deck so keep an eye out. You don’t want it to be prone to accidents.

Deck Maintenance

Resealing and staining the deck every 2 to 3 years is important. It reduces cracking from water but also heat and cold temperatures.

Removing snow from the roof and the deck is important to make sure it does not allow the deck to collapse.

Check the eaves and gutters to make sure they are working well as you don’t want there to be water coming off the roof and causing mildew on the deck. This can easily happen if the water is coming over the sides and sitting in puddles on the deck.

Continue to inspect the footings of the deck as they are a major part of the decks foundation. If there are cracks in the concrete around the footings, call an inspector to check it out.

Other Maintenance

If you leave your home for the winter, you want to dewinterize it when you come back. This includes checking the deck for the issues above and making sure that the outdoor spigots, that are often close to the deck, are working. Don’t forget you may have put outdoor faucet covers on them before you left so take these off after the last freeze.

When checking out the deck, pay attention to other areas around the home. For example, is there negative grading in the yard? If so, you want to get that fixed. It can cause the ground to become too soft and a hazard for the deck.

Also, if you are looking around the home and think you see moisture intrusion, hiring a licensed home inspector who uses thermal imaging is a smart idea.

When to Call a Professional

Call a professional if you need an inspection on your deck or there is an area of concern. You want to make sure that the deck is safe as many accidents occur when a deck is not structurally sound.

Conclusion

It can be hard to know what an inspector will look for so we let you know in the blog. After the inspection is done and complete, it is you the homeowner that has to continue to do maintenance and check the deck for any issues. You will want to find these before it becomes an issue, injury, or death. We can inspect your deck while we do home inspections in the Chicago area. Think you might need our services? Leave us a comment below!

May 7, 2021

Pages

  • About
  • Areas We Serve
  • Best Home Inspectors in Chicago, IL
  • Commercial Building Inspection Chicago, IL
  • Condo Inspections
  • Contact
  • COVID-19 Guidelines
  • Home
  • Multi-Unit Inspections
  • Our Blog
  • Preferred Contractors
  • Pricing
  • Privacy Policy
  • Radon Testing Chicago, IL
  • Sample Page
  • Schedule Your Inspection
  • Testimonials
  • Thanks
  • The Best Home Inspectors in Aurora, IL
  • The Best Home Inspectors in Evanston, IL
  • The Best Home Inspectors in Naperville, IL
  • The Best Home Inspectors in Northbrook, IL
  • Your Inspection
  • Your Report

Categories

  • Appliances
  • Attic
  • Basement
  • Deck
  • Electrical
  • Fireplace
  • Home Buyers
  • Home improvement
  • Home Inspection
  • Home Maintenance
  • HVAC
  • mold
  • Plumbing
  • Podcast
  • Real Estate
  • Resources
  • Roof
  • Safety in the Home
  • Taking Care of Your Home
  • Uncategorized
  • Water
  • Water Heater
  • Winterization

Archive

  • May 2022
  • April 2022
  • March 2022
  • February 2022
  • January 2022
  • December 2021
  • November 2021
  • October 2021
  • September 2021
  • August 2021
  • July 2021
  • June 2021
  • May 2021
  • April 2021
  • March 2021
  • February 2021
  • January 2021
  • December 2020
  • November 2020
  • October 2020
  • September 2020
  • August 2020
  • July 2020
  • June 2020
  • May 2020
  • April 2020
  • March 2020
  • February 2020
  • January 2020
  • December 2019

Providing Home Inspection Services to Cook, Lake, and DuPage Counties

We provide Inspection services to the Chicago Metro Area. Certified home inspection services including Buyers Inspections, Pre-listing Inspections, New Construction Inspections, Commercial Inspections, Radon Testing, and Sewer Scope Inspections.

View Service Area

Privacy Policy

773-242-9358
info@homeinspectiongeeks.com
Chicago, IL
Open Everyday 24 hours

Sitemap

© Copyright Home Inspection Geeks, Inc. - Managed by WolfPack Advising
  • Facebook
  • Twitter
  • Yelp
Scroll to top