Home Inspection Geeks
  • Home
  • Your Inspection
    • Single Family Homes
    • Condo Inspections
    • Multi-Unit Inspections
    • Commercial Building Inspections
    • Radon Testing
    • Your Report
  • Pricing
  • About
  • Areas We Serve
    • Aurora, IL
    • Chicago, IL
    • Evanston, IL
    • Naperville, IL
    • Northbrook, IL
    • View All Service Areas
  • Blog
  • Contact
  • Book Now
  • Menu Menu

Smoke Alarm Flashing Red

Safety in the Home

Smoke alarms are a necessity in a home and save up to 890 lives a year and reduce the risk of dying by fire up to 50% a year according to the New York State Department of Health. Additionally, the National Fire Protection Association recommends that there be a smoke alarm in each room that people sleep in, outside the room of each sleeping area, as well as every level on a home, finished attics and basements. This may seem like a lot, but saving lives is important. What happens if your smoke alarm is flashing red? If it flashes every 40-60 seconds, this means that it is functioning properly. However, some models it may be that it is not working. It is important to look at the manual for the ones you have in your home.

Let’s take a look at the other indicators so you know what to do to get it back to flashing red again (or whatever color is good for your make and model). We will also look at Carbon Monoxide detectors.

Combination smoke and carbon monoxide detector

Smoke Alarms Do More Than Detect Smoke

The smoke detectors that will work best in your home are ones that detect carbon monoxide and natural gas, as well as fire and smoke. This is because these are harmful to the residents of your home and need to be known when they are in the air. Here is information about the combination detector above.

However, you need to know what the different indicators (and unfortunately, the sounds) mean and stay on top of making sure the detectors are in working condition.

Flashing Red is Good on Many Models

Often when we see red lights on things like our car, or a red pen used by a teacher, we think the red is bad. However, on most smoke detectors, it is a good sign. Red flashing on some smoke alarms signals that all is well and it is working. Take a look around your home at the smoke detectors. What color do you see on the detector? If it is flashing red, check this box on your maintenance list that it is working properly and is ready to save your life if needed. Be sure to research your individual model or look at the manufacturer’s documents to tell for certain.

Chirping Every Minute

When the smoke detector is chirping every minute, this is a clear indicator that the battery levels are low and will need to be replaced. The cycle of chirping will occur every minute for the first hour of low battery operation. After the hour has concluded and the battery is still not changed, the smoke detector will then announce a low battery function.

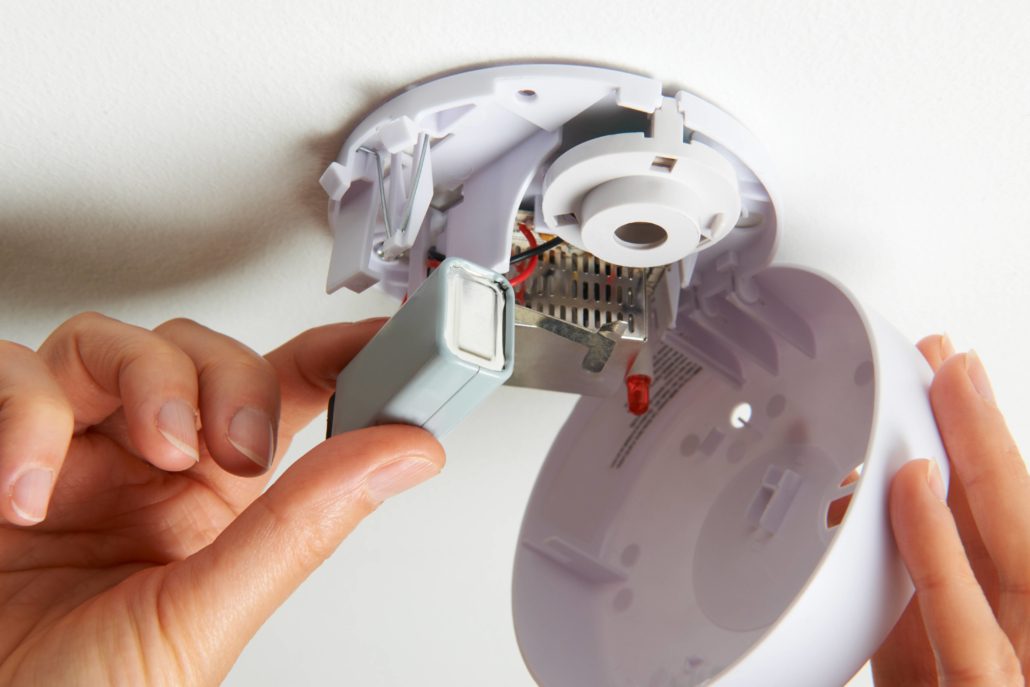
When to Change Battery

First, you will need to determine the type of smoke detector that is present in your home. Once you have established the type, you can determine what battery operates your smoke detector. Most smoke detectors operate off a 9-volt battery. It is highly recommended that the batteries are changed once a year. Regardless of having no malfunctions during the year, it is best to change all of the 9-volt batteries in your system.

Continuous Green Color

When you check your smoke detectors to ensure they are working properly, and you see a continuous green light, this indicates that the unit is functioning off of the AC power unit. This isn’t a bad thing at all. Check the brand and model number on the back of the unit and look up the manual on line. This will allow you to find out what each color means.

Why You Need to Disconnect AC Before Changing the Battery

The importance of disconnecting the AC power revolves around electrician wiring. You should never assume that the wiring in your smoke detector system has been done perfectly. To avoid a potential shock situation when changing the battery, you simply disconnect the AC power.

Green Light Is Out

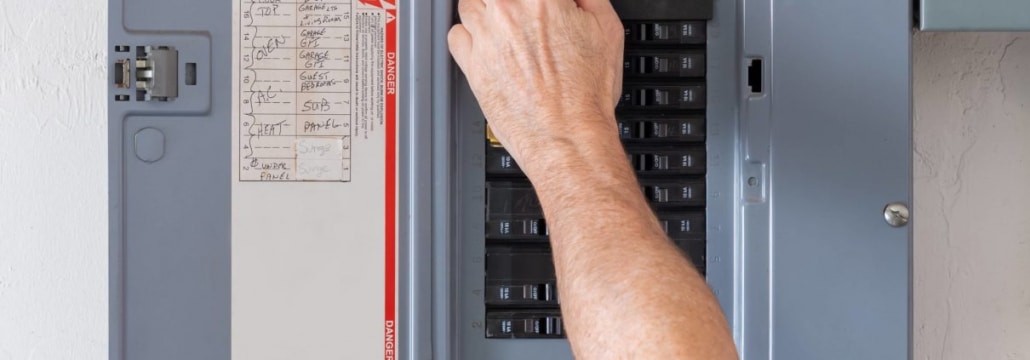
While you are checking your smoke detectors and you notice that your green light is out, you should check your circuit breaker to see if it has tripped. Having a green light out indicates an interruption in the power source. This could be due to the circuit breaker or the wiring of AC power.

How to Reset the Smoke Alarm

In order to reset the smoke alarm, you should first locate the actual issue within the device. It could be something as simple as changing the battery.

  1. Check the area near the alarm that has gone off. Determine that the area is safe and the alarm was triggered by a malfunction, rather than a burnt food item or actual fire in the area of the alarm.
  2. Next, locate the test button on the device and push it. This will give you a clear determination based on the color and sounds of the alarm. This is when you will determine if the batteries need replacement.
  3. Lastly, to reset the hardwired smoke alarm you will use the test button just like you would on a battery operated alarm.

Some Smoke Alarms Have Colors That Mean Something Else

Typically, a smoke alarm has a red and green light to allow you to understand the system is working properly. However, there are other models that will integrate a third light indicator to separate when a malfunction, power source, and a simple battery replacement might be needed.

It is important to do the following:

  • Check the manual
  • Research the model online
  • Decipher what each color might mean for that model: Red, Green, and even Yellow

Carbon Monoxide Detector

Having a working carbon monoxide detector in your home is very important and could save a life. Installing a carbon monoxide detector inside every bedroom and outside every sleeping area is a recommendation. Carbon monoxide can be present in the home in various ways and it is odorless and tasteless so you can’t see it.

Lastly, the carbon monoxide detector has a sticker that says “Move to Fresh Air” to remind you that once the alarm sounds at the very moment the CO levels become unsafe and you must get outside to fresh air. There are also combination smoke and carbon monoxide detectors which are your best choice for keeping the family safe.

Potential Contributors of Carbon Monoxide

Range, oven, stove, water heater, furnace, a running car in the garage, space heaters, portable generators, charcoal grill, and clothes dryers are all potential contributors of carbon monoxide in your home. Having carbon monoxide detectors in the home will allow you to know when the levels are unsafe and you must seek fresh air.

In the wintertime, many people run their furnaces. Keep an eye out for the following:

1.Yellow or flickering flame – this is usually a blue color so this is a sign that the unit may be burning carbon monoxide

2. Moisture around windows or walls – this is an indicator of a leaking furnace

3. Streaks of soot- black, brown or yellow soot stains may be indicating that carbon monoxide is leaking

4. Rust on the vent pipe – water and moisture may have leaked out, thus indicating a leak in the furnace

Any of these signs above may indicate that carbon monoxide is leaking from the furnace.

IF YOU SUSPECT THERE IS A CARBON MONOXIDE LEAK

  1. Get your family and pets out of the home as quickly as possible
  2. Call the HVAC company and gas company
  3. See a doctor to have the family’s health assessed. Carbon monoxide poisoning is treatable, but only if caught early.

Maintenance in the Home

There are a few things you can do to avoid fires in the home that will lead to the smoke alarm sounding.

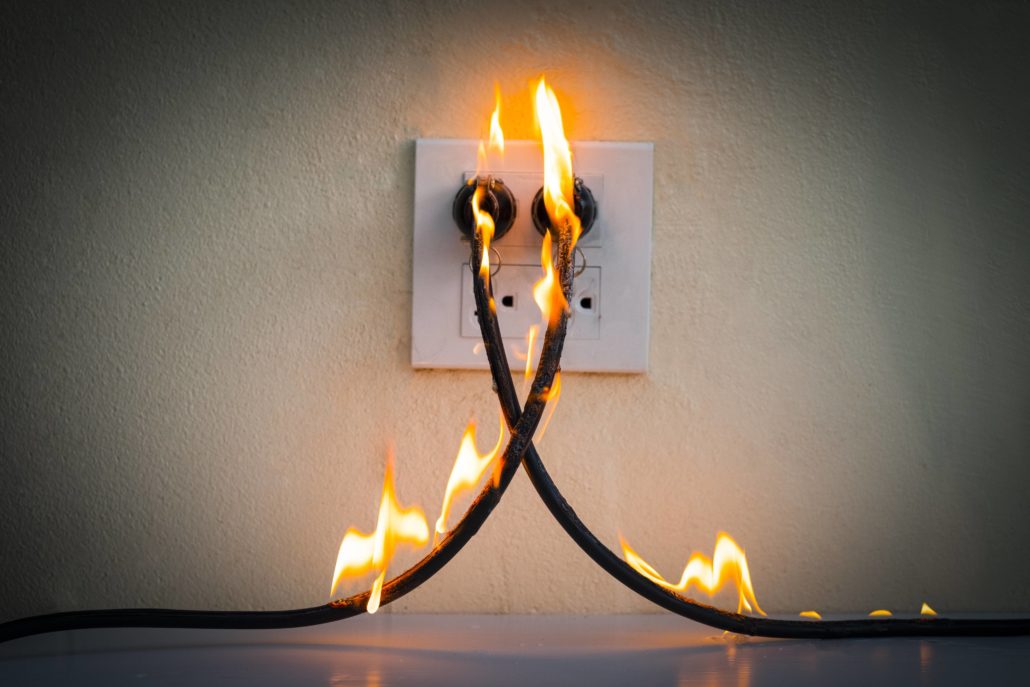
  1. Check the electrical outlets – you want to make sure they are not overloaded. If a fire starts, turn off the power to the electrical current and get the family out of the home right away. If you have time, throw baking soda on top of the fire to help put it out. Call 911 from outside of the building in a safe place.
  2. Power surge – some power surges are external and happen because of mother nature or an animal. Others are internal and can be controlled. It is best to unplug any appliances you are not using in order to cut off the power going through the home. A power surge can start a fire in the home and you want to make sure you are taking precautions. Lastly, this is even more of a reason to make sure your smoke detectors are working.
  3. HVAC unit – pay attention to any sounds or smells coming from the HVAC unit. This may signal that you have a bad blower motor. The problem is, if it overheats, it can cause a fire. Listen carefully to the unit inside and outside the home. If you have concerns, call a professional and schedule maintenance once a year.
  4. Replace smoke detectors every 10 years – Most smoke detector manufacturers recommend you replace your smoke detectors every 10 years.

When to Call a Professional

When installing a carbon monoxide detector or a smoke detector it is highly recommended to consult a professional. You will need a licensed electrician to connect the proper wiring for your devices. In addition, you may want to interconnect the units and this will require the expertise of a licensed professional. Also contact a professional if you are having any issues with either type of detector and hopefully they can be of help.

Conclusion

Smoke detectors and/or carbon monoxide detectors save lives. These two alarm systems are built to warn you when there are fires or unhealthy conditions in the air. You must listen to the alarms that are communicating to you. Ignoring a faulty unit could cost lives in a home or place of business.

Checking your system once a month to ensure proper working conditions, as well as changing the batteries once every year is imperative to your safety. Also make sure you read the manual for the detectors that you have so you know what each color means. Home Inspection Geeks will check your electrical usage in the home and smoke detectors when conducting a home inspection.

July 26, 2021

Bad Blower Motor Symptoms in HVAC Units

HVAC

Most residential homes rely on an HVAC, whether it is for the furnace in the winter or the air conditioner in the hotter summer months. Of course, we always want to find any issues with this in the opposite season, but it doesn’t ever seem to work that way does it?

An HVAC system should last 10-15 years and can with proper maintenance. However, as with anything, parts can malfunction. One of the main parts of an HVAC is the blower motor and there are symptoms when it is bad. What are the bad blower motor symptoms in HVAC? Weak or no air flow, higher than usual electric bill, strange sounds, and overheating.

Let’s take a look at why you need to know about the symptoms of a bad blower motor in HVAC, what the symptoms are, replacing a bad motor blower, cost, maintenance, spring maintenance around the home, and when to contact a professional.

Why You Need to Know About Bad Blower Motor Symptoms in HVAC

The blower motor blows conditioned air through vents in the home. The air conditioner circulates the cool air through the home to the temperature on the thermostat. This is done by spinning the air and it moves through the vents and ducts in the home. As the HVAC system ages, so does the blower motor. If you have to replace the blower motor, check the year of the AC unit to see if you need to replace the whole system instead.

Two Types of Blower Motors

  • Single Speed- goes at one speed and full capacity
  • Variable speed– operates at a low or high speed and creates an even temperature throughout the home.

Bad Motor Blower Symptoms in HVAC

Vents Have Weak Air Flow

Weak airflow means that the motor is having a hard time pushing the air through the vents. This can be due to a number of reasons:

  • Dirt and dust buildup – see if you can clean the dirt off the fan and install a good air filter. If not, contact a professional
  • Excessive moisture- call an HVAC technician to see if it can be dried out and fixed
  • Bad capacitor – call an HVAC technician to fix it
  • Aging motor – HVACs last about 10-15 years so if the motor is in that range and not working, it may be time to replace the unit
  • Ducts that are dirty or leaky
  • Clogged filter – a filter should be replaced every 3 months or sometimes before that in a home that has dust and pets

It is important that the blower motor is functioning properly. If it is not, then the indoor coil could freeze over because there is no air pushes across the coil.

No Air Flow

No air flow can be due to several issues: Bad battery, fan control problem, bad relay, or a thermostat that isn’t working. Unfortunately, this is often a bad sign and a replacement may be in your future.

Higher Than Usual Electric Bill is One of the Bad Blower Motor Symptoms in HVAC

This can be due to a few things such as a dirty and aging blower motor. If this is the problem, it has to work harder to get the air to circulate, thus increasing the electric bill.

Have a single speed motor? You may want to think about replacing it with a variable speed motor. This will allow the motor to operate at the speed it needs to in order to cool the home and reach the temperature set on the thermostat. It does not have to work as hard as a single speed motor and can shut off when it has done its job.

Strange Sounds

These sounds are a reason to call a professional as different sounds mean different things.

For example: screeching and squaeling may mean that there is problems with a belt or damage to the bearing. The good news is a professional can probably replace the belt or lubricate the bearings.

Rattling or banging sounds? These sounds may signify that there is a loose or broken part. If you have any sounds, you should turn off the system until you have spoken to a professional.

Overheating

Overheating may happen if there is a build up of dirt and grime around the blower motor. It can also happen if the blower motor is old and worn out. Definitely turn off the unit if you smell a burning smell and call a professional right away.

Here is a video about the blower motor:

Replacing a Bad Blower Motor

When the professional visits your home, he/she will decide if the blower motor can be repaired or if it needs to be replaced. If the professional decides that you need to replace the blower motor, the good news is there are replacements that are cost effective.

The professional is trained to find out: The diameter of the motor, type of drives, rotation direction, voltage, speeds, size of the capacitor, and horsepower.  The professional can give you a quote and ensure it is replaced with the correct motor.

Cost to Replace a Blower Motor

When the blower motor can be fixed instead of replaced, you will save a lot of money.  A replacement ranges from $500 to $1500 depending on the size of the unit and where you live.

Maintenance of the HVAC Unit

There are various things you can do for maintenance of the HVAC unit.

  1. Change the air filter every 30-90 days. If the HVAC serves as the air conditioner unit and the furnace, there is one filter.
  2. Make sure there is enough refrigerant. If you hear a hissing or blowing sound, then you know it is low.
  3. Check for cracks in the drain pan.
  4. Keep the condensate line clear and unclogged by pouring 1/3 cup of vinegar down the drain every 3 months.

All of the things above that malfunction may have water leaking from the air handler. If you do see water leaking, you can fix them or contact a professional. Leaking water can also be an unsolved water issue or that the unit may just be sweating.

Spring Maintenance and Other Maintenance

The spring is the perfect time of the year for maintenance  for the following:

  1. First, pick up debris around the HVAC unit and make sure there are no plants or weeds growing near or into the unit. Doing this several times a year will help.
  2. Clean the condensing unit and the condensation line
  3. Adjust the thermostat- cool in summer, and warm in winter
  4. Keep the attic cool and air flowing easily by cleaning the ductwork
  5. Take a look at the water heater and make sure that it is working well by flushing it.
  6. Finally, replace weatherstripping in the doors and windows to make sure the air is staying inside the home in the warmer months and the heat in the colder months.

When to Call a Professional

Call a professional if you are having any issue with the air from the HVAC, electric bill is higher, there are strange sounds, or there is overheating. HVAC’s are difficult for a homeowner to fix so call a professional for a diagnosis and estimate of repair or replacement.

Conclusion

Maintenance is necessary on many units or fixtures in our home. It is important to keep an eye on the HVAC unit as we rely on it for the furnace in the winter and the air conditioner in the summer. Home Inspection Geeks will take a look at your HVAC unit during a home inspection in the Chicago area.

July 11, 2021

What Are the Pipes on My Roof?

Plumbing, Roof

We see a lot of things on the roof of a house. Gutters, chimneys, sometimes solar panels, and pipes. It is obvious what the gutters, chimneys, and solar panels do, but what about the pipes? This may leave you wondering what are the pipes on my roof? Those pipes are plumbing vents. It makes sure that the plumbing works properly and keeps the methane gas out of the home. This is on all homes as it helps in preventing back ups, clogs, and sewer smells from entering the home.

Let’s take a look at why you need to know about the pipes on your roof, how the plumbing vent works, keeping the vent clog-free, signs of a clogged vent, other pipes seen on a roof, maintenance on the roof, and when to call a professional.

Why You Need to Know About the Pipes on Your Roof

You do need to know that there may be various pipes on the roof, they have an important purpose, and not there for decoration. This article will talk about the plumbing vent. It is important to keep the pipes clear of debris and clogging so there is no backup in the home, along with a smell.

How the Plumbing Vent Works

The plumbing vent is a pipe that runs vertically up through the walls of the home and out the roof. Connecting the drainage pipe of the plumbing system in the home, the pipe leaves the home and leads to the sewage pipe. The sewage pipe then connects to a septic tank or the public sewer system. This will depend if you have septic or sewer.


The purpose of the vent is to allow air to enter the drainage system. This then keeps the pressure even and allows the wastewater to flow out. The roof vent pipe helps regulate the pressure in the drainpipes and this allows wastewater from the home to flow out into the sewer. In the end, it eliminates the risk of methane gas from finding its way back into your home.

Keeping the Vent Clog Free

It is important that the vent does not clog. If it does, it will become smelly and messy in the home. Here are some reasons why the vent clogs and how to fix the problem:

Leaves and debris clog the entrance of the vent– Clean away any leaves or debris that are in, on, or near the pipe vent. If you don’t, they will clog the vent and cause a backup and smell in the home.

Bird nests or rodents can make nests or clog the entrance – Check to make sure these animals are not creating nests or getting trapped inside the vent. If there is, try removing it or contact a professional. Also, a professional can help clear the vent if it is stuck inside.

Humans may be blocking the vent – Having work done on your roof? A gentle reminder to the workers not to block the vent is a great idea.

Corrosion of the pipe – the pipe may become corroded and start to fall apart of break. This will be a good time to call a professional to fix it or add a new one .

Signs of a Clogged Vent

The signs of a clogged vent are much like ones you will find when there are broken pipes or clogged pipes inside the home. This is why it is important to investigate and possibly call a professional if you need assistance.

1. Gurgling Toilet

A gurgling toilet is one sign there may be a clogged pipe on your roof. This happens because the air that is coming through is reduced in the pipes. When you flush the toilet, it is competing against the pressure in the line and causes the toilet to gurgle. Here is a great way to think about this:

If you try to empty a milk jug by flipping it completely upside down you find that it gurgles and takes a while to drain. On the other hand, if you allow air to pass by adding a hole or pouring the milk slowly, the milk drains easily. Ultimately, you can see how water flows when air is able to get behind the milk versus when there is no way for air to reach behind the flowing milk. Vent pipes help do just that.

2. Slow Drains in the Sink or Bathtub

Now, a slow drain in the sink or bathtub could be many things like hair or other things clogging it. However, if you clean the drains out and find this is still happening, it can be a signal there is an issue with the vent pipes.

3. Dry P-traps

Having dry or missing P traps will lead to the methane gas escaping into the home and this can be hazardous to your health. This trap is located under the sink and also in the shower drain in the bathroom. As a result, it does a good job of keeping the sewer gases from getting into the home. Dry P traps can be due to the sink trap leaking so checking the connection under the sink is a good idea. Maybe it is the shower drain that smells? This can also be due to the P traps missing or dry or biofilm in the shower. Whatever it may be, taking care of it may solve your problem. If it does not, then it may be another area in the home that is causing the vent to clog.

You may also see dry P-traps in a home that has been vacant for a while. This is because there has not been water running through the system.

If there is a leak around the pipe, here is a great video about how to fix it:

Other Pipes On the Roof

There are often other pipes on the roof of a home, depending where you live. Some of those are:

  1. HVAC Vent Stack

This is for letting out the fuel that burns from the fireplace, burner, boiler, or water heater.

2. Small Box Vent

The small box vent is for the bathroom fan or the dryer. Cleaning the protective vent screen is important when maintaining this vent and think about adding a flap to make it more accessible. Add in cleaning the vent in the dryer to your maintenance once a year. In addition, there are different ways to clean the dryer vent that goes to the roof here.

3. Attic Fan

This is a fan that will pull the hot air along with condensation out of the attic. Attic fans work better in the southern states than colder and more northern states. However, in the cooler weather states, a whole house fan is the better choice as it can be used all year long.

Maintenance on the Roof

When keeping an eye on the vents on the roof, there are other things that you can make sure you are paying attention to. If you have solar panels, make sure they are in place, especially after bad storms.

If you have a chimney, take a look around it to make sure that the counter flashing was installed correctly. You also want to keep up with chimney maintenance during the warmer months to make sure the fireplace and chimney are ready for the colder temperature seasons that lie ahead.

If you have asphalt shingles on your roof, they combine nicely with the roof sheathing to provide protection against leaks. Lastly with maintenance, it is important to check there are no shingles missing or leaks into the house.

When to Call a Professional

Call a professional if you have questions about the pipes on top of your house or you are finding there is a back up in your home. It may not be easy to diagnose and a professional can help. Lastly, don’t let an issue go too long, get it solved and fixed quickly!

Conclusion

Roof pipes are essential for the home and need to be kept clean and clear in order to function properly. Those pipes control many things in the home and keeping them working is essential. Many things can stop working in the home so it is important to figure out why and fix them. The last thing you want is a high repair bill. Home Inspection Geeks can check your roof pipes when conducting a home inspection in the Chicago area.

July 1, 2021

Pages

  • About
  • Areas We Serve
  • Best Home Inspectors in Chicago, IL
  • Commercial Building Inspection Chicago, IL
  • Condo Inspections
  • Contact
  • COVID-19 Guidelines
  • Home
  • Multi-Unit Inspections
  • Our Blog
  • Preferred Contractors
  • Pricing
  • Privacy Policy
  • Radon Testing Chicago, IL
  • Sample Page
  • Schedule Your Inspection
  • Testimonials
  • Thanks
  • The Best Home Inspectors in Aurora, IL
  • The Best Home Inspectors in Evanston, IL
  • The Best Home Inspectors in Naperville, IL
  • The Best Home Inspectors in Northbrook, IL
  • Your Inspection
  • Your Report

Categories

  • Appliances
  • Attic
  • Basement
  • Deck
  • Electrical
  • Fireplace
  • Home Buyers
  • Home improvement
  • Home Inspection
  • Home Maintenance
  • HVAC
  • mold
  • Plumbing
  • Podcast
  • Real Estate
  • Resources
  • Roof
  • Safety in the Home
  • Taking Care of Your Home
  • Uncategorized
  • Water
  • Water Heater
  • Winterization

Archive

  • May 2022
  • April 2022
  • March 2022
  • February 2022
  • January 2022
  • December 2021
  • November 2021
  • October 2021
  • September 2021
  • August 2021
  • July 2021
  • June 2021
  • May 2021
  • April 2021
  • March 2021
  • February 2021
  • January 2021
  • December 2020
  • November 2020
  • October 2020
  • September 2020
  • August 2020
  • July 2020
  • June 2020
  • May 2020
  • April 2020
  • March 2020
  • February 2020
  • January 2020
  • December 2019

Providing Home Inspection Services to Cook, Lake, and DuPage Counties

We provide Inspection services to the Chicago Metro Area. Certified home inspection services including Buyers Inspections, Pre-listing Inspections, New Construction Inspections, Commercial Inspections, Radon Testing, and Sewer Scope Inspections.

View Service Area

Privacy Policy

773-242-9358
info@homeinspectiongeeks.com
Chicago, IL
Open Everyday 24 hours

Sitemap

© Copyright Home Inspection Geeks, Inc. - Managed by WolfPack Advising
  • Facebook
  • Twitter
  • Yelp
Scroll to top