Home Inspection Geeks
  • Home
  • Your Inspection
    • Single Family Homes
    • Condo Inspections
    • Multi-Unit Inspections
    • Commercial Building Inspections
    • Radon Testing
    • Your Report
  • Handy Geeks
  • Pricing
  • About
  • Areas We Serve
    • Aurora, IL
    • Chicago, IL
    • Evanston, IL
    • Naperville, IL
    • Northbrook, IL
    • View All Service Areas
  • Blog
  • Contact
  • Book Now
  • Menu Menu

How Long Does It Take To Replace A Roof

Roof

Having to replace a roof is never a fun task. Not only can it be costly, but it can be time-consuming and stressful. Do you just replace the shingles or do you go for something more trendy? This is just one of many decisions a homeowner must face when replacing their roof. Curb appeal is important in the neighborhood, in case you look to sell your home one day. How long does it take to replace a roof? Roof replacement depends on the type of roof and the damage to your current roof.

Let’s take a look below at some of the details involved with how long it takes to replace a roof.

How Long Does It Take

The time it takes to replace a roof varies based on the size, shape, damage of the roof, and the roofing crew. In some cases, you might need an entire roof reconstruction and this could take a couple of days. The roofing contractor that you hire will be able to give you the best timeline for the completion of roof replacement. Keep in mind that most licensed roofing contractors have multiple projects going on at the same time.

So, it is highly likely that you will see a team for demolition day, and then they might not return for a day or two. The standard timeframe is a single day to remove the old materials such as shingles and sheathing. Then you might need another day to install the new materials. This timeframe varies based on the damage to the roof and size of the roof.

Pitch of the roof can affect how long it takes to install.

Factors That Affect The Timeframe

The existing roof and the square feet of that roof are huge factors that can affect how long it takes for a roof replacement project.

  • Weather-colder months and the rainy season might delay the roofing replacement
  • Roof Shape and Size-the bigger the roof, the more material needed, the longer it will take.
  • Materials Used-type of roof materials selected, such as synthetic slate, shingle roof, metal roof, etc.
  • Accessibility-how easily the roofing contractor can scaffold and support his/her crew on the roof.
  • Historical Significance of the Roof-historically significant buildings have specific laws and code for reconstruction. Following to a specific detail can take time.
  • Damage to the Current Roof-shingle replacement or replacing the boards underneath can determine the length of the job.
  • Steepness or Pitch of the Roof-steeper the roof the more difficult it is to rip off the old and install the new. Safety first will require the roofing contractor to take their time and ensure that all is safe when working on a steep roof.
Asphalt shingle roof

What Is Different In Each Roof

The actual timeframe of a roof replacement can vary based on complexity, time of year, and size of the roof. Roofs can be categorized as easy to difficult, in terms of replacement and installation. Let’s take a look below at the differences.

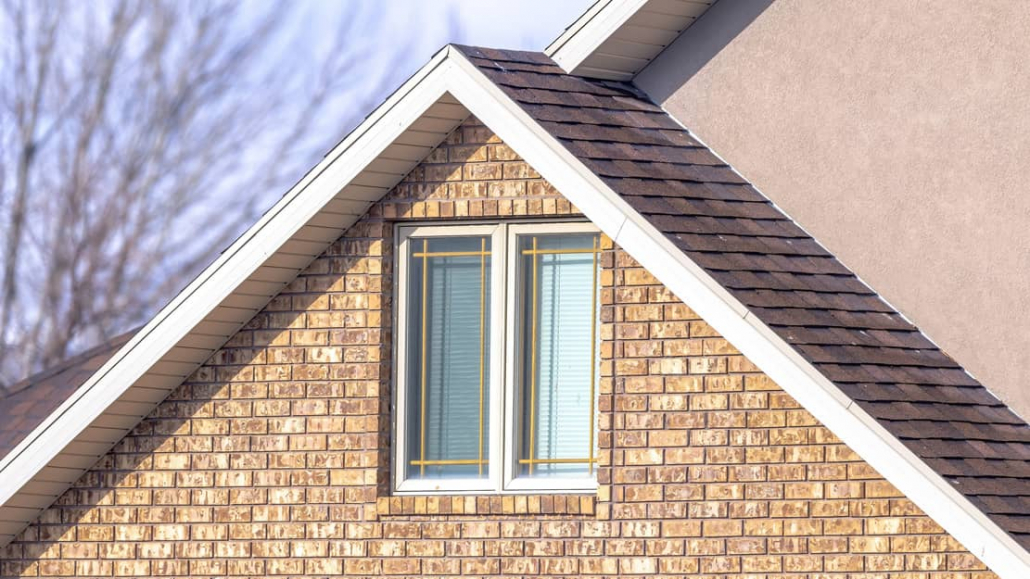
  • Asphalt Shingles (easy)-can be completed in 1-2 days.
  • Metal (moderate)-can be completed in 2-5 days.
  • Membrane (moderate/difficult)-can be completed in 2-14 days.
  • Wood Shakes (moderate)-can be completed in 2-5 days.
  • Concrete Tile (difficult)-can be completed in 5-14 days.

So, when wondering how long it might take to replace your roof, consider the type of roof that you currently have and if you are going to use the same materials for your new roof. Do you have a flat roof or pitched roof? You might decide to change the roof look and switch from shingles to a metal or tile roof. Keep in mind that this changes the timeframe of completion by the roofing contractor.

How Much Does It Cost

Unfortunately, replacing a roof can cost a lot of money. The varying pricing across the country is vast. Depending on where you live, a new roof could cost $3.50 to $16 per square foot. So, the size of your homes roof, materials needed, and labor fees are all factors in determining how much you will pay. The national average for a new roof is $8,000 to $12,000. In many cases, roof damage is caused by a naturally occurring environmental factor and can be covered by your homeowners’ insurance. Make sure you do your research prior to replacing the roof.

Other Recommended Maintenance

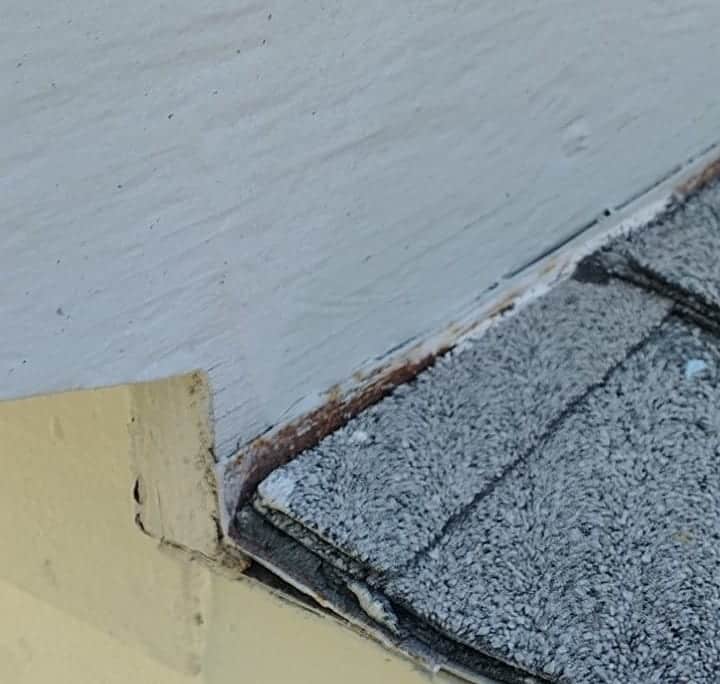
While you are getting your roof inspected, you will want to consider other roof inspection items. Check out this roof inspection checklist. The checklist will help you look for areas of repair, such as any exposed nails, missing tiles, or flashing to name a few. Lastly, if there are damaged shingles, they should be repaired or replaced. This might save you some time and money, rather than replacing an entire roof.

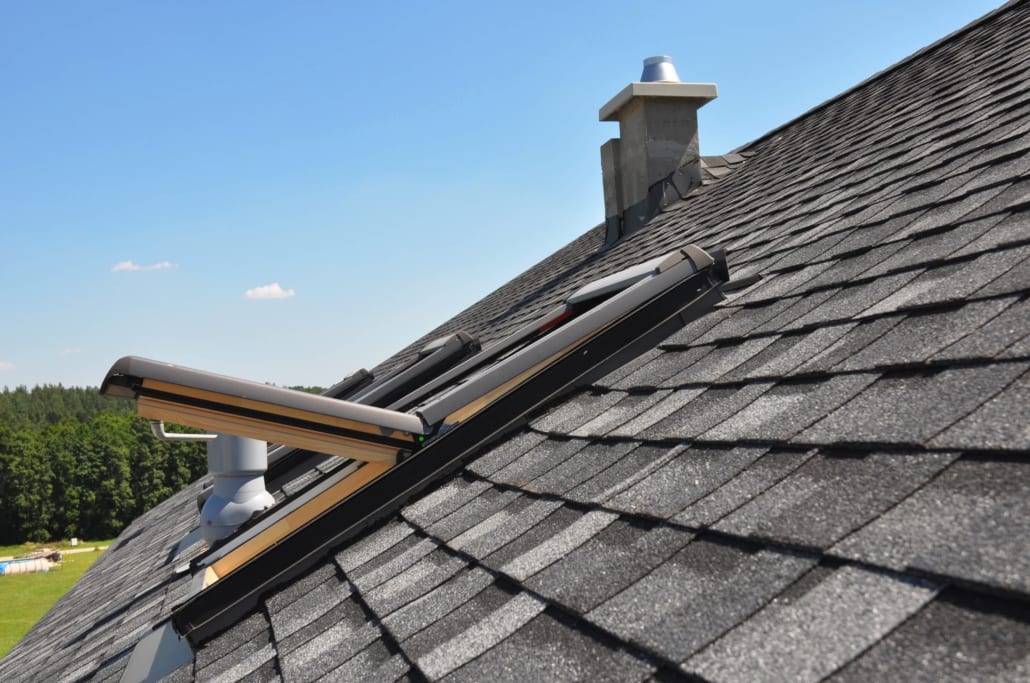
When checking your roof to see if it needs to be replaced, take a look at the plumbing vents as well. Plumbing vents stick out from the roof and their purpose is to keep methane gas out of the home. It is important to keep it clog-free, as in no bird nests, debris, rodents, or humans blocking it.

Lastly, gutters are great to have on a roof but sometimes homes don’t have them. Does this mean you must get them? Not necessarily. You can have a rain dispersal system, french drains, or a rain barrel collection system.

When Do I Call A Professional

Call a professionally licensed roofing contractor if you are concerned about damage to your roof. A professionally licensed roofing contractor will assess your roof damage and recommend any needed repairs. Also, if you are missing any of the shingles and have substantial damage, a professional can help with a replacement cost estimate.

Also, reach out to your local home inspection team. They can conduct a roof inspection at the same time as your home inspection. The home inspection team can give you a checklist of damaged areas on the roof, that allows you to share with your professionally licensed roofing contractor. Having both a home inspection team and a reputable professionally licensed roofing contractor saves time and money.

Conclusion

When working on a roofing project it is always best to contact your local home inspection team. They can recommend a reputable professionally licensed roofing contractor. In addition, the home inspection team can look at other damage to the roof, so that you can begin to get an idea of the magnitude of repairs that are needed. Getting the home inspection can save you money on your roofing project and ensure that you hire the best roofing company in town. Give Home Inspection Geeks a call. Home Inspection Geeks can take a look at your roofing needs when we come out for a home inspection in Cook, Lake, and DuPage Counties, IL.

January 14, 2022

What is a Roof Scupper

Roof

Imagine walking around in a city with huge buildings that have flat roofs. You will see these decorative downspouts or even side spouts on the buildings. They can be very decorative and fit the style of the architecture of the building. Let’s assume that you never asked yourself, what is that thing connected to the gutter system?

We can also assume that no one ever told you, that it was a roof scupper, which made you question, what is a roof scupper? A roof scupper is a drainage system for flat roofs that allows water to move through a gutter system. It is best to consult a licensed roofing professional when conducting roofing work. If you take a look at the image below you will see one of many examples of a roof scupper.

Let’s learn more about what a roof scupper is and its purpose.

How Effective Is a Roof Scupper

A roof scupper is very valuable to a flat roof drainage system and works in conjunction with your downspouts. Also, a roof scupper gives you a chance to have proper drainage on your flat roof. As long as the scupper is clear of debris, the water will drain nicely. Roof scuppers are vital pieces of a flat roof drainage system. It is important to check them for proper drainage regularly. If you live up north, you will want to make sure you get the snow off the roof and the roof scuppers are kept clear of ice. If not, the water will back up onto the roof and into the home.

Various Types Of Roof Scuppers

There are a few types of roof scuppers and they come in different shapes. The most standard roof scupper is a rectangular-shaped box. Here is a list of ones we found on Amazon (Note: We have not tested these products).

  • Open Scupper–three sided scupper with an opening at the top
  • Through Wall Scupper-usually a rectangular hole in the wall, connecting to a downspout
  • Round Scupper or Decorative-found in the sidewall of a building, allowing water to run off through a piping system

The Difference Between A Roof Scupper and A Drain

You will be surprised at the difference between a roof scupper and a roof drain. One would assume that they are very similar items in your roof drainage system.

A roof scupper is a part of your roof drainage system that allows water to run off the roof through a metal edge, parapet wall, or through the flat roof into the downspout. This will prevent the water from running into the interior of the building as it puddles up on the roof.

Roof drains are assemblies where water runoff transfers through the roof drain and into piping that runs out to the exterior of the building. Roof drains can be installed in the middle of the roof and connected to piping that will run through the attic and out to the sidewall of the building exterior.

Cost Of a Roof Scupper

A basic roof scupper can run you around $100-$150. However, there are additional materials you need to make the installation successful: Caulk to seal the joints and the potential for welding of the scupper to the downspouts of your gutter system.

Since there are so many moving parts to installing a roof scupper, it is best to consult a licensed roofing specialist. There are local roofing codes for each state and you will want to make sure you follow those roofing codes. These are the codes for Chicago and these are for DuPage County.

Installation of a roofing scupper will likely run you between $400-$800, depending on the time and materials needed for the job.

Let’s take a look at how to install a flat roof scupper drain.

Other Recommended Maintenance

Flat roofs can puddle after heavy rain. It is important to have the proper drainage system so that this doesn’t occur. Installing a roof scupper will allow for proper drainage off of your flat roof. However, if the drainage system backs up, you could end up with roof damage. Check the roof for clogged drainage and puddles.

Check the pipes on the roof and make sure the vent is clog-free, along with no birds or rodents making nests. Additionally, check to make sure are no humans blocking the vent or corrosion of the pipe.

When Do I Call A Professional

When it comes to roofing, you will want to consult a licensed roofing contractor. Getting up on a flat roof to install a roof scupper could prove to be more challenging than you think. In addition, there are various building and roofing codes for your state and you will want to ensure that those codes are followed. So, for the safety of you and the home, you will want to consult a licensed roofing contractor.

Conclusion

In many cases, it is easy to identify the need to repair a leaking flat roof. In this case, the installation of a roof scupper would be ideal. Additionally, making sure that the drainage system connects properly will ensure that no leaks will occur on your flat roof.

It is also highly recommended that you consult a licensed roofing contractor to conduct any repairs or new installations needed on your flat roof drainage system. This will save you time and money, as you might not know the state roofing code and more damage could be done.

Lastly, they will be able to assess all of the potential damages and provide a great estimate as to the cost of repairs. Home Inspection Geeks can take a look at your roofing needs when we come out for a home inspection in the Cook, Lake, and DuPage Counties, IL.

September 10, 2021

What Are the Pipes on My Roof?

Plumbing, Roof

We see a lot of things on the roof of a house. Gutters, chimneys, sometimes solar panels, and pipes. It is obvious what the gutters, chimneys, and solar panels do, but what about the pipes? This may leave you wondering what are the pipes on my roof? Those pipes are plumbing vents. It makes sure that the plumbing works properly and keeps the methane gas out of the home. This is on all homes as it helps in preventing back ups, clogs, and sewer smells from entering the home.

Let’s take a look at why you need to know about the pipes on your roof, how the plumbing vent works, keeping the vent clog-free, signs of a clogged vent, other pipes seen on a roof, maintenance on the roof, and when to call a professional.

Why You Need to Know About the Pipes on Your Roof

You do need to know that there may be various pipes on the roof, they have an important purpose, and not there for decoration. This article will talk about the plumbing vent. It is important to keep the pipes clear of debris and clogging so there is no backup in the home, along with a smell.

How the Plumbing Vent Works

The plumbing vent is a pipe that runs vertically up through the walls of the home and out the roof. Connecting the drainage pipe of the plumbing system in the home, the pipe leaves the home and leads to the sewage pipe. The sewage pipe then connects to a septic tank or the public sewer system. This will depend if you have septic or sewer.


The purpose of the vent is to allow air to enter the drainage system. This then keeps the pressure even and allows the wastewater to flow out. The roof vent pipe helps regulate the pressure in the drainpipes and this allows wastewater from the home to flow out into the sewer. In the end, it eliminates the risk of methane gas from finding its way back into your home.

Keeping the Vent Clog Free

It is important that the vent does not clog. If it does, it will become smelly and messy in the home. Here are some reasons why the vent clogs and how to fix the problem:

Leaves and debris clog the entrance of the vent– Clean away any leaves or debris that are in, on, or near the pipe vent. If you don’t, they will clog the vent and cause a backup and smell in the home.

Bird nests or rodents can make nests or clog the entrance – Check to make sure these animals are not creating nests or getting trapped inside the vent. If there is, try removing it or contact a professional. Also, a professional can help clear the vent if it is stuck inside.

Humans may be blocking the vent – Having work done on your roof? A gentle reminder to the workers not to block the vent is a great idea.

Corrosion of the pipe – the pipe may become corroded and start to fall apart of break. This will be a good time to call a professional to fix it or add a new one .

Signs of a Clogged Vent

The signs of a clogged vent are much like ones you will find when there are broken pipes or clogged pipes inside the home. This is why it is important to investigate and possibly call a professional if you need assistance.

1. Gurgling Toilet

A gurgling toilet is one sign there may be a clogged pipe on your roof. This happens because the air that is coming through is reduced in the pipes. When you flush the toilet, it is competing against the pressure in the line and causes the toilet to gurgle. Here is a great way to think about this:

If you try to empty a milk jug by flipping it completely upside down you find that it gurgles and takes a while to drain. On the other hand, if you allow air to pass by adding a hole or pouring the milk slowly, the milk drains easily. Ultimately, you can see how water flows when air is able to get behind the milk versus when there is no way for air to reach behind the flowing milk. Vent pipes help do just that.

2. Slow Drains in the Sink or Bathtub

Now, a slow drain in the sink or bathtub could be many things like hair or other things clogging it. However, if you clean the drains out and find this is still happening, it can be a signal there is an issue with the vent pipes.

3. Dry P-traps

Having dry or missing P traps will lead to the methane gas escaping into the home and this can be hazardous to your health. This trap is located under the sink and also in the shower drain in the bathroom. As a result, it does a good job of keeping the sewer gases from getting into the home. Dry P traps can be due to the sink trap leaking so checking the connection under the sink is a good idea. Maybe it is the shower drain that smells? This can also be due to the P traps missing or dry or biofilm in the shower. Whatever it may be, taking care of it may solve your problem. If it does not, then it may be another area in the home that is causing the vent to clog.

You may also see dry P-traps in a home that has been vacant for a while. This is because there has not been water running through the system.

If there is a leak around the pipe, here is a great video about how to fix it:

Other Pipes On the Roof

There are often other pipes on the roof of a home, depending where you live. Some of those are:

  1. HVAC Vent Stack

This is for letting out the fuel that burns from the fireplace, burner, boiler, or water heater.

2. Small Box Vent

The small box vent is for the bathroom fan or the dryer. Cleaning the protective vent screen is important when maintaining this vent and think about adding a flap to make it more accessible. Add in cleaning the vent in the dryer to your maintenance once a year. In addition, there are different ways to clean the dryer vent that goes to the roof here.

3. Attic Fan

This is a fan that will pull the hot air along with condensation out of the attic. Attic fans work better in the southern states than colder and more northern states. However, in the cooler weather states, a whole house fan is the better choice as it can be used all year long.

Maintenance on the Roof

When keeping an eye on the vents on the roof, there are other things that you can make sure you are paying attention to. If you have solar panels, make sure they are in place, especially after bad storms.

If you have a chimney, take a look around it to make sure that the counter flashing was installed correctly. You also want to keep up with chimney maintenance during the warmer months to make sure the fireplace and chimney are ready for the colder temperature seasons that lie ahead.

If you have asphalt shingles on your roof, they combine nicely with the roof sheathing to provide protection against leaks. Lastly with maintenance, it is important to check there are no shingles missing or leaks into the house.

When to Call a Professional

Call a professional if you have questions about the pipes on top of your house or you are finding there is a back up in your home. It may not be easy to diagnose and a professional can help. Lastly, don’t let an issue go too long, get it solved and fixed quickly!

Conclusion

Roof pipes are essential for the home and need to be kept clean and clear in order to function properly. Those pipes control many things in the home and keeping them working is essential. Many things can stop working in the home so it is important to figure out why and fix them. The last thing you want is a high repair bill. Home Inspection Geeks can check your roof pipes when conducting a home inspection in the Chicago area.

July 1, 2021

What is Counter Flashing

Roof

There are a lot of different ways to keep the inside of our homes dry as well as our chimneys. One of those ways is by having counter flashing on the chimney. What is counter flashing? It is usually made of galvanized steel and directs water away from areas on the roof such as the intersection of the roof and walls.  Roofers will install flashing around vents, skylights, and chimneys.

Let’s take a look at why you need to know about counter flashing, what it is, problems with it, common materials used, installing it after building a chimney, common cause of roof leaks, maintenance, and when to contact a professional.

Why You Need to Know About Counter Flashing

You might be wondering why you need to know about counter flashing? Well, if your home has any brick on it, you want to make sure that counter flashing was used in the construction process. Counter flashing is often used to flash chimneys, which means to divert the water away from the chimney and down the siding.

What is Counter Flashing

As mentioned above, it is most often used on chimneys or where the wall meets a roofline. There are two layers: The first one is the base and is at the bottom of the chimney and the second one is inserted into the brickwork of the chimney. The purpose of the counter flashing is to sit on top of the base flashing to make sure water doesn’t go past it and instead flows down the roof or through the gutter.

Problems with Counter Flashing

You can see that counter flashing is very important to the chimney and the roof. However, we have to rely on the worker to install it when he/she is laying the brick and mortar. This will make it work best. Unfortunately for some workers, this is too much work so they skip this step and then the roofer has to cut out a ridge and seal it later on. The bad thing about this is the sealant eventually wears out and leaks into the home can occur.

Another problem is some people install it incorrectly such as in the picture below. The counter flashing should be up higher on the wall.

Here is another example of improper counter flashing. Just like the example above, it should be up higher on the wall so water cannot get underneath the shingles.

Common Materials Used for Counter Flashing

The three common materials used for counter flashing are: Aluminum, copper, and galvanized steel

Aluminum

Pros

  1. Aluminum can last for 20 years or more when taken care of properly
  2. Pieces can be cut so they are custom-fitted and slide together
  3. Some people will paint it and it is corrosion resistant
  4. Equally important, it is the least expensive of the three materials

Cons

  1. If the material is not taken care of or painted, it can corrode or oxidize. This is especially true if it is in contact with mortar
  2. It is a thin material, can break easily, and cannot be soldered
  3. Joints are weaker when nailed together
  4. Ladders of fallen limbs can damage it

Copper

Pros

  1. Durable and lasts for decades
  2. Aesthetically pleasing
  3. Joints can be soldered
  4. Light, workable, shaped easily
  5. Not to mention, it is an easy install

Cons

  1. Cost the most of the three materials
  2. Thieves love to steal it because of the value
  3. Similar to aluminum, damage occurs by ladders or fallen limbs

Galvanized Steel

Pros

  1. Can last for 40 years or more
  2. Rust resistant
  3. Not to mention, joints can be soldered which is very important

Cons

  1. Can rust if not taken care of and develop holes which lead to water entering the home
  2. Hard to tell if the material is falling apart
  3. Material is very heavy
  4. Tough to custom fit and install because it is so thick

Installing Counter Flashing After Building a Chimney

Improperly Installed Flashing Is a Common Cause of Roof Leaks

Hopefully, now you are seeing how important flashing is! In fact, if it is not installed properly or is damaged, it can lead to roof leaks. This is especially true in the areas of roof crickets, or dormer, and the chimney.

Architectural shingles

Maintenance on the Roof and Chimney

Every year, it is important to do maintenance on the roof and around the chimney. For example, take a look at your shingles. If any are missing or starting to come off, you have choices in shingles. Many people like architectural shingles while some like the three tabs.

Clean out the gutters and make sure the downspouts extend 6-10 feet from the home. You have the counter flashing which is directing the water away from the chimney so make sure the gutters are clean and the water can flow down and away from the home.

Conduct your summer chimney maintenance so you can make sure there are no unwanted pests or rodents living in the chimney.

Check the roof sheathing. If you are noticing water coming in through the attic or you see wood rot, you may need a professional to help with a diagnosis.

When to Call a Professional

If you notice water coming into the home or issues on the roof or near the chimney, call a professional for help. They can help with a diagnosis and also with answering any questions you may have.

Conclusion

Counter flashing is very important anywhere you have brick on a home. This is usually on the roof and chimney areas. With this in mind, sometimes it is not installed or it wears out quickly and needs replacing. In general, the idea is to always keep water outside of the home. We will look at your chimney during home inspections in Chicago and the surrounding suburbs. Think you may need our services? Leave us a comment below!

April 16, 2021

Pages

  • About
  • Areas We Serve
  • Best Home Inspectors in Chicago, IL
  • Commercial Building Inspection Chicago, IL
  • Condo Inspections
  • Contact
  • COVID-19 Guidelines
  • Handy Geeks Quote
  • Handyman Services Chicago: Handy Geeks
  • Home
  • Multi-Unit Inspections
  • Our Blog
  • Preferred Contractors
  • Pricing
  • Privacy Policy
  • Radon Testing Chicago, IL
  • Sample Page
  • Schedule Your Inspection
  • Terms of Use
  • Testimonials
  • Thanks
  • The Best Home Inspectors in Aurora, IL
  • The Best Home Inspectors in Evanston, IL
  • The Best Home Inspectors in Naperville, IL
  • The Best Home Inspectors in Northbrook, IL
  • Your Inspection
  • Your Report

Categories

  • Appliances
  • Attic
  • Basement
  • Deck
  • Electrical
  • Fireplace
  • Home Buyers
  • Home improvement
  • Home Inspection
  • Home Maintenance
  • HVAC
  • mold
  • Plumbing
  • Podcast
  • Real Estate
  • Resources
  • Roof
  • Safety in the Home
  • Taking Care of Your Home
  • Uncategorized
  • Water
  • Water Heater
  • Winterization

Archive

  • May 2022
  • April 2022
  • March 2022
  • February 2022
  • January 2022
  • December 2021
  • November 2021
  • October 2021
  • September 2021
  • August 2021
  • July 2021
  • June 2021
  • May 2021
  • April 2021
  • March 2021
  • February 2021
  • January 2021
  • December 2020
  • November 2020
  • October 2020
  • September 2020
  • August 2020
  • July 2020
  • June 2020
  • May 2020
  • April 2020
  • March 2020
  • February 2020
  • January 2020
  • December 2019

Providing Home Inspection Services to Cook, Lake, and DuPage Counties

We provide Inspection services to the Chicago Metro Area. Certified home inspection services including Buyers Inspections, Pre-listing Inspections, New Construction Inspections, Commercial Inspections, Radon Testing, and Sewer Scope Inspections.

View Service Area

Privacy Policy

Terms of Use

773-242-9358
info@homeinspectiongeeks.com
Chicago, IL
Open Monday – Sunday 8AM to 6PM

Sitemap

© Copyright Home Inspection Geeks, Inc. - Hosted by WolfPack Advising
  • Facebook
  • Twitter
  • Yelp
Scroll to top