Home Inspection Geeks
  • Home
  • Your Inspection
    • Single Family Homes
    • Condo Inspections
    • Multi-Unit Inspections
    • Commercial Building Inspections
    • Radon Testing
    • Your Report
  • Handy Geeks
  • Pricing
  • About
  • Areas We Serve
    • Aurora, IL
    • Chicago, IL
    • Evanston, IL
    • Naperville, IL
    • Northbrook, IL
    • View All Service Areas
  • Blog
  • Contact
  • Book Now
  • Menu Menu

Tag Archive for: realtor

Bad Blower Motor Symptoms in HVAC Units

HVAC

Most residential homes rely on an HVAC, whether it is for the furnace in the winter or the air conditioner in the hotter summer months. Of course, we always want to find any issues with this in the opposite season, but it doesn’t ever seem to work that way does it?

An HVAC system should last 10-15 years and can with proper maintenance. However, as with anything, parts can malfunction. One of the main parts of an HVAC is the blower motor and there are symptoms when it is bad. What are the bad blower motor symptoms in HVAC? Weak or no air flow, higher than usual electric bill, strange sounds, and overheating.

Let’s take a look at why you need to know about the symptoms of a bad blower motor in HVAC, what the symptoms are, replacing a bad motor blower, cost, maintenance, spring maintenance around the home, and when to contact a professional.

Why You Need to Know About Bad Blower Motor Symptoms in HVAC

The blower motor blows conditioned air through vents in the home. The air conditioner circulates the cool air through the home to the temperature on the thermostat. This is done by spinning the air and it moves through the vents and ducts in the home. As the HVAC system ages, so does the blower motor. If you have to replace the blower motor, check the year of the AC unit to see if you need to replace the whole system instead.

Two Types of Blower Motors

  • Single Speed- goes at one speed and full capacity
  • Variable speed– operates at a low or high speed and creates an even temperature throughout the home.

Bad Motor Blower Symptoms in HVAC

Vents Have Weak Air Flow

Weak airflow means that the motor is having a hard time pushing the air through the vents. This can be due to a number of reasons:

  • Dirt and dust buildup – see if you can clean the dirt off the fan and install a good air filter. If not, contact a professional
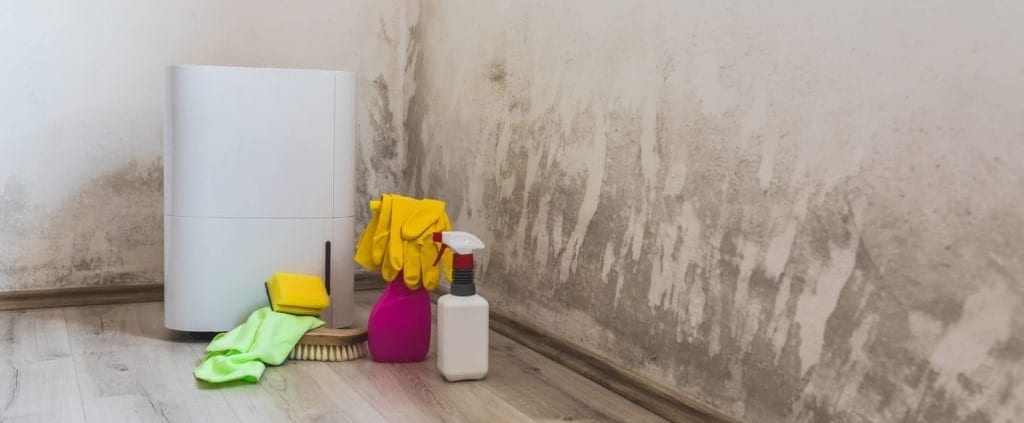
  • Excessive moisture- call an HVAC technician to see if it can be dried out and fixed
  • Bad capacitor – call an HVAC technician to fix it
  • Aging motor – HVACs last about 10-15 years so if the motor is in that range and not working, it may be time to replace the unit
  • Ducts that are dirty or leaky
  • Clogged filter – a filter should be replaced every 3 months or sometimes before that in a home that has dust and pets

It is important that the blower motor is functioning properly. If it is not, then the indoor coil could freeze over because there is no air pushes across the coil.

No Air Flow

No air flow can be due to several issues: Bad battery, fan control problem, bad relay, or a thermostat that isn’t working. Unfortunately, this is often a bad sign and a replacement may be in your future.

Higher Than Usual Electric Bill is One of the Bad Blower Motor Symptoms in HVAC

This can be due to a few things such as a dirty and aging blower motor. If this is the problem, it has to work harder to get the air to circulate, thus increasing the electric bill.

Have a single speed motor? You may want to think about replacing it with a variable speed motor. This will allow the motor to operate at the speed it needs to in order to cool the home and reach the temperature set on the thermostat. It does not have to work as hard as a single speed motor and can shut off when it has done its job.

Strange Sounds

These sounds are a reason to call a professional as different sounds mean different things.

For example: screeching and squaeling may mean that there is problems with a belt or damage to the bearing. The good news is a professional can probably replace the belt or lubricate the bearings.

Rattling or banging sounds? These sounds may signify that there is a loose or broken part. If you have any sounds, you should turn off the system until you have spoken to a professional.

Overheating

Overheating may happen if there is a build up of dirt and grime around the blower motor. It can also happen if the blower motor is old and worn out. Definitely turn off the unit if you smell a burning smell and call a professional right away.

Here is a video about the blower motor:

Replacing a Bad Blower Motor

When the professional visits your home, he/she will decide if the blower motor can be repaired or if it needs to be replaced. If the professional decides that you need to replace the blower motor, the good news is there are replacements that are cost effective.

The professional is trained to find out: The diameter of the motor, type of drives, rotation direction, voltage, speeds, size of the capacitor, and horsepower.  The professional can give you a quote and ensure it is replaced with the correct motor.

Cost to Replace a Blower Motor

When the blower motor can be fixed instead of replaced, you will save a lot of money.  A replacement ranges from $500 to $1500 depending on the size of the unit and where you live.

Maintenance of the HVAC Unit

There are various things you can do for maintenance of the HVAC unit.

  1. Change the air filter every 30-90 days. If the HVAC serves as the air conditioner unit and the furnace, there is one filter.
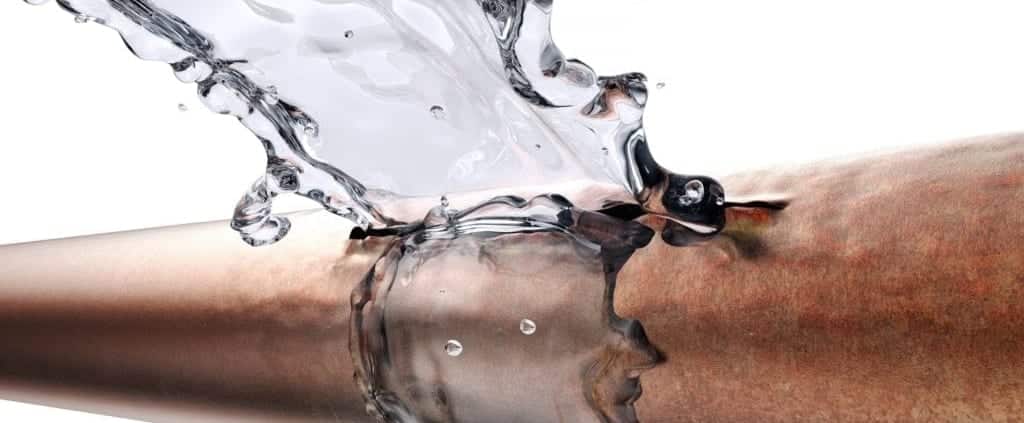
  2. Make sure there is enough refrigerant. If you hear a hissing or blowing sound, then you know it is low.
  3. Check for cracks in the drain pan.
  4. Keep the condensate line clear and unclogged by pouring 1/3 cup of vinegar down the drain every 3 months.

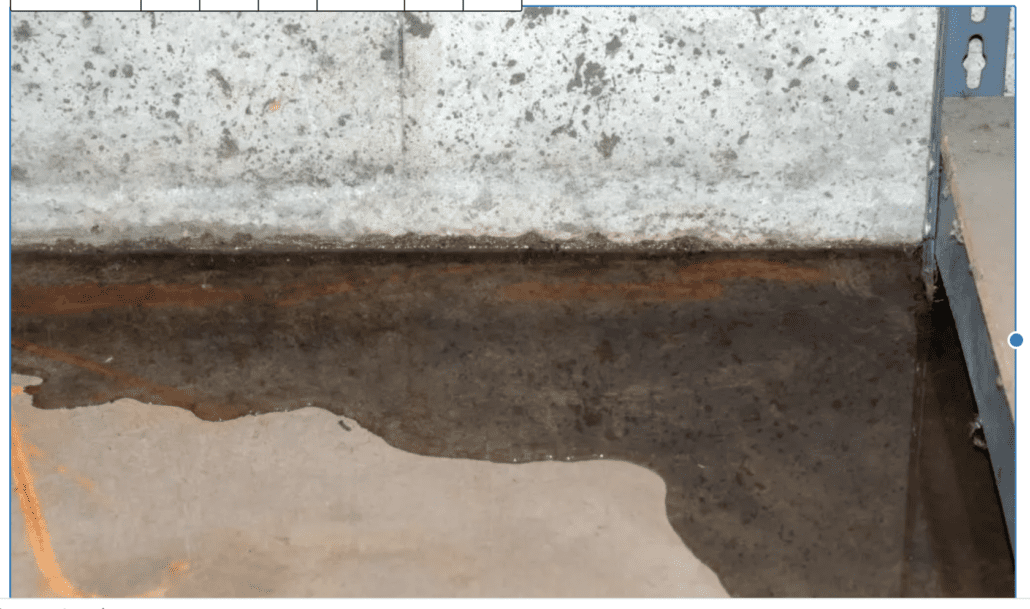
All of the things above that malfunction may have water leaking from the air handler. If you do see water leaking, you can fix them or contact a professional. Leaking water can also be an unsolved water issue or that the unit may just be sweating.

Spring Maintenance and Other Maintenance

The spring is the perfect time of the year for maintenance  for the following:

  1. First, pick up debris around the HVAC unit and make sure there are no plants or weeds growing near or into the unit. Doing this several times a year will help.
  2. Clean the condensing unit and the condensation line
  3. Adjust the thermostat- cool in summer, and warm in winter
  4. Keep the attic cool and air flowing easily by cleaning the ductwork
  5. Take a look at the water heater and make sure that it is working well by flushing it.
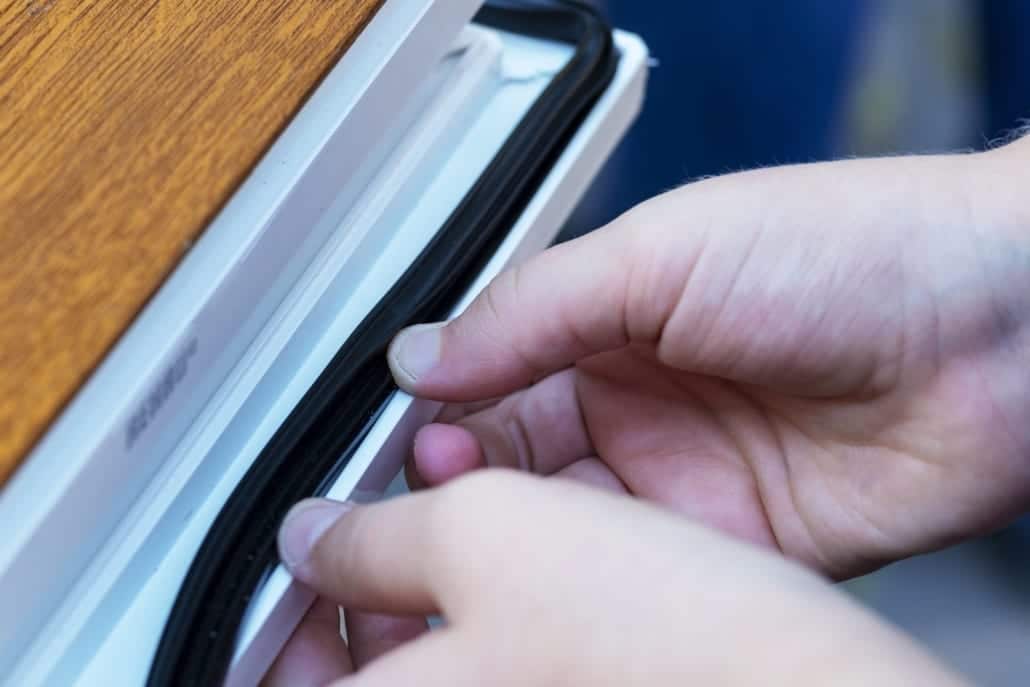
  6. Finally, replace weatherstripping in the doors and windows to make sure the air is staying inside the home in the warmer months and the heat in the colder months.

When to Call a Professional

Call a professional if you are having any issue with the air from the HVAC, electric bill is higher, there are strange sounds, or there is overheating. HVAC’s are difficult for a homeowner to fix so call a professional for a diagnosis and estimate of repair or replacement.

Conclusion

Maintenance is necessary on many units or fixtures in our home. It is important to keep an eye on the HVAC unit as we rely on it for the furnace in the winter and the air conditioner in the summer. Home Inspection Geeks will take a look at your HVAC unit during a home inspection in the Chicago area.

July 11, 2021

What Are the Pipes on My Roof?

Plumbing, Roof

We see a lot of things on the roof of a house. Gutters, chimneys, sometimes solar panels, and pipes. It is obvious what the gutters, chimneys, and solar panels do, but what about the pipes? This may leave you wondering what are the pipes on my roof? Those pipes are plumbing vents. It makes sure that the plumbing works properly and keeps the methane gas out of the home. This is on all homes as it helps in preventing back ups, clogs, and sewer smells from entering the home.

Let’s take a look at why you need to know about the pipes on your roof, how the plumbing vent works, keeping the vent clog-free, signs of a clogged vent, other pipes seen on a roof, maintenance on the roof, and when to call a professional.

Why You Need to Know About the Pipes on Your Roof

You do need to know that there may be various pipes on the roof, they have an important purpose, and not there for decoration. This article will talk about the plumbing vent. It is important to keep the pipes clear of debris and clogging so there is no backup in the home, along with a smell.

How the Plumbing Vent Works

The plumbing vent is a pipe that runs vertically up through the walls of the home and out the roof. Connecting the drainage pipe of the plumbing system in the home, the pipe leaves the home and leads to the sewage pipe. The sewage pipe then connects to a septic tank or the public sewer system. This will depend if you have septic or sewer.


The purpose of the vent is to allow air to enter the drainage system. This then keeps the pressure even and allows the wastewater to flow out. The roof vent pipe helps regulate the pressure in the drainpipes and this allows wastewater from the home to flow out into the sewer. In the end, it eliminates the risk of methane gas from finding its way back into your home.

Keeping the Vent Clog Free

It is important that the vent does not clog. If it does, it will become smelly and messy in the home. Here are some reasons why the vent clogs and how to fix the problem:

Leaves and debris clog the entrance of the vent– Clean away any leaves or debris that are in, on, or near the pipe vent. If you don’t, they will clog the vent and cause a backup and smell in the home.

Bird nests or rodents can make nests or clog the entrance – Check to make sure these animals are not creating nests or getting trapped inside the vent. If there is, try removing it or contact a professional. Also, a professional can help clear the vent if it is stuck inside.

Humans may be blocking the vent – Having work done on your roof? A gentle reminder to the workers not to block the vent is a great idea.

Corrosion of the pipe – the pipe may become corroded and start to fall apart of break. This will be a good time to call a professional to fix it or add a new one .

Signs of a Clogged Vent

The signs of a clogged vent are much like ones you will find when there are broken pipes or clogged pipes inside the home. This is why it is important to investigate and possibly call a professional if you need assistance.

1. Gurgling Toilet

A gurgling toilet is one sign there may be a clogged pipe on your roof. This happens because the air that is coming through is reduced in the pipes. When you flush the toilet, it is competing against the pressure in the line and causes the toilet to gurgle. Here is a great way to think about this:

If you try to empty a milk jug by flipping it completely upside down you find that it gurgles and takes a while to drain. On the other hand, if you allow air to pass by adding a hole or pouring the milk slowly, the milk drains easily. Ultimately, you can see how water flows when air is able to get behind the milk versus when there is no way for air to reach behind the flowing milk. Vent pipes help do just that.

2. Slow Drains in the Sink or Bathtub

Now, a slow drain in the sink or bathtub could be many things like hair or other things clogging it. However, if you clean the drains out and find this is still happening, it can be a signal there is an issue with the vent pipes.

3. Dry P-traps

Having dry or missing P traps will lead to the methane gas escaping into the home and this can be hazardous to your health. This trap is located under the sink and also in the shower drain in the bathroom. As a result, it does a good job of keeping the sewer gases from getting into the home. Dry P traps can be due to the sink trap leaking so checking the connection under the sink is a good idea. Maybe it is the shower drain that smells? This can also be due to the P traps missing or dry or biofilm in the shower. Whatever it may be, taking care of it may solve your problem. If it does not, then it may be another area in the home that is causing the vent to clog.

You may also see dry P-traps in a home that has been vacant for a while. This is because there has not been water running through the system.

If there is a leak around the pipe, here is a great video about how to fix it:

Other Pipes On the Roof

There are often other pipes on the roof of a home, depending where you live. Some of those are:

  1. HVAC Vent Stack

This is for letting out the fuel that burns from the fireplace, burner, boiler, or water heater.

2. Small Box Vent

The small box vent is for the bathroom fan or the dryer. Cleaning the protective vent screen is important when maintaining this vent and think about adding a flap to make it more accessible. Add in cleaning the vent in the dryer to your maintenance once a year. In addition, there are different ways to clean the dryer vent that goes to the roof here.

3. Attic Fan

This is a fan that will pull the hot air along with condensation out of the attic. Attic fans work better in the southern states than colder and more northern states. However, in the cooler weather states, a whole house fan is the better choice as it can be used all year long.

Maintenance on the Roof

When keeping an eye on the vents on the roof, there are other things that you can make sure you are paying attention to. If you have solar panels, make sure they are in place, especially after bad storms.

If you have a chimney, take a look around it to make sure that the counter flashing was installed correctly. You also want to keep up with chimney maintenance during the warmer months to make sure the fireplace and chimney are ready for the colder temperature seasons that lie ahead.

If you have asphalt shingles on your roof, they combine nicely with the roof sheathing to provide protection against leaks. Lastly with maintenance, it is important to check there are no shingles missing or leaks into the house.

When to Call a Professional

Call a professional if you have questions about the pipes on top of your house or you are finding there is a back up in your home. It may not be easy to diagnose and a professional can help. Lastly, don’t let an issue go too long, get it solved and fixed quickly!

Conclusion

Roof pipes are essential for the home and need to be kept clean and clear in order to function properly. Those pipes control many things in the home and keeping them working is essential. Many things can stop working in the home so it is important to figure out why and fix them. The last thing you want is a high repair bill. Home Inspection Geeks can check your roof pipes when conducting a home inspection in the Chicago area.

July 1, 2021

How Much Does It Cost to Waterproof a Basement

Basement

Having a basement in a home is really nice. The extra storage space is great, or if you finish the basement there is another place for people to gather or to have guests to entertain. However, if your basement is not waterproof, then you risk issues of water leaking in and mold growing. Waterproofing the basement is something to think about. How much does it cost to waterproof a basement? It ranges in price from $1000 to $6000 and more. It depends on the size of the basement, age of the home, and the foundation type to name a few.

Let’s take a look at why you should know how much it cost to waterproof a basement, reasons to do this, results, factors that affect this, cost to waterproof a home, and when to call a professional.

Why You Should Know How Much It Cost to Waterproof a Basement

Any time you are having improvements made to your home, you need to know how much the cost will be. This is because you need to budget for it. For some people, budgeting is easy and the money is readily available. For others, it may take moving some things around or saving the money for the work to be done. When we have an idea of how much something will cost, it will help us determine if we think we can afford it, do we need it, and how long we need to save the money.

Reasons to Waterproof a Basement

If you are having some of the issues below, you will want to think about waterproofing your basement.

Issues such as:

Missing Downspouts or Gutters

It is important to have downspouts and gutters on your house so the water diverts away from the home. Unfortunately, when you don’t have these, you risk water pooling near the basement window or foundation. This can then seep into the home. If possible, steer the downspouts 4-6 feet away from the home and 6 feet is best.

Negative Grading in the Yard

Negative grading can also be a factor. This is when the yard slopes towards the home. Unfortunately, then water enters the home and through the basement. Instead of digging up the yard, you can put in plants and shrubbery that will help keep the water away. Also, you may need to think about a drainage system in the yard if there are issues with the runoff.

Water Pipes That Leak

Take a look at the water pipes and see if these are the culprit. If they are leaking, this could be what is causing the moisture in your basement. If your home was built between 1978-1995, you may have polybutylene pipes. These are seen in the walls in the basements and also across the ceiling in unfinished basements.

Do you have pex plumbing? This closely resembles polybutylene but is a good material for piping. However, rodents do like it as well, and cause them to spring a leak. It is important to find out what type of plumbing you have and consult a professional to take a look. Even if you have copper pipes or another material, anything can burst and spring a leak. It is always best to have a professional check it out.

To find a water leak in the walls, hire a professional who uses a thermal imaging scanner. This will show thermal anomalies and help the inspector figure out where the moisture is coming from.

Groundwater Sits in the Basement

If you have groundwater in the home and need a way for it to get out, installing a french drain may be necessary. Sump pumps collect the groundwater and pump it away from the home. However, if it is an existing house, then a french drain is expensive to add.

Window Leaks When it Rains

When it rains, you may notice that the window is leaking. This is a perfect time to find out if there is a sealing or caulking issue. You may also notice that there may be missing flashing as well as clogged gutters. Flashing is usually installed near the chimney, vents, and skylights. If it is missing, then water will get into the home through any place that it can.

Results of Water in the Basement

Mold

Mold will form in the basement and cause health and structural issues. There are various ways to clean the mold in the basement and you will need to use an N95 mask, protective eyewear, protective clothing, and gloves. You will be stopping the source of the mold, cleaning the area, and drying the surfaces.

You may even find mold on the concrete in the basement because the mold spores will land on it and spread.

Rotting Wood

There will be rotting wood in the basement from the water. Just like with cleaning it above, you will need to wear protective gear to take care of any mold or mildew issues. Contacting a professional will be a good idea to see if anything structural was affected.

Damaged Walls and Floors

Walls and floors in the basement will be damaged from any water that comes in. You will need to contact a professional to survey the damage and find out what can be saved and what needs to be fixed.

Three Factors That Will Affect the Cost to Waterproof a Basement

Size of the Basement

Professionals usually calculate the cost for drainage by linear footage. If the previous owner didn’t waterproof the basement, then you probably have water in there and will need to calculate tearing down drywall and putting in new flooring as well. This will almost be like a demolition and you will need an estimate.

Age of the Home Determines Cost to Waterproof a Basement

A home built after the 1960’s will probably have footing that will allow water to drain into it. It usually costs $50-60 per linear foot. Homes built before the 1960s will have a fast track drainage that needs to be installed and range from $70-80 per linear foot.

Foundation Type

The concrete block will allow water to seep in and the hollow cavities will become full. You or a professional can drill weep-holes in the lowest block to allow drainage.

Cost to Waterproof a Basement

Companies will charge $1000-$6,000 and up to waterproof a basement. Some of that charge will also be on repairs and additions to the home as outlined below as well as it will vary depending on the factors mentioned above.

Dehumidifier

For a minor issue and small space, you can use a dehumidifier. This can be for moisture that occurs when drying laundry in the home. However, it won’t work for a larger area.

Cost: A dehumidifier can cost about $150 or more for a small space. For a large area, over $2000 is possible to pay for one. Consult a professional before you spend the money to see if it will help.

Waterproofing Products

Did you know that there are waterproofing products such as paint, sealants, and others that will stop moisture in the walls? They may work in small places but may not last as long as they should.

Cost: About $20 – $200 per can of paint and then add in labor charges.

Install Downspouts or Gutters

As mentioned above in the issues section, missing downspouts or gutters from the home can cause moisture in the basement. Also, if you already have gutters, maybe you only need repairs (or to clean them out) and that is a lot cheaper.

Cost: Downspouts and gutters can cost between $500-$1400 or more depending on the size of the house.

Weep Holes in Windows

Make sure that the windows have a good well drain or weep hole. If it doesn’t, the water comes in and sits on the windowsill, and causes wood rot. If your windows don’t have a weep hole, it means they are older and need replacing.

Cost: Replacing a window can cost $100 and up depending on size and style.

Grading in the Yard

The other option is to find different landscaping that can help keep the water away from the home and also from pooling like various types of vegetation, gravel, swale, pavers, and a rain barrel.

Cost: Leveling out the land can cost about $1000-$3000, however, adding vegetation, gravel, swale or a rain barrel will be cheaper. Pavers would be a nice addition for aesthetics as well.

Install a French Drain

This is expensive to add to a pre-existing home because it requires using a jackhammer to break up the concrete. However, if you are building a home, it may add about $1500 to the cost of the foundation so it is better to do it at that time.

Cost: A french drain can cost $7,000 to install on a pre-existing home.

Exterior Weeping Tiles

These are outside of the home and are plastic pipes that collect the water before it reaches the wall.

Cost: $100 per foot for the pipe, gravel, and exterior membrane.

Sump Pump (outside of the state of Florida)

In homes that have a basement, a sump pump is very effective for getting the groundwater out. It removes the water that collects in a water collecting basin and sends it out to the yard. If this combines with a subfloor pressure relief system, then it is even more effective. This channels the water to multiple sump pumps.

Cost: A sump pump costs between $500 and $1100 depending on how many pumps are needed in the home.

Crack in Foundation

If you think there may be a crack in the foundation, contact a professional to check it out. There are some that you can fix and some that will require a professional to fix. Additionally, there are various reasons why these happen so a professional can help with the diagnosis.

Cost: Between $500-1000 depending on the size of the crack

Missing Concrete Vapor Barrier

What if the concrete vapor barrier is missing? Unfortunately, this will be an expensive repair. There are some people who will tear up the flooring and add an epoxy vapor barrier to the concrete, called CrownCote. On the other hand, others may cut out the floors, install a moisture barrier, and then re-pour the floors. This of course requires the involvement of a professional.

When to Call a Professional

Call a professional to help you with a plan for waterproofing the home. When we buy a home, we assume the previous owner put things in place to prevent issues such as water in the basement. Unfortunately, it doesn’t always work that way and we are left holding the bill. This is also why a home inspection before the purchase of a home is important.

Conclusion

Waterproofing a basement can be an arduous task and time-consuming. Patience will be needed as the best solution for the home is explored. Not sure where to start or what you need to do? Home Inspection Geeks will inspect your basement during your home inspection in Chicago, IL., and surrounding areas.

June 9, 2021

How to Identify Polybutylene Pipes

Plumbing

Polybutylene is a plastic material that used in homes for piping from 1978-1995. They were used in about 10 million homes in the U.S. because they were flexible, cheaper, easy to install and freeze resistant. However, production stopped in 1996 because of many reports of pipes bursting and causing extensive damage in homes. Do you wonder how to identify polybutylene pipes? Well, there are several ways, including a stamp on the pipe, they are flexible and may be curved, gray in color, white, black, blue, or silver. It will depend on the part of the U.S. as to what color the pipes are. Lastly, they are about 1/2 inch to 1 inch in diameter. They were mostly installed in the mid-Atlantic, Sun Belt, and Pacific Northwest states.

Let’s take a look at why you need to know how to identify polybutylene pipes, where they are found in the home, how to identify them. how they fail, lawsuits, why replace the pipes, and when to call a professional.

Why You Need to Know How to Identify Polybutylene Pipes

It is important for you to be able to identify these pipes as you will need to have them replaced in the home. You will want to replace them before they cause a disaster and thousands of dollars of damage.

Where The Pipes Are Found in the Home

While they are routed throughout your home, inside walls, attics, and crawlspaces, you can look in common areas to see if you have polybutylene.

Interior

From walls that connect to sinks and toilets

Across the ceiling in unfinished basements

Near the water heater

Exterior

Through the basement wall entering the home

At the water meter

At the water main shut-off valve

How to Identify the Polybutylene Pipes

There are a few ways to identify these pipes:

  1. Stamped with the code “PB2110”.
  2. Flexible and sometimes curved.
  3. Not used for waste, drain or vent piping – only supply lines.
  4. Usually grey in color, but they can also be white, silver, black or blue.

How the Polybutylene Pipes Fail

The plastic that is used for the polybutylene pipes is cheap and not sturdy. It starts to degrade over time and develop small holes in it. As with anything that develops holes, the holes grow bigger, and then the pipe breaks and water escapes. Thus, causing extensive damage and repair bills. It is also said that the polybutylene reacts with chlorine and other things added to the water, thus causing it to leak at the connections. This can lead to leaking inside walls. Do you know where the leak is in the walls? Maybe, but this is when you need to call a professional who uses an infrared camera to help locate it.

Lawsuit in the Sunbelt States

The manufacturer of the polybutylene pipes states that the leaks are where the joints and union connect and is an installation issue, however this does not seem to be the truth. In 1978, builders in the Sun Belt states were using this pipe in homes until 1996. The failure of the pipes wreaked havoc on homes and thus a Class A lawsuit was filed against the manufacturers. In the end, $1 billion was awarded to the plaintiffs.

Why Replace the Polybutylene Pipes

Leaking can happen without warning and then this causes flooding. We know then it is a domino effect: the water gets into the walls and the flooring and then mold develops. Replacing the pipes with copper or another material is a good idea and will last a long time. Copper can last up to 70 years! There are professionals that can help you with the decision.

Insurance

Homeowner’s insurance will either charge you higher premiums or not cover a home that has this type of piping. This is because everyone in the insurance world knows they leak and cause damage. It is also not a secret about the lawsuit against the manufacturers. Thus, if you are wanting to buy a home with this type of piping, you should negotiate the price due to needing to replace all of the plumbing.

When to Call a Professional

Call a professional to positively identify the pipes. You don’t want to assume that you have polybutylene until a professional checks it out. Also, if it turns out you do have them, the professional can recommend what your next step is.

Conclusion

Polybutylene is not something to mess around with and finding out if your home or the one you are wanting to buy is essential. This will save you from a mess and damage down the road. We look at the types of pipes in the homes during home inspections in the Chicago area. Do you have concerns about the piping in your home? Or do you have a home with Polybutylene pipes? Comment below! We would love to hear from you!

May 17, 2021

Deck Inspection: What You Need to Know

Deck

A deck on a home is a luxury as not every home has one. It is the place for families to gather and entertain as well as relax. However, they do need to be inspected to make sure they are durable and strong. There are 45 million decks and about 45% of them are safe. This means 55% of them are not. The last thing you want is for a deck to collapse. What do you need to know about the deck inspection? Make sure that you have the permit and building it correctly. Follow the order of events to get you to the inspection and what to check on your own after you pass the inspection.

Let’s take a look at why you need to know about deck inspections, the cost, what inspectors look for when building a deck, homeowner deck inspection, deck maintenance, other maintenance, and when to call a professional.

Why You Need to Know About Deck Inspections

Do you have a deck? If yes, listen (or read) closely. Sometimes we don’t think that inspecting the deck is important. If you are building a deck, you need to have it inspected and approved. However, if you have one you need to keep up the maintenance. The spring is a perfect time here in Illinois and colder states. After the winter storms and as spring is starting to begin is great so you can get the deck ready for your summer cookouts and parties.

Cost of a Deck Inspection

A deck inspection can cost from $25 to $200 depending on the length of time needed for structural, safety, and common building code violations check.

Building a Deck? Here is What the City and Home Inspectors Will Check

City Inspector

  • The city inspector is in charge of making sure that the plans you submitted are in compliance with local and zoning codes and regulations
  • You will want the inspector to check the framing before the decking is installed so he/she knows it is in compliance and also for safety
  • Schedule footing inspection before pouring the concrete foundation as footings must pass inspection before you pour the concrete!
  • Lastly, the inspector will check the base sizes and depths of the holes against the plans you submitted to make sure they are in compliance

When the entire project is complete, the inspector will need to be called for a final inspection to close out the permit. It is always a good idea to attend the inspection, however if you can’t, post the plans in a place where the inspector can see it to sign

If you get a failure notice for the deck, find out what needs to be fixed and have it re-inspected by a professional.

Home Inspector

The home inspector will inspect the deck after the city inspector has approved it and check for:

  • Proper joist hangers
  • No missing fasteners
  • Good connections for beams
  • All hardware connections.
  • As with the city inspector, try to attend the inspection so you can find out if there are any issues and anything the city inspector might have missed.

The idea is to make sure the deck is in compliance and safe.

Here is a great video below about the 6 warnings of an unsafe deck:

Deck Statistics From InterNACHI

  • Many deck collapses happen while people are on them or have heavy snow on them.
  • Decks collapse more in summer than other times of the year.
  • 90% of deck collapses happen because of separation of the house and the deck ledger board. This allows the deck to move away from the house causing it to collapse.

Keep these things from happening by also doing your own maintenance inspections.

Homeowner Deck Inspection

When checking out your deck, pay attention to the following:

Insect Damage

The wood used to build the deck is treated to keep the ants and termites away. However, sometimes this step is skipped or the deck was built before the 1980’s. In this case, there could still be damage from ants and termites. Take a look around the outside of the deck and where it is attached to the home. If you live in a more humid climate, there is a better chance you will have termite issues. If you notice when you walk on the deck that it sways a little, this is a good time to call a professional to check it out.

Under the Deck

Going under the deck is the next area to check. You are looking for any rusting of fasteners, connectors, and joists. These should be in good shape. Bolts, screws, nails, and metal connector plates should also not be rusting and should be in place. If there are any areas you have concerns about, contact a professional. It is better to be safe than sorry.

Is your deck 10 years old or older? If it is, you will want to contact a professional who knows about the codes to make sure it is in compliance.

Cracks and Rotting

If you notice a crack on the floorboard, watch it over the next few months. If it starts to grow, you will need to replace it. Also, if you notice any wood rotting and it has spread across the beams replacing them is a good idea.

Checking the Railing

According to InterNACHI, there are more injuries because of rail failure than deck collapse. Also, deck stairs are known for not having handrails that are graspable. It is important to make sure the handrails are on the deck to help those who need them when going up and down the stairs.

Mildew and Mold

It can be difficult to avoid mildew and mold depending on the climate and also weather patterns. However, you can monitor it and make sure you treat it when you see it. Mildew can make the steps very slippery so you need to check often to make sure it isn’t there. If it is starting to form, wash down the deck.

Mold can grow on the deck, especially on the wood. However, mold can also grow on concrete. This happens in humid climates but also when trees and branches cover the ground or the deck. Often, there is concrete near the deck so keep an eye out. You don’t want it to be prone to accidents.

Deck Maintenance

Resealing and staining the deck every 2 to 3 years is important. It reduces cracking from water but also heat and cold temperatures.

Removing snow from the roof and the deck is important to make sure it does not allow the deck to collapse.

Check the eaves and gutters to make sure they are working well as you don’t want there to be water coming off the roof and causing mildew on the deck. This can easily happen if the water is coming over the sides and sitting in puddles on the deck.

Continue to inspect the footings of the deck as they are a major part of the decks foundation. If there are cracks in the concrete around the footings, call an inspector to check it out.

Other Maintenance

If you leave your home for the winter, you want to dewinterize it when you come back. This includes checking the deck for the issues above and making sure that the outdoor spigots, that are often close to the deck, are working. Don’t forget you may have put outdoor faucet covers on them before you left so take these off after the last freeze.

When checking out the deck, pay attention to other areas around the home. For example, is there negative grading in the yard? If so, you want to get that fixed. It can cause the ground to become too soft and a hazard for the deck.

Also, if you are looking around the home and think you see moisture intrusion, hiring a licensed home inspector who uses thermal imaging is a smart idea.

When to Call a Professional

Call a professional if you need an inspection on your deck or there is an area of concern. You want to make sure that the deck is safe as many accidents occur when a deck is not structurally sound.

Conclusion

It can be hard to know what an inspector will look for so we let you know in the blog. After the inspection is done and complete, it is you the homeowner that has to continue to do maintenance and check the deck for any issues. You will want to find these before it becomes an issue, injury, or death. We can inspect your deck while we do home inspections in the Chicago area. Think you might need our services? Leave us a comment below!

May 7, 2021

What is Counter Flashing

Roof

There are a lot of different ways to keep the inside of our homes dry as well as our chimneys. One of those ways is by having counter flashing on the chimney. What is counter flashing? It is usually made of galvanized steel and directs water away from areas on the roof such as the intersection of the roof and walls.  Roofers will install flashing around vents, skylights, and chimneys.

Let’s take a look at why you need to know about counter flashing, what it is, problems with it, common materials used, installing it after building a chimney, common cause of roof leaks, maintenance, and when to contact a professional.

Why You Need to Know About Counter Flashing

You might be wondering why you need to know about counter flashing? Well, if your home has any brick on it, you want to make sure that counter flashing was used in the construction process. Counter flashing is often used to flash chimneys, which means to divert the water away from the chimney and down the siding.

What is Counter Flashing

As mentioned above, it is most often used on chimneys or where the wall meets a roofline. There are two layers: The first one is the base and is at the bottom of the chimney and the second one is inserted into the brickwork of the chimney. The purpose of the counter flashing is to sit on top of the base flashing to make sure water doesn’t go past it and instead flows down the roof or through the gutter.

Problems with Counter Flashing

You can see that counter flashing is very important to the chimney and the roof. However, we have to rely on the worker to install it when he/she is laying the brick and mortar. This will make it work best. Unfortunately for some workers, this is too much work so they skip this step and then the roofer has to cut out a ridge and seal it later on. The bad thing about this is the sealant eventually wears out and leaks into the home can occur.

Another problem is some people install it incorrectly such as in the picture below. The counter flashing should be up higher on the wall.

Here is another example of improper counter flashing. Just like the example above, it should be up higher on the wall so water cannot get underneath the shingles.

Common Materials Used for Counter Flashing

The three common materials used for counter flashing are: Aluminum, copper, and galvanized steel

Aluminum

Pros

  1. Aluminum can last for 20 years or more when taken care of properly
  2. Pieces can be cut so they are custom-fitted and slide together
  3. Some people will paint it and it is corrosion resistant
  4. Equally important, it is the least expensive of the three materials

Cons

  1. If the material is not taken care of or painted, it can corrode or oxidize. This is especially true if it is in contact with mortar
  2. It is a thin material, can break easily, and cannot be soldered
  3. Joints are weaker when nailed together
  4. Ladders of fallen limbs can damage it

Copper

Pros

  1. Durable and lasts for decades
  2. Aesthetically pleasing
  3. Joints can be soldered
  4. Light, workable, shaped easily
  5. Not to mention, it is an easy install

Cons

  1. Cost the most of the three materials
  2. Thieves love to steal it because of the value
  3. Similar to aluminum, damage occurs by ladders or fallen limbs

Galvanized Steel

Pros

  1. Can last for 40 years or more
  2. Rust resistant
  3. Not to mention, joints can be soldered which is very important

Cons

  1. Can rust if not taken care of and develop holes which lead to water entering the home
  2. Hard to tell if the material is falling apart
  3. Material is very heavy
  4. Tough to custom fit and install because it is so thick

Installing Counter Flashing After Building a Chimney

Improperly Installed Flashing Is a Common Cause of Roof Leaks

Hopefully, now you are seeing how important flashing is! In fact, if it is not installed properly or is damaged, it can lead to roof leaks. This is especially true in the areas of roof crickets, or dormer, and the chimney.

Architectural shingles

Maintenance on the Roof and Chimney

Every year, it is important to do maintenance on the roof and around the chimney. For example, take a look at your shingles. If any are missing or starting to come off, you have choices in shingles. Many people like architectural shingles while some like the three tabs.

Clean out the gutters and make sure the downspouts extend 6-10 feet from the home. You have the counter flashing which is directing the water away from the chimney so make sure the gutters are clean and the water can flow down and away from the home.

Conduct your summer chimney maintenance so you can make sure there are no unwanted pests or rodents living in the chimney.

Check the roof sheathing. If you are noticing water coming in through the attic or you see wood rot, you may need a professional to help with a diagnosis.

When to Call a Professional

If you notice water coming into the home or issues on the roof or near the chimney, call a professional for help. They can help with a diagnosis and also with answering any questions you may have.

Conclusion

Counter flashing is very important anywhere you have brick on a home. This is usually on the roof and chimney areas. With this in mind, sometimes it is not installed or it wears out quickly and needs replacing. In general, the idea is to always keep water outside of the home. We will look at your chimney during home inspections in Chicago and the surrounding suburbs. Think you may need our services? Leave us a comment below!

April 16, 2021

What is a Fireplace Lintel

Fireplace

Fireplaces are a luxury to have in the home. Many people don’t see it that way but if your home has one and there is a cold night, you are a lucky one. It is relaxing as you listen to the crackling and pop from the fireplace producing heat for the home. Does your fireplace have an arch or lintel bar on the front of the fireplace? This bar is a fireplace lintel. What is a fireplace lintel? It is a beam that protects the structure of the fireplace and also keeps the chimney from coming down. Some people don’t think it is important but it is!

Let’s take a look at why the fireplace lintel is important, what they are made of, the jobs of a fireplace lintel, what happens when it is removed, adding or replacing a lintel and other maintenance.

Why the Fireplace Lintel is Important

As mentioned above, the fireplace lintel is not there just for show, but it provides support for the weight of the chimney and also protects the other parts from the high temperatures of the fire. Sometimes it is closer to the back of the firebox and near the part of the chimney that many call the “throat.” It is about 4 inches into the side of the wall and is often made of brick or stone and extends into the walls.

What a Fireplace Lintel is Made Of

Old homes usually have a wooden lintel while new homes use a variety of materials such as stone, brick, steel, or concrete.  Sometimes timber is used but not as much as it is a combustible material.

Steel– made for large openings and heavy loads. It is made with rolled steel joists embedded in concrete and is long lasting.

Concrete– this material is fire resistant and can handle any weight. It is usually 8cm in width and just like steel, is a long lasting material.

Brick– this is used when the opening is less than 1m and the load of bricks is light.  It is 10 -20 cm in depth.

Stone– these are about 10cm per meter of width and very heavy. They are vulnerable to cracks because of the way the structure vibrates with this material.

A Fireplace Lintel Has Many Jobs

The fireplace is held together by mortar and joints and just like with many things, they deteriorate over time. If there is no lintel, the front of the chimney can crash into the firebox or fireplace opening, causing a mess and big expense.

The lintel is also necessary because when it is time to have a chimney cleaning, powerful tools are used to clean it. These tools can rattle the chimney and without support, it can fall.

Lastly, due to the high temperatures that come from the fire, the lintel will protect the chimney masonry from deterioration. The lintel reduces heat exposure, extends the chimney’s life, and decreases the risks of cracks and other heat damage.

What Happens When the Fireplace Lintel is Removed

Sometimes a designer, a DIY homeowner, or other person will remove the lintel to make the fireplace look taller. When in actuality, they are making it less structurally sound. Also removing it causes the smoke to go into the home instead of up and out of the chimney.

Adding or Replacing a Fireplace Lintel

  1. Adding a lintel should be done by a professional as it can be difficult to install them for someone not trained.

2. Make sure that the bearing on each side is enough to hold the weight so that it doesn’t collapse.

3. Height of the lintel should be enough to support the hearth thickness .

If you have a lintel and it is too high, one can be installed underneath that is the right size.

Other Maintenance In and Around the Fireplace

An estimated 25,000 fires start each year because of the chimney so it is important to maintain.

Chimney maintenance – should be done in the summer and involves looking to see if there are cracks in the seals, build-up of soot, or dead animals or nests. A certified inspector should do this from the Chimney Institute of America.

Roof– checking the roof is a good idea as well in the summer. You will be looking for any missing shingles, drip flashing, and that the eaves are attached, and the gutters are clean. The last thing you want is a backup of water in the home.

Water can also come through the outside walls so taking a look around the outside of the home for negative grading and water intrusion is a good idea.

When to Contact a Professional

If you are remodeling your fireplace, check with a chimney inspector who is certified with the National Fireplace Instititute.  He or she can look at the plans and make sure they will be up to code.

Conclusion

Many people don’t realize that the lintel is an important part of the chimney and fireplace. It is holding up the structure and also directing the smoke in the right direction. Not sure if yours is working correctly or if you have one? We can take a look at the lintel and chimney during our home inspections in Chicago, Illinois. Think you might need one of our services? Comment below.

April 9, 2021

Should I Drywall My Garage

Home improvement

People use the garage for a variety of things: storage, park cars, and some people turn it into a room that someone would live in or entertain in.  Whatever your plans are for the garage, should you drywall the garage or detached garage? Yes, if it is something you are interested in doing.

Let’s take a look at why this is important, why drywall a detached garage, what to do when the drywall is up, using plywood, starting with an unfinished garage, maintenance, and when to call a professional.

Why This is Important

Drywall is treated gypsum and used to finish walls and ceilings in a home. A material that is used in building modern homes, it is also used to convert the garage into a room to entertain or other uses.

Why Drywall a Detached Garage

Protects From Fire

Drywall is a great building matter that is highly resistant to fire so it is a great addition to garages.  Garages often have power tools in them, flammable materials, and also people who work on cars with products that could catch fire. Installing drywall would be a good idea to keep it a safe area.

Helps With Noise

Is there a lot of noise that comes from the garage such as people watching a live football game on TV, playing foosball, or your child has a rock band that uses the garage?  The drywall will help reduce the noise that is heard.

Visibility and Lighting

Visibility and Lighting

The white color of drywall shows up nicely in the garage as it maximizes the lighting and reflects well in the room.

Resell of the home

It is difficult to carry the drywall so you need others to help.  It is heavy but once you get it installed, it looks great!  Many buyers like to see drywall on the detached garage as they can use the room for various activities and they don’t have to spend the time doing it themselves!

Make An Old Garage Look New

Some people will drywall the garage because it is old and they don’t want to replace it.  This gives the area a new look and hides the cosmetic issues.

The Drywall is Up, What Now

Using a Stud Finder

Once you are done installing the drywall, you can use a stud finder to find the wall stud.  You will need this wall stud (spaced 16-24 inches apart) to safely hang items.  You cannot hang items in the hollow drywall, they will fall down.  If you don’t have a stud finder, you can knock on the wall to find the studs.

Weight to Hang on the Walls

You can hang up to various weights on the wall.  How much weight can drywall hold? Over 100 pounds!  For example, if you want to hang your prized NFL jerseys, you can use a screw and an anchor to put into the stud and to provide the support for up to 20 pounds.  However, if you were hanging a shelf with football helmets on it, you can hang up to 100 pounds with #4 or larger screws.  Depending on what you are hanging is the size of the screws or anchors that you need.

Plywood is another choice

Plywood is Another Choice

Some people find that using plywood is better.  This is because it is stronger and better for tools and storing equipment. It is also easier to hang than drywall because it is not as heavy. Lastly, you can drill right into it and don’t need to look for studs like you do with drywall.  Some like the look of the plywood while some like drywall. However, plywood is not fire-rated and an attached garage should always be protected with fire-rated materials.

Starting With an Unfinished Garage

Make sure the garage is ready and has the following:

  1. Sometimes there may not be enough wall studs to drywall.  Adding the blocks will be necessary so you have the support needed.

2. If you plan to hang lights or bicycle hooks, you will need to add nail blocking.

3. If you have an attic hatch, make sure you add an opening to the drywall so you can access it and the attic ladder.

4. Are you adding skylights or a window AC unit? Cut out a space in the drywall to do this.

Adding or Moving Wires in the Garage

If you are adding wires and electric, consult a professional to help with this. Safety should be a priority.

Moving Wires

You will probably need to move wires to other places.  If you aren’t sure how to do this safely, contact a professional.

Ventilate the Garage

You want your garage to have air that flows freely and stays cool. Having enough attic and roof vents is important.  The rule is total of 1 sq. ft. (144 sq. in.) of vent opening per 300 sq. ft. of attic divided between the soffit and roof vents.  Here are some great instructions about how to insulate the walls.

Add Insulation

After the drywall is done, blowing in insulation is the next step.  You can buy this at a local hardware store and contact a professional if you need help.

Weather strip doors and windows

Weather Strip Doors and Windows

Make sure there are no drafts from the windows or doors in the garage. Installing weather stripping is important so you can keep your air and heating bills low. The garage can experience heat or air loss so putting weather-stripping on the door is a good idea. Then drywall is the last part.  You may want to rent a drywall lift that will allow you to put the drywall on the walls and the ceilings.  It will make your job easier.

Maintenance in the Garage

1. If you have recessed lighting or skylights, make sure there is enough sealant around them so air is not escaping.

2. A garage door opener should last about 10 to 15 years, while a garage door should last 15-30 years with proper maintenance. 

3. Keeping the rollers, door tracks and springs lubricated, garage door balanced, and door sensitivity adjusted are great ways to get the most amount of years out of the garage door and openers.

4. Clean window ac unit – often a window AC unit must be added to a garage.  Maintaining this is important.  There are ways you can clean the window AC unit and do this with or without removing it from the window.  Additionally, cleaning the filter, coils, fins, pan, and fan are all-important.

Don't overload the circuit

5. Don’t overload the circuit- make sure that you don’t have a lot of electrical plugs all plugged into the same place.  The recommended amount is not more than 1440 watts plugged in at one time on a 15-amp circuit.  If you overload the circuit, it can start an electrical fire.  Also, make sure you have a fire extinguisher in the garage in case there are any issues.

When to Call a Professional

If you want to add outlets and lights or a 20-amp circuit and add in wires, you need to have it inspected before dry walling.  As mentioned above, wires and electricity can be dangerous.  Calling a professional to install the drywall for you or to help with making sure your garage is safe is also a great idea.

Conclusion

Many people think of drywall as a building material in the walls but don’t realize that it is also used for sprucing up a detached garage.  We can look at your detached garage when conducting a home inspection in Chicago. 

Questions about your detached garage or need our services?  Comment below!

March 12, 2021

How to Reset a Water Heater

Water Heater

You know how cold it gets here in Chicago in the winter.  It is frigid for all of winter and it takes every ounce of us to get out from the nice warm bed when the alarm goes off to jump into the shower. If you are like many people, you turn the water on and let it warm up before jumping in.  However, what if you are standing there waiting and the water is NOT warming up?

Every thought goes through your head about what could be wrong on this cold Monday morning.  It could be the water heater reset button tripped.  How do you reset a water heater?  Check the electrical panel and flip the button to on (if it was in the off position and vice versa).  Then, push the red reset button on the water heater. If those don’t work, you will need to call a professional.

Let’s take a look at why this is important, checking the electrical panel, the purpose of the reset button, what to do if it does not come back on, maintenance of the water heater, and when to call a professional.

Why This is Important

It is important that you have hot water coming out of the faucets, appliances, and showerheads.  The warm water is not only for showers but to properly clean clothes and dishes. Water heaters last about 8-12 years but sometimes need replacing before that.

Why Water Heaters Stop Working

Often the water heater reset button trips because something is faulty on the water heater or issues such as:  

  1. The water heater unit’s thermostat is not working.
  2. The reset button is malfunctioning.
  3. The high-limit switch is not working- that is the part that keeps the water from getting too hot.  If it trips, then there is a problem with it or it is allowing the water to get to hot.
  4. There is a short in the heating element- this may allow the water to continue to heat up, however, it will trip the high-limit switch.
  5. A wire is loose somewhere in the water heater- this can cause the water to get hot and trip the high-limit switch.
  6. An electrical issue in the home.
Check the electrical panel
Electrical Panel

Check the Electrical Panel

Wander over to the electrical panel.  It is often in the garage, basement, or storage closet.  There is a circuit breaker that is labeled “Water heater.”

If the breaker is in the “off” position, flip it to “on.”  If it stays “on”, even after a few minutes, it was a minor issue and all seems to be well.

If it goes off, follow the directions below. However, if the breaker is in the “on” position, flip it to “off.”

Purpose of the Water Heater Reset Button

The purpose of this button is to stop the flow of power from the water heater.  This is a safety feature and happens when there is an issue in the water heater such as a thermostat not working properly or a power surge. The reset button keeps the water from getting too hot in the unit.

Water heater reset button: Location and How to Reset It.

Water Heater Reset Button: Location and How to Reset It

The reset button is often red and located near the thermostat or behind a metal panel that is removable on the unit. When you find it, push the reset button and then release it.

There may be a lower thermostat button also known as a second reset button. Push this and then release it.  Does the water heater trip again right away after pushing either button? Then there is an issue with a part and you will need to call a professional.

If it does not trip, replace the metal panel on the unit and go to the electrical box and flip the circuit breaker back to the “on” position.  Does the water heater turn on? Yes? This is great!

If it does not turn on, switch the breaker back to “off” and call a professional.

Possible Reason The Water Heater Won’t Work

In a water heater unit, there is an upper and lower heating unit.  If the thermometer is not working correctly, the water can become scalding hot as mentioned above.  Thus, the reset button will trip to keep the water from coming out, as this is not normal.

How a water heater works

How a Water Heater Works

The water fills in the bottom of the tank and the lower thermostat heats the water up.  As the water travels up the tank, the upper heating element continues to keep the water hot in the unit.

When the water sits in the tank, it cools down.  Then, when the water is needed, the thermostats heat it up.  There is a temperature on the high limit thermostat in the upper heating element and when the water heats to that temperature, the thermostat shuts off.

Lower Heating Element

If the lower heating element or thermostat in that area stops working, then the cold water goes up to the upper heating level.  When the water comes out in whichever appliance you are using or in the shower, the cold water is what will come out. This is because it did not heat up on its travels to the top.

Upper Heating Element

If this part stops working and the lower heating element works, you may get hot water for a little bit. However, it will turn cold once it starts pulling the water from the upper element.  It will be cold because there is no continuous heating element at the top working to keep it from getting cold. The high limit switch will trip as the water continues to heat up in the higher element to avoid it coming out scalding hot.

Maintenance of a water heater
Draining the water heater

Maintenance of a Water Heater

As with all appliances, you may be able to find this issue early if you properly maintain the unit.  

Here are a few ideas:

  1. Flush the hot water heater
  2. Whether you have gas or electric, adjust the temperature and reset
  3. Turn your gas water heater off and back on
  4. When you are traveling, set the water heater to vacation mode
  5. Tighten the drain valve if you see water leaking out
  6. Check the temperature release valve, also known as T&P or TPR
  7.  Set thermostat to 120 degrees F.
Check the anode rod in a tank style water heater
Anode rod that is corroded inside a water heater

Check the Anode Rod in a Tank Style Water Heater

Inside a tank-style water heater is an anode rod.  This keeps the middle of the tank from rusting.  Changing this out as it starts to rust will keep the water heater working longer.  How do you know if the anode rod is bad? There is a rusty smell, a sulfur smell, brown or rusty water, a gel-like substance, or the water heater is leaking or making noise.  If your water heater is 5 years old, it is time to change the rod.

Check the Age of a Water Heater

Not sure when the water heater was last replaced?  You can find out the age of a water heater by the label on the unit. Usually, the last two digits of the year are listed on the serial number.  However, if you have a Bradford water heater, it is a little more difficult to find it.

Replacing a Water Heater

There are a lot of things to think about when replacing the water heater if it comes down to that point.  The style of heater, the tank size, etc.  Take a look at this article to see what might work best for you!

When to Call a Professional

Call a professional if your water heater is tripping or not working at all. There also could be an issue with appliances sharing a circuit breaker and you want to make sure this is not the case.  A professional can let you know if there is life left in your water heater or if you need to replace it.  Additionally, if you need your water tested, it is a good idea to call a professional to make sure it is safe to drink.

Conclusion

Water heaters are essential in our lives as we use hot water for showers and our appliances to make sure they are clean.  When they are working properly, they can last 8-12 years.  If your water heater is having issues, check out the steps above and call a professional if you need assistance.  Hopefully, it is a minor issue with the reset button and you can fix it. We will inspect your water heater during our home inspections in Chicago.

Questions about your water heater or in need of our services?  Comment below.

March 2, 2021
Page 3 of 3123

Pages

  • About
  • Areas We Serve
  • Best Home Inspectors in Chicago, IL
  • Commercial Building Inspection Chicago, IL
  • Condo Inspections
  • Contact
  • COVID-19 Guidelines
  • Handy Geeks Quote
  • Handyman Services Chicago: Handy Geeks
  • Home
  • Multi-Unit Inspections
  • Our Blog
  • Preferred Contractors
  • Pricing
  • Privacy Policy
  • Radon Testing Chicago, IL
  • Sample Page
  • Schedule Your Inspection
  • Terms of Use
  • Testimonials
  • Thanks
  • The Best Home Inspectors in Aurora, IL
  • The Best Home Inspectors in Evanston, IL
  • The Best Home Inspectors in Naperville, IL
  • The Best Home Inspectors in Northbrook, IL
  • Your Inspection
  • Your Report

Categories

  • Appliances
  • Attic
  • Basement
  • Deck
  • Electrical
  • Fireplace
  • Home Buyers
  • Home improvement
  • Home Inspection
  • Home Maintenance
  • HVAC
  • mold
  • Plumbing
  • Podcast
  • Real Estate
  • Resources
  • Roof
  • Safety in the Home
  • Taking Care of Your Home
  • Uncategorized
  • Water
  • Water Heater
  • Winterization

Archive

  • May 2022
  • April 2022
  • March 2022
  • February 2022
  • January 2022
  • December 2021
  • November 2021
  • October 2021
  • September 2021
  • August 2021
  • July 2021
  • June 2021
  • May 2021
  • April 2021
  • March 2021
  • February 2021
  • January 2021
  • December 2020
  • November 2020
  • October 2020
  • September 2020
  • August 2020
  • July 2020
  • June 2020
  • May 2020
  • April 2020
  • March 2020
  • February 2020
  • January 2020
  • December 2019

Providing Home Inspection Services to Cook, Lake, and DuPage Counties

We provide Inspection services to the Chicago Metro Area. Certified home inspection services including Buyers Inspections, Pre-listing Inspections, New Construction Inspections, Commercial Inspections, Radon Testing, and Sewer Scope Inspections.

View Service Area

Privacy Policy

Terms of Use

773-242-9358
info@homeinspectiongeeks.com
Chicago, IL
Open Everyday 24 hours

Sitemap

© Copyright Home Inspection Geeks, Inc. - Hosted by WolfPack Advising
  • Facebook
  • Twitter
  • Yelp
Scroll to top