Home Inspection Geeks
  • Home
  • Your Inspection
    • Single Family Homes
    • Condo Inspections
    • Multi-Unit Inspections
    • Commercial Building Inspections
    • Radon Testing
    • Your Report
  • Handy Geeks
  • Pricing
  • About
  • Areas We Serve
    • Aurora, IL
    • Chicago, IL
    • Evanston, IL
    • Naperville, IL
    • Northbrook, IL
    • View All Service Areas
  • Blog
  • Contact
  • Book Now
  • Menu Menu

Is A Freon Leak In Your Home Dangerous

Home Maintenance

Homeowners have many items that need maintenance or replacing. Over the years, it is best to maintain a consistent home maintenance checklist. This can save you time and money over long periods of time. No homeowner wants to put their family’s health in danger. So, ensuring that any appliance dealing with a form of gas or chemical is working properly should be a priority. Always remember that your AC unit has many functioning parts. Your goal as a homeowner should be to have the unit inspected yearly. This allows you to maintain a level of comfort when it comes to the dangers of your AC unit. Is a freon leak in your home dangerous? If exposed to a freon leak over a long period of time, you will experience many health symptoms.

Let’s take a look below at what this all means in terms of your health and safety.

What Is Freon

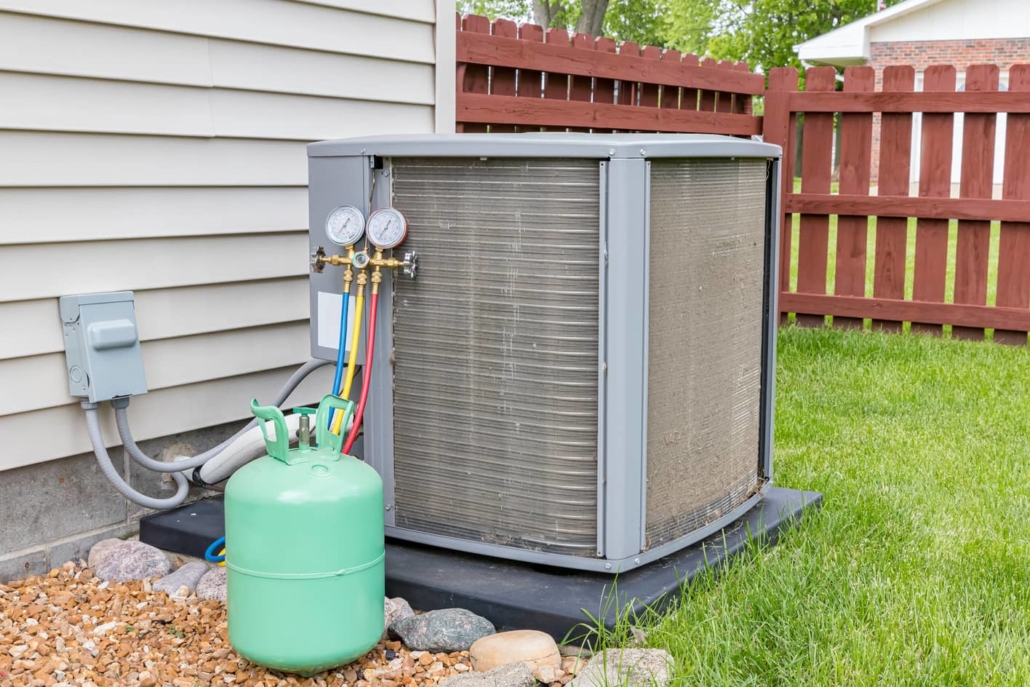
The word “freon” comes from the Dupont company and was trademarked by the Chemours Company. Freon 22 is the most common type of freon used in homes. It is referred to by professionals as R-22 refrigerant. Keep in mind that freon is for cooling appliances and is a propellant in aerosol cans. In addition, freon is a chlorofluorocarbon that has been linked to the depletion of the ozone layer. After 2005 this refrigerant was phased out from all appliances. A new version of an environmentally refrigerant was created called R-410A. Also, it became law that all appliances made after 2010 must not contain freon. The most obvious place where freon is used would be your HVAC system. The air conditioning unit in most modern homes before 2010 uses freon to cool the air.

What Are The Health Risks

Believe it or not, there are a few health risks that go along with freon. If you have a freon leak, you could be exposed to a serious chemical. Not only can you be exposed to a refrigerant in your AC unit, but also, your car uses a freon refrigerant as well. The various symptoms that you will endure should you become exposed to freon are as follows:

  • Headaches
  • Dizziness
  • Coughing and irritation to the throat
  • Eye irritation

Should you become exposed to freon for a longer period of time, then your symptoms will surely become more severe. It is highly recommended that you seek medical assistance if the following symptoms occur:

  • Vomiting
  • Heartbeat speeds up
  • Blackout or loss of consciousness
  • Having difficulty breathing or shortness of breath
Outdoor AC unit freon boost.

How Would I Detect A Leak

Detecting a leak in your AC unit could take you some time. There is a sweet kind of odor that is associated with a refrigerant leak. Although it does take a lot to smell, exposure over a long period can cause health issues as mentioned above. Also, the good thing is, that exposure to a refrigerant leak would take extreme damage to the AC unit and is not deadly.

How Much Does It Cost

The national average for freon refill is $125 to $150 per pound. In most cases, the homeowner is going to pay anywhere from $200 to $400 per refill. In addition, if you have a larger AC unit that requires more refrigerant, you could be expected to pay up to and possibly more than $600 per refill.

Other Recommended Maintenance

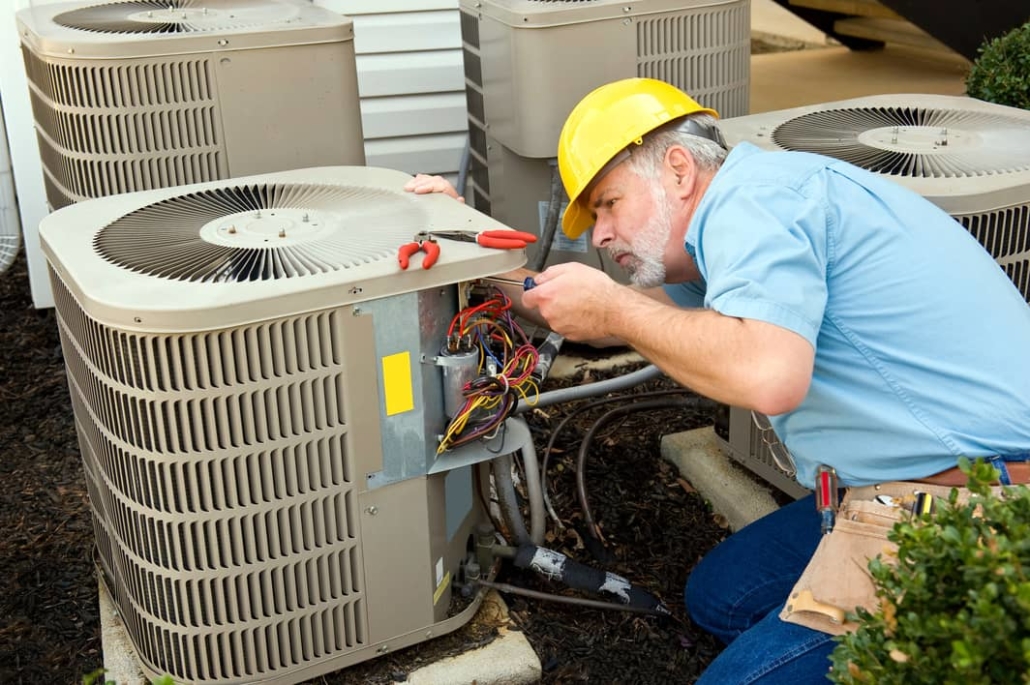
Now that you have an understanding of a freon leak in your AC unit, it is also a good idea to understand more about your AC unit. Major damage is required for any refrigerant or freon leak to occur. Most homeowners will never experience this occurring over the time they own their homes. However, keep in mind that things happen to your AC unit and you should be prepared for those equipment failures. AC pressures adjust as the unit is being used. Be mindful of what head pressure in your AC unit should look like. This will help you to understand when to call a professional AC service technician.

Next, consider how old your AC unit is. Having the AC unit serviced more often than you would like is an indication that a replacement is necessary. Always track how often you service your AC unit and keep a record of any parts that are replaced.

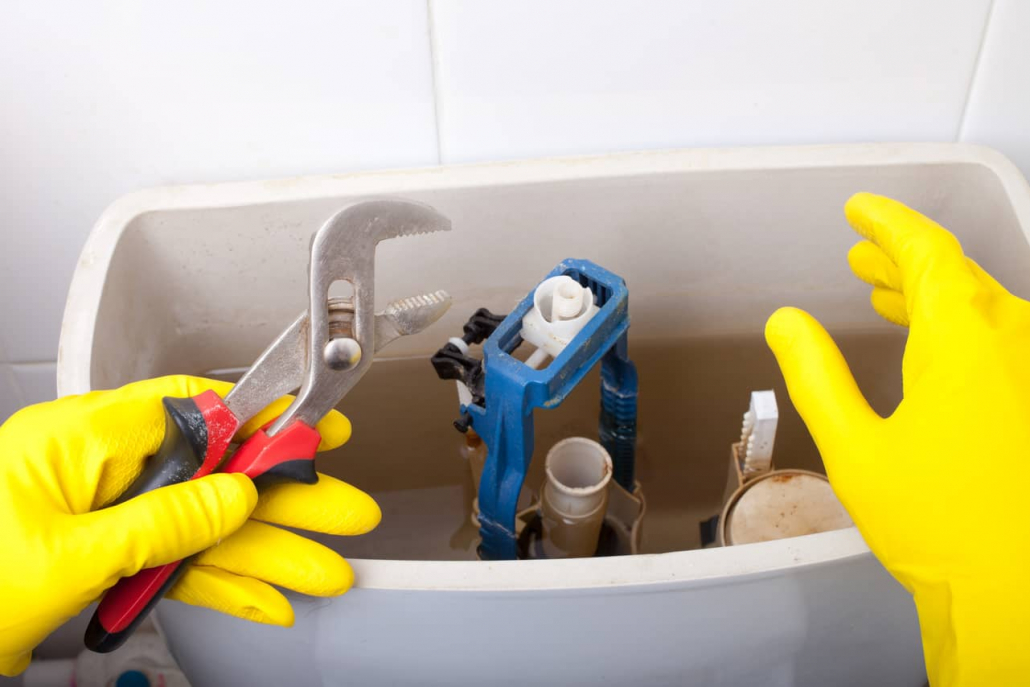
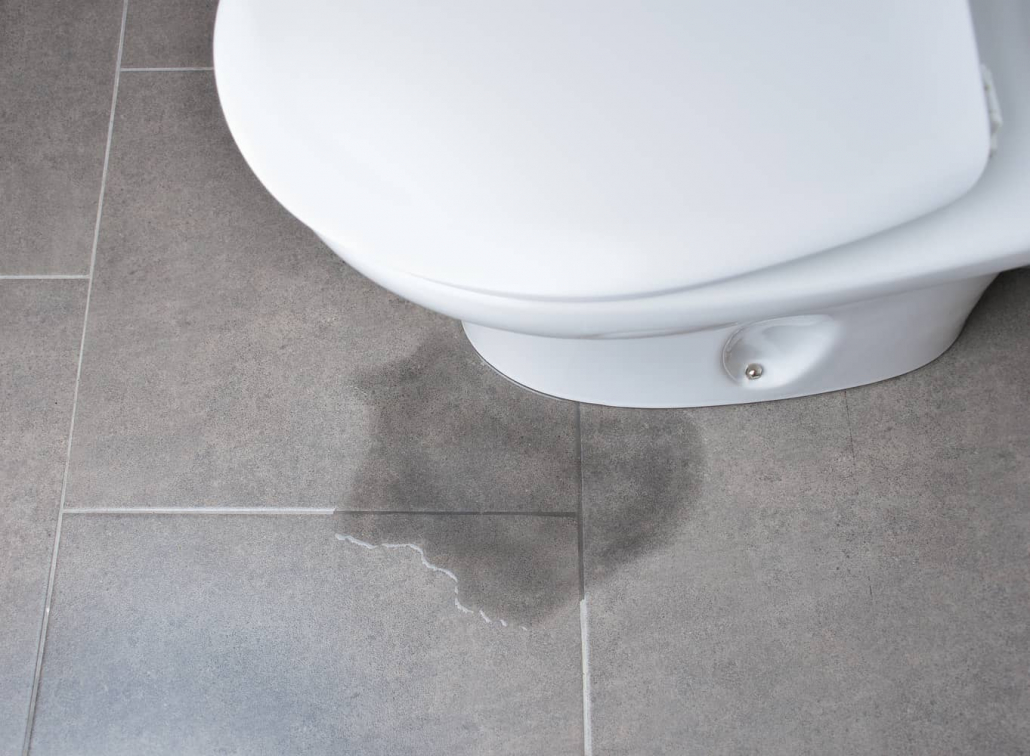
Lastly, check for leaks. There are a few possible reasons why your AC unit leaks water. While you are looking into a freon leak, consider checking into the water that might be leaking around your AC unit. Typically, if one area of the AC unit is malfunctioning, other parts are also breaking down. Always consider reading up on where and why your AC unit might be leaking water. This will keep you from getting too worried about bigger repair bills.

AC unit service repair technician helps take care of the AC unit and look for freon leaks.
AC unit service repair technician.

When Do I Call A Professional

Calling on a professional for all of your HVAC needs is vital to keeping your system up and running. The more you maintain your HVAC unit the longer it will last for you. If you don’t know who to call, reach out to your local home inspection team. Not only can they refer a reputable HVAC service technician, but they can also inspect your home for any other recommended HVAC repairs.

Conclusion

Regular maintenance of your AC unit is key to preventing any type of leaking in your unit. Whether it is water or freon leaking, you will want to call a professional HVAC service technician right away. The longer that you wait to inspect and repair any damage to your unit, the more exposure to health issues you have. Call on your local home inspection team to get an inspection of your HVAC system and decide on potential repair project needs. Also, remember that it is highly recommended that your HVAC unit is serviced in the Springtime. Reach out to Home Inspection Geeks will take a look at your HVAC unit during a home inspection in the Chicago area.

May 17, 2022

Do Gutters With Gutter Guards Need To Be Cleaned

Home Maintenance

Spring cleaning can be a very challenging situation. Consider the long list of items that need to be handled once the weather turns nice again. Cleaning your roof and the materials attached to your roof are definite tasks on the list. This is not only the shingles on the roof but also the soffit areas of the roof overhang and the gutters. If you have gutters on your home, then it is likely that over time you have invested in a product called gutter guards. Keep in mind that this product is meant to keep your gutters clear of any debris over the year. Do gutters with gutter guards need to be cleaned? Gutter guards should be cleaned and the gutters rinsed out.

Let’s take a look below at the advantages and disadvantages of the gutter guard system.

What Are Gutter Guards

Gutter guards are typically a type of metal mesh-style material that gets attached to the gutters. The object of the gutter guards is to keep the larger debris from entering your gutter system. This is a good idea. Leaves, twigs, pine needles, and other large items are kept out of the gutter. The expectation is that you can blow the debris off or let the wind do it for you, however, this isn’t always the case. In fact, it is recommended that no matter what type of gutter guard you have installed, you clean them twice a year. Gutters can still collect fine particles and dirt which can cause a backup of rainwater. If the rainwater backs up in the gutters you can have bigger issues, like flooding, house damage, or even mosquito outbreaks.

Gutter guards keep debris out.

Advantages Of Gutter Guards

The advantages of installing gutter guards are quite obvious to the homeowner. Let’s take a look below:

  • Maintenance – installing gutter guards reduces the amount of maintenance need and are keeping your gutters free from clogging. You won’t eliminate your maintenance needs 100%, but you will substantially reduce those needs.
  • Property damage – gutter guards reduce the risk of damage to your home because they allow water to flow more easily through the gutter system. Water does not pool up by being backed up due to a clog.
  • Safety – gutter guards are easier to clean and safer. You only need a long brush to sweep off the tops of the gutter guards. In fact, only twice a year would you need to use a ladder to pressure wash the gutter guards and gutters.
  • Home value – believe it or not, your home value can increase. If the gutter guards are installed properly by a professional installer, you can add gutter guards to a list of bonus items for any potential buyers.

Disadvantages Of Gutter Guards

The disadvantages of a gutter guard system is also quite obvious to the homeowner. Let’s take a look below:

  • Maintenance – although the big stuff is easily removed from your gutter guard system, debris and dirt can still get into the gutter and clog it up. Keep in mind that the gutters still require cleaning during the year.
  • Aesthetics – if the gutters are not in color coordination of the home, they can often be an eye-sore. Not every homeowner enjoys the look of gutters and downspouts taking over the sides and corners of their home. However, if gutter guards are installed correctly and the color matches the gutter system and home, then you’re going to increase the curb appeal.
  • Cleaning challenge – by installing gutter guards you now take away instant access to the gutters. Even though you are happy to have the gutters capped off. Keeping the big stuff out of the gutters is good, but allowing the small stuff in is bad. Over time, you will need to clean the gutters or hire a professional gutter cleaning service.
  • Warranty – keep in mind that installing gutter guards could actually void your roof warranty. If you have chosen the wrong type of gutter guard, your roof installation will be void of warranty.

What Are The Tools Needed

Every project requires some kind of tool, equipment, or materials. Cleaning gutter guards is no different. Here is a recommended list of tools and equipment needed to make your job easier.

  • Bucket – needed to hold the leaves and debris you got out of the gutters and off the gutter guard.
  • Ladder or extension ladder – this allow you to get up onto the roof safely
  • Garden gloves – worn to protect your hands from any insect bites or sharp objects that might be mixed in the debris.
  • Goggles – worn to protect your eyes.
  • Rope – allows you to drop the bucket down to the ground so that your partner can empty the bucket and you can pull it back up. Saves you from going up and down the ladder.
  • Drop cloth – in some cases you can brush or push debris off the gutter guards and onto a drop cloth. This protects your lawn from a huge mess.
  • Garden hose with a pistol-grip nozzle – allows you to have a strong stream of water shooting out for higher pressure against the gutter and gutter guards.
  • Garden spade – narrow garden shovel to pick the debris up and out of the gutters to place into your bucket.
Cleaning gutters while on a ladder

What Are My Maintenance Needs

The step-by-step process for taking care of your gutters is as follows. Keep in mind that everyone’s approach can be different.

  1. Place your ladder in a safe location where you have a sturdy base. Always count on someone to assist you at the home so the ladder stays safe. Make sure to secure the ladder.
  2. Prepare your safety by putting on your goggles, gloves, and old clothing. This protects you from dirt, pests/insects, and any other surprises that you might find while up cleaning the gutters and gutter guards.
  3. Take your bucket and climb the ladder. You can place the bucket on the roof and use it to drop your debris in as you clean.
  4. Once the debris is placed in your bucket, you can switch over to your garden hose. Use your garden hose to pressure clean the tops of the gutter guards. High water pressure can rinse through the gutters themselves after you have safely removed the gutter guards. Even though some gutter guards are permanently attached, you can remove the inserts and gain access to the gutter.
  5. If you have removed the gutter covers to clean the insides of the gutter track, go ahead and re-attach them once you have pressure cleaned with the garden hose.
  6. Make sure that the downspouts are free and clear and collect all debris. You wouldn’t want to go through all of this work only to clog up your downspouts.

How Much Does It Cost

Believe it or not, you will need to clean your gutter guards and gutters even if they are protected. Keep in mind that anything exposed to the elements outside should expect a cleaning. The national average for gutter cleaning, which can include gutter guards is $150 to $300. In most cases, the professional gutter cleaning company will charge per linear foot. That cost can range from $.50 to $1.50.

Other Recommended Maintenance

Now that you know about cleaning your gutters even with gutter guards, you can decide if they are a waste of money or a great investment. This information can further enhance your decision to purchase gutter guards. Do some more research to make sure that the pros and cons line up with your needs at the home.

Next, understanding what is involved with your gutter system is important. Just knowing when and how to clean your gutters might not be the only need. There are a few working parts that are involved with your gutter system. Understand what they are and how they work so that you don’t end up with greater repair needs. For example, knowing how far your downspouts should extend away from your home is key. You will want to keep the water flowing as far away from the home as possible. This protects your foundation and landscaping.

Roof vent on a house.

Lastly, getting to know your entire home and what the parts and pieces do is important. While you are on the roof cleaning your gutters or even leaning on a ladder up against the gutter system, you will want to know what everything does. Your roof will have many vents and pipes coming out of it. Wouldn’t you like to know what they all do? While you are cleaning your gutters, you can get up on the roof and clean the roof vents to make sure that they are free of debris. Keeping them free from clogging is important.

When Do I Call A Professional

This is a great time to reach out to a gutter cleaning service. Having to concern yourself with climbing a ladder just to clean your gutter guards or even remove debris from your gutters can be a challenge. Getting your gutter guards and gutters cleaned out twice a year is a great idea. Having the tools in hand to get this project done is not always an option. Reach out to your local home inspection team before getting your gutter guards and gutters cleaned.

The home inspection can tell you if water from the gutters has caused any damage to the home. You wouldn’t want to waste time and money getting the gutter guards and gutters cleaned if you have bigger issues. Additionally, your home inspection team can recommend a reputable gutter cleaning service if that is the only project needed.

Conclusion

Getting to know your gutters and what they need is important for your home’s maintenance schedule. Much like remembering the schedule of your ac filter replacements, you need to make gutter cleaning seriously. If you have opted to install gutter guards on your gutter system, make sure that they are being cleaned. Reach out to your local home inspection team to make sure that the gutter guards haven’t caused any damage to your roof. In many cases, items that are out of sight are out of mind. If you cannot see the gutters, then homeowners will often forget that cleaning is needed. Your local home inspection team can refer a reputable gutter cleaning service and ensure there is no further roof damage. Call on Home Inspection Geeks for a roof inspection and gutter check when we come out for a home inspection Cook, Lake, and DuPage Counties, IL

April 14, 2022

How Does Radon Enter A Home

Home Maintenance

The last thing homeowners ever think about regarding their home is testing. Most homeowners attribute the word “test” to their educational backgrounds. Homeowners rarely think a home needs to be tested. Believe it or not, your home requires a variety of tests throughout the buying, selling, and owning processes. Keeping up to date on the good and bad of your home is a great way to protect your investment. Testing your home for radon, carbon monoxide, structural stability, and wind sustainability are just a few ways we learn more about our home. How does radon enter a home? Radon travels up through the soil and enters the home via cracks in your foundation and concrete walls.

Let’s take a look below at what’s involved with Radon and Radon testing.

What Is Radon

Radon is a radioactive gas that is a product of decaying uranium. Radon is found in nearly all soils on earth. The gas rises above the soil and makes its way into the air. As it approaches the air, it escapes into your home via cracks and crevices in your foundation and other locations of the home. Once it arrives at the home, it becomes trapped and builds up. Radon from soil gas is the biggest problem. Also, radon gas can come from well water.

Radon gas and where it comes from.

Where Does Radon Come From

Believe it or not, Radon gas is a naturally occurring phenomenon that we have zero control over. All we can do is understand its existence and hope to cope properly to avoid health issues or death. Let’s take a look below at the areas in which Radon comes from.

  • The existence of radon comes as it is a bi-product of natural decaying uranium and radium. As uranium decays it becomes radium which releases radon gas into the soil, water, and rock formations. So, it is a natural occurrence of radioactive materials naturally breaking down.
  • Much like carbon monoxide, radon is odorless, tasteless, and colorless. It comes to us from rocks and soil. The radon gas dissipates through our soil and out into the atmosphere. According to the Environmental Protection Agency (EPA), one out of fifteen homes contains elevated levels of radon in the U.S. This creates an increase in lung cancer susceptibility of nonsmokers.
  • Radon enters all types of homes. It does not matter how new or old the home is. Radon into the home through cracks and crawl spaces can happen daily. If you have met or exceeded 4.0 picocuries per liter (pCi/l) of gas in the air of your home, you should take action. According to the Surgeon General, Centers for Disease Control, and the EPA, these gas levels are very detrimental to your health and should have your home tested and equipped for gas removal.
  • Radon is also known to enter a home through unsealed sump pump areas and cracks or openings in plumbing and water supplies. Non-visible and visible cracks in your slab foundation and basement are great areas for radon to enter the home.
  • More specifically, radon gas will enter through cracks in the foundation, construction joints, cracks in the basement walls, holes in your sump pump area, plumbing penetrations that aren’t sealed, suspended floors, and drafty homes.
  • Since air pressure in a home is lower than its surrounding areas, as the gas leaves the home via exhaust fans, radon gas is sucked into the home and the home traps the radon. Hot air rises, and so, during the colder months, the hot air escapes and new air moves into the home. The gases are drawn in from the surrounding areas to replace the air that has left the home. Pressure variations are what create this vacuum-type action.
  • As long as the home is a contact with the ground, radon gas can and will enter the home. The level of the home and building materials used are key factors for radon problems arising. Make sure to test every two years and install a radon mitigation system to alleviate any issues.

How To Inspect For Radon

Believe it or not, you have three options for radon testing. You could have short-term testing, long-term testing, or continuous radon testing conducted at your home. Typically, this is not a do-it-yourself recommended project due to the health and safety implications. Hiring a professional service is highly recommended for all tests regarding radon gas.

Short-Term Radon Testing

Many of these tests are activated charcoal-based or electric ions. They are typically conducted if additional information is needed from the home. In addition, they measure radon gas levels over a 2 to 7 day period. Test measurements are then mailed to a lab for review. You can find these in hardware stores and online retailers. Learn more about short-term radon testing in Chicago here.

Long-Term Radon Tests

Just like a short-term test, you can purchase a long-term radon test at your radon agency or online retailer. Long-term tests conduct a 90-day to a one-year inspection and are typically more reliable due to the capturing of the drop in air pressure, gusty winds, snow levels, and the moisture in the soil. All of these factors trap radon gas. So, measuring their presence is important.

Continuous Radon Tests

Lastly, you have what’s called continuous radon tests that are electric and can plug into a standard outlet. They conduct testing every second that they are plugged in and functioning properly. Air is sampled and measured continuously so that the homeowner is alerted right away, of any potential issues.

Radon Mitigation
Radon Mitigation

How Much Does It Cost

Fortunately for the homeowner, radon testing is fairly inexpensive. Of course, ensuring your family’s health and safety should never have a price tag. The national average cost for a radon test is $150 to $350. However, if you get a full home inspection, you could get a radon mitigation test for a lower price. The average cost for a full home inspection is $520 to $650.

Every home inspection team is different, so double-check with your local team to see who offers the combination of tests, so you can save time and money. Keep in mind that if you live in an area with high radon exposure, the installation and equipment costs for installing a radon mitigation system are $750 to $5,000 depending on the size of your home.

Other Recommended Maintenance

Now that you are understanding how radon gas can enter a home. Make sure that you read up on who is responsible for conducting a radon mitigation test. If you are selling or buying a home, a radon mitigation test is highly recommended. But knowing who foots the bill, is key here! You don’t want to go out spending more money if the seller is responsible for having the test completed as part of a home inspection.

Once you know who is responsible for hiring a radon mitigation team, go ahead and begin to move forward. Understanding how often a radon mitigation test should be conducted is also very important. Let’s be clear, that just because you have purchased the home, does not mean the recommended maintenance is completely done. It just means you bought yourself time as the inspections on the home should all be up-to-date.

Finally, while you are on the topic of radon testing, it is a great idea to test other areas of your home. One area related to home safety that we often ignore is our fire alarm system. This is a great time to conduct testing on your smoke detectors and possibly change the batteries to your smoke detectors. Many brands of smoke detectors are also capable of conducting carbon monoxide detection. So, keeping your family safe from another odorless gas that can enter the home is a great idea here.

Radon gas can enter the cracks in your home.

When Do I Call A Professional

Knowing how radon can enter a home is your first step to success. Hiring a radon mitigation team to conduct a test of your home is the next step. As a homeowner, you are not going to be the one to conduct this test. It isn’t a do-it-yourself kind of project. It needs to be conducted safely and accurately. This test is recommended to be completed every two years. Contact your local home inspection team. They will be able to conduct your radon mitigation inspection or refer you to the proper professional. Your health and safety are key here, so make sure that the tests are conducted in a timely manner.

Conclusion

Regardless of where you live, conducting a radon mitigation test every two years is highly recommended. Regardless of if you are selling your home or not, keeping tabs on possible exposure that could impact your health is most important. Anytime you are dealing with an odorless and tasteless gas, you should want to get regular tests conducted. Before you purchase a home or even after a renovation has been completed, hire your local home inspection team to get a full home inspection. This can include a radon mitigation inspection.

Once the inspection comes back, you will get peace of mind that all is well. You might also get a recommendation to install a radon mitigation system if it registers high in your area of living. At the very least, you will know what the radon gas levels are in your local area. Call on  Home Inspection Geeks to get a radon mitigation test while we conduct a full home inspection in the Chicago area.

March 9, 2022

How To Change Light Bulb In High Ceiling

Home Maintenance

Unfortunately, the majority of materials in your home do not last forever. Light bulbs are no different. For some, they are lucky homeowners as their builder went with the longer-lasting LED bulbs. For others, light fixtures are outdated and need some specific light bulbs in order to work properly. You might also have an architectural design that looks amazing and keeps the main room open and refreshing. Then, only to discover, it is nearly impossible to change a light bulb. How to change a light bulb in high ceiling? If you do not have the equipment, your best bet is to call your local licensed electrician.

Let’s take a look below at the equipment that might be needed.

Lights on a tall ceiling are difficult to change.

Where Might This Happen

Typically, the issue arises in ceiling fixtures that are at least 10 feet tall or taller. Chandelier bulbs and recessed lighting are most often in need of changing. You often see this issue in foyers, stairwells, and open family living spaces.

What Are My Options

Fortunately for homeowners, there are a variety of ways to accomplish the task of changing a light bulb in a high ceiling. Unfortunately, most homeowners don’t have the time or patience to change these bulbs. You can also check your local hardware store for the equipment necessary to get the job done. Let’s take a look at the list of options below.

  • Bulb Grabber-typically used when ladders or scaffolds aren’t available. Most homeowners prefer this option so that they can change bulbs on their own.
  • Tall Ladder-you can rent a ladder that is 16 feet tall. As long as you have someone on the other end holding the ladder and you aren’t afraid of heights, you will be ok with going up the ladder to reach the bulbs needing change.
  • Pole Hooks or Ladder Hooks-these are used to attach to a platform. This is so you can hang your tools needed on the ladder or platform as you work to unscrew and replace the light bulbs.
  • Scaffold or Platform-these are used by professional contractors offering their services to get up to your light fixtures. It is not a normal piece or equipment for a homeowner to keep in their home. This is because they often take up a lot of space.
  • Call a professional-electricians and contractors typically have what you need to change a light bulb that is high in the ceiling. Although the price could be large, it might be worth the one time fee as you install long lasting LED bulbs.

The types of bulbs you have, how tall the ceilings are, are the vaulted ceilings, are the bulbs in a ceiling fan, and if you have a step ladder are all guiding factors as to if you can replace the light bulbs yourself.

How Much Does It Cost

The national average to upgrade your lighting to recessed lighting in a high ceiling is roughly $360 per light. In most cases, there is a required number of recessed lights for each setup. On average 4-6 light canisters are required for each recessed lighting system. Your cost then ranges from $800 to $2,200 in total. The average handyman or electrician will charge $50 to $75 to replace the lightbulbs in your recessed lighting canisters.

Other Recommended Maintenance

While you are learning about how to change lightbulbs in a high ceiling, check whether a fire can be started by an LED light bulb or LED light strips. You never know what the heat source might do to your recessed light fixtures. It does appear to be fairly safe though. Choosing a longer-lasting LED bulb is a great replacement idea.

Reset a smart bulb

It is also a good idea to look into using smart bulbs. Typically, they work great with your in-home illumination. You can have peace of mind knowing that the smart bulbs last long. Also, you likely will not need to change the bulbs in a high ceiling too often. You will also want to know how to reset a smart bulb in case it acts upon you, after installation.

Lastly, since you are on the topic of electrical work and light bulbs, it might be a great idea to inspect all of your appliances and electrical breaker box. Working in the family room to change a light bulb or two could also prompt you to discover how your electric fireplace works. With the power being shut off while you change the light bulbs, this would be a great time to read up on how the electric fireplace works. Understanding the items that you have purchased and how they work with other appliances on the same breaker is a great idea for health and safety.

When Do I Call A Professional

The majority of the time, homeowners will want to call a local professionally licensed electrician. This Is so he/she can take a look at their needs for upgrades. Sometimes if in a new home, it may be to simply change their light bulbs. New homes are likely set up with the bare minimum from the builder. So, the light bulbs might go a lot faster than anticipated.

Before changing your light bulbs, double-check to see if the fixtures can handle the wattage and the style of bulb that you are wanting to use. Also, consider reaching out to your local home inspection team for your home inspection. They can find any issues of concern regarding your electrical setup and can recommend some important projects. You can also get a referral to a reputable licensed electrical contractor from your local home inspection team.

Conclusion

Using your local home inspection team prior to upgrading or changing your light bulbs in your current light fixtures is a great idea. The home inspection team can determine what needs you might have. They can also tell you whether or not it is as simple as replacing a bulb. Most homeowners do not have the time, patience, or equipment to change a light bulb that has gone out in their high ceiling light fixtures. Not only can your home inspection team determine what you might need, but they can also recommend a professionally licensed electrician. Home Inspection Geeks can take a look at your electrical needs when we come out for a home inspection in the Cook, Lake, and DuPage Counties, IL.

February 14, 2022

Why Does My Toilet Whistle

Home Maintenance

The unexpected whistling of your toilet can come about at the most inopportune time. Imagine flushing your toilet in the middle of the night and it happens to begin whistling at you. Clearly the result of some damaged parts. Unfortunately, the stores are closed and now you have a nuisance on your hands. Why does my toilet whistle? It whistles due to a worn down rubber gasket or damaged fill valve. Both items need to be replaced.

Let’s take a look below at the best approach to replace these parts.

Toilet valve may need replacing.

What Do I Need

Stopping by your local hardware store is a great idea at this point. You can purchase the parts that you need to stop your toilet from whistling. Pick up a fill valve replacement and the rubber gaskets that go with it. Let’s review the necessary steps for making this replacement happen.

Follow these steps to replace the valve:

  1. Shut off the water valves under the toilet tank and empty the remaining water from the tank.
  2. Unscrew the plastic nut from the old valve from the bottom of the tank.
  3. Make sure the new fill valve is adjusted to fill to the adequate water level and attach it to the toilet tank.

How Much Does It Cost

The cost to repair a whistling toilet can be rather inexpensive. If you know your way around a toilet bowl you can make the fix rather quickly. The cost of the materials is all you will come up with and that can range from $20 to $45 for the parts. All parts can be found at your local hardware store. If you are going to hire a professional plumbing contractor to make your fix, you are looking at paying $75 to $200 for parts and labor.

Other Recommended Maintenance

While you are taking care of the whistling sound from your toilet, also check around the base to make sure it isn’t leaking. Next, move to the t-bolts and make sure they are in place, and then check the wax ring.  Lastly, you may need to replace the toilet or caulk.

Next, take a look at the sink in the bathroom. If there is calcium buildup, you will need to take care of this. Calcium buildup can be caused by hard water so getting a water softener will be helpful. Also, you can use white vinegar to take the calcium off the faucet.

Lastly, if you find that your bathroom smells like sewage, there is an issue but you can fix it. It may be the toilet, sink, jacuzzi tub, or shower drain. Taking a closer look at these areas will help you find the cause and get rid of the nasty smell.

Toilet leaking water is a plumbing issue and needs to be tended to.

When Do I Call A Professional

Dealing with plumbing concerns is never a fun project. You can accidentally make a bigger mess with water leaks and spills that don’t otherwise need to happen. Accidentally breaking the porcelain of your toilet tank is possible if you don’t really understand the leverage of replacing your fill valve and gaskets. Calling a professionally licensed plumbing contractor allows you to save time and money on your plumbing projects. They will get the job done quickly and correctly. Consider calling on your local home inspection team to get a thorough home inspection, which can include your plumbing.

Conclusion

In order to avoid further damage to your toilet and bathroom, it is a great idea to contact a professionally licensed plumbing contractor. Your plumbing contractor can replace the fill valve and rubber gasket quickly and save you time and money. If for some reason you have other plumbing needs, they can complete these projects all at once. Contacting your local home inspection team to determine if you have other plumbing concerns is a great idea at this point. Consider the worn parts in your toilet as a way to remind you that everything breaks down eventually. Home Inspection Geeks can take a look at your plumbing needs when we come out for a home inspection in the Cook, Lake, and DuPage Counties, IL.

January 28, 2022

When To Worry About Sprinkler System Freezing

Home Maintenance, Winterization

As the winter months approach it is completely reasonable to think that you forget about your sprinkler system. Unfortunately, this is not an option when it comes to winterizing. Just like how you look to winterize your swimming pool pipes, you should winterize your sprinkler system. While you ensure that the chimney or HVAC system is ready for winterization, don’t forget the sprinkler system. When to worry about sprinkler system freezing? Running the sprinkler system when it is 32 degrees Fahrenheit or below is cause for concern.

Let’s take a look below at the best ways to protect your sprinkler system in the winter months.

Working sprinkler system

Best Ways To Protect The Sprinkler System

Remembering to winterize your sprinkler system to protect the system is typically the furthest thing from your mind. Projects like cleaning your chimney or sealing your doors and windows before the winter months usually take priority. Should you forget to winterize your sprinkler system, this could prove to be costly. When it comes time to restart your system, you need to ensure everything is working properly. When to worry about your sprinkler system freezing is typically around the months before cold temperatures begin to arise. Here are some ways that you can avoid spending more money on your sprinkler system.

  • Water supply-shut off the water supply to the sprinkler system. This ensures that no running water is remaining in the pipes after they are blown out. Water will freeze and expand in the pipes if you leave water in them.
  • Unplug booster pump-not all systems have this, however, if yours does, simply unplug it from the outlet or disconnect the control box from it’s power source.
  • Relieve pressure-run the system for up to 2 minutes on any zone. This pushes out any pressure from the system. No water comes out, simply air pressure release.
  • Outside pipe-open the outside pipe by turning the spigot that attaches to the outside pipes.
  • Open outside RPZ valves-using a flat head screw driver open the RPZ valves that are located on the outside of your system.

Calling out a professional winterization irrigation or sprinkler system company is the final step. They can blow out the lines of your system and ensure that no remaining water is left to freeze and expand in your pipes or sprinkler heads.

Sprinkler system spigot

How Much Does It Cost

Winterizing your sprinkler system costs vary depending on where you live and the time of year. The national average for blowing out your sprinkler system lines can range from $30 to $160 in costs. This cost covers all equipment maintenance and service. The national average depending on the size of the system is $55 to $85.

Other Recommended Maintenance

While you are exploring your options for winterizing your sprinkler system, ensure that all pipes are free from damage. Knowing this answer can also save money. Having a professional come out and inspect your sprinkler system before winterizing is key. You can also look into how to repair broken PVC pipes. This ensures any issues are handled in a timely manner.

Since you are on the topic of winterizing projects. It is a great idea to look into your fireplace maintenance at this time. Maintaining your fireplace is important to ensure that you do not end up with major repairs. Hiring a professional to come and clean your chimney is a great idea. Completing all winterizing projects in the early Fall is key.

Finally, as the snow and rain appear more often in the winter months, consider waterproofing your basement. Understanding the importance of waterproofing your basement can save you a lot of money. It also saves you from the headache of the groundwater seeping into your basement. Allowing water intrusion can cause mold and mildew to build. These are not ideal circumstances. Water-proof your basement in the summer months so it is ready for the winter.

Sprinkler system shut off

When Do I Call A Professional

Calling on a professional irrigation or sprinkler system company is a great idea. In this case, they can provide you with the best service for maintaining your sprinkler system in the winter months. Winterizing the sprinkler system is not always an easy task for the homeowner. Getting your local irrigation or sprinkler system professional out to assist is highly recommended. The irrigation or sprinkler system company can look over your system and provide the recommended maintenance so you don’t worry about the sprinkler system freezing. This ensures the system is ready for use when the temperatures sustain above 32 degrees Fahrenheit.

Conclusion

Winterizing your irrigation/sprinkler system is a great necessity. Failing to get this project completed risks the possibility of having your system’s pipes burst. You might even see the sprinkler heads pop off. At the freezing point of 32 degrees, Fahrenheit water left in your sprinkler system can expand and burst the pipes. Call on Home Inspection Geeks to take a look at your winterizing needs. Home Inspection Geeks can take a look at your winterizing needs when we come out for a home inspection in the Cook, Lake, and DuPage Counties, IL.

December 13, 2021

How To Remove Mold From Attic Plywood

Home Maintenance

Inspecting for mold can be a tricky task. Getting into an attic space can be easy for some and difficult for others. Knowing what to look for when searching for mold in the attic is important. It is always best to call on professionals to assist you with this task. Keeping your family safe and healthy is the most important part. Mold removal is not something that every homeowner can do. Better yet, not every homeowner knows how to remove mold. How to remove mold from attic plywood? There is a process of mixing a chemical solution, spraying, and then scrubbing the unsightly mold.

Let’s take a look below at the process for cleaning mold off of attic plywood.

Mold on wood in the attic

What Is Mold

Mold is a type of fungi that contains spores. These spores find areas of high moisture content and show themselves in various colors of black, brown, white, orange, green, or purple. Most molds are harmless, however, it can be rather unhealthy to breathe them in. So, their removal is vital to your health and safety.

What Is Needed

In order to remove mold from your attic plywood, you need the following tools and items to be successful. Let’s take a look.

  • Box fan-this ventilates the attic space.
  • KN95 mask-this is the best face mask to wear so that you do not inhale mold spores while cleaning.
  • Old Clothes-you are going to throw out whatever clothing you wear while cleaning the mold spores.
  • HEPA filter wet/dry vacuum-you need this in order to safely vacuum up the loose mold spores as you clean the area.
  • RMR Mold/Stain remover-specialized chemical that cuts into the mold and safely removes it from the wood surface.
  • Protective plastic gloves-allow you to handle the scrub brush and keep your skin safe.
  • Scrub brush-needed to loosen the mold spores so that you can vacuum them off the surface of the wood.
  • Spray bottle-used to spray the specialized mold remover onto the mold.

How To Prevent Mold Growth

The easiest way to ensure that mold does not grow in your attic space is by making sure that moisture is not present in the attic. Inspect the following areas to ensure that nothing leaks in or allows moisture in.

  • Roof leaks-inspect your roof to ensure there are no leaks that cause dampness and moisture buildup.
  • Raised shingles-make sure that the shingles are secured keeping water from getting trapped and creating an increase in moisture.
  • Ventilation-proper ventilation in the attic allows air to flow evenly throughout and all moisture causing hot air to escape.
  • Air gaps-check to ensure that the attic is sealed and not allowing energy from the home to flow into it. Also, this can create a hotbed of damp heat and a breeding ground for mold.

Checking these areas and making sure that the attic is sealed as tight as it is supposed to be, can keep you from ever having a mold growth issue.

How Much Does It Cost

The cost to remove mold from the attic plywood will be expensive. The area of the attic and the space of the attic determine how much you will pay. Additionally, the national average cost ranges from $1,000 to $5,000 depending on those factors.

Other Recommended Maintenance

While you are up in the attic and looking into the removal of mold on your drywall, you are likely to need to remove mold from your trusses. Understanding how to accomplish this is key to keeping your home healthy and safe. Learning how to remove mold from your trusses is a topic that you will want to learn about.

Considering that you are up in the attic looking at mold removal, you might want to research how the mold has shown up. Parts of the roof might be damaged or exposed to the elements allowing moisture buildup, which in turn, can promote mold growth. Also, check the roof and all of its working parts for your answers. You might find that installing a roof scupper is something that you need to do. Roof scuppers can help the flow of water off your roof and ensure that pooling doesn’t occur.

Chances are that if you are searching for ways to clean mold out of your attic, you should also look into ways to clean mold out of your basement. Moisture levels in the home can cause mold growth in both the attic and the basement, so while you are working to clean the mold off of your attic plywood, this would be a great time to see if the mold has reached your basement.

Mold on the attic ceiling

When Do I Call A Professional

Calling on a professional is necessary when dealing with any type of mold. You want to ensure that all mold is removed properly and the area where the mold has taken over is cleaned and disinfected. Protecting your family and the investment of your home is the biggest priority here. If you are planning to convert your attic into an additional living space or even a space of storage, it is always best to call on an inspection team to ensure that the space is free of any possible mold.

Conclusion

Inspecting your attic can be a simple project. Most attics are readily built with plenty of crawl space and even the opportunity to convert it into a room. Before upgrading your living space, you should call for a home inspection to make sure that the attic is free of mold. Getting the home inspection saves you time and money as you invest in home upgrades. Give Home Inspection Geeks a call. Home Inspection Geeks can take a look at your moldy attic needs when we come out for a home inspection Cook, Lake, and DuPage Counties, IL.

November 30, 2021

Pages

  • About
  • Areas We Serve
  • Best Home Inspectors in Chicago, IL
  • Commercial Building Inspection Chicago, IL
  • Condo Inspections
  • Contact
  • COVID-19 Guidelines
  • Handy Geeks Quote
  • Handyman Services Chicago: Handy Geeks
  • Home
  • Multi-Unit Inspections
  • Our Blog
  • Preferred Contractors
  • Pricing
  • Privacy Policy
  • Radon Testing Chicago, IL
  • Sample Page
  • Schedule Your Inspection
  • Terms of Use
  • Testimonials
  • Thanks
  • The Best Home Inspectors in Aurora, IL
  • The Best Home Inspectors in Evanston, IL
  • The Best Home Inspectors in Naperville, IL
  • The Best Home Inspectors in Northbrook, IL
  • Your Inspection
  • Your Report

Categories

  • Appliances
  • Attic
  • Basement
  • Deck
  • Electrical
  • Fireplace
  • Home Buyers
  • Home improvement
  • Home Inspection
  • Home Maintenance
  • HVAC
  • mold
  • Plumbing
  • Podcast
  • Real Estate
  • Resources
  • Roof
  • Safety in the Home
  • Taking Care of Your Home
  • Uncategorized
  • Water
  • Water Heater
  • Winterization

Archive

  • May 2022
  • April 2022
  • March 2022
  • February 2022
  • January 2022
  • December 2021
  • November 2021
  • October 2021
  • September 2021
  • August 2021
  • July 2021
  • June 2021
  • May 2021
  • April 2021
  • March 2021
  • February 2021
  • January 2021
  • December 2020
  • November 2020
  • October 2020
  • September 2020
  • August 2020
  • July 2020
  • June 2020
  • May 2020
  • April 2020
  • March 2020
  • February 2020
  • January 2020
  • December 2019

Providing Home Inspection Services to Cook, Lake, and DuPage Counties

We provide Inspection services to the Chicago Metro Area. Certified home inspection services including Buyers Inspections, Pre-listing Inspections, New Construction Inspections, Commercial Inspections, Radon Testing, and Sewer Scope Inspections.

View Service Area

Privacy Policy

Terms of Use

773-242-9358
info@homeinspectiongeeks.com
Chicago, IL
Open Monday – Sunday 8AM to 6PM

Sitemap

© Copyright Home Inspection Geeks, Inc. - Hosted by WolfPack Advising
  • Facebook
  • Twitter
  • Yelp
Scroll to top