Home Inspection Geeks
  • Home
  • Your Inspection
    • Single Family Homes
    • Condo Inspections
    • Multi-Unit Inspections
    • Commercial Building Inspections
    • Radon Testing
    • Your Report
  • Handy Geeks
  • Pricing
  • About
  • Areas We Serve
    • Aurora, IL
    • Chicago, IL
    • Evanston, IL
    • Naperville, IL
    • Northbrook, IL
    • View All Service Areas
  • Blog
  • Contact
  • Book Now
  • Menu Menu

Tag Archive for: realtor

When To Worry About Sprinkler System Freezing

Home Maintenance, Winterization

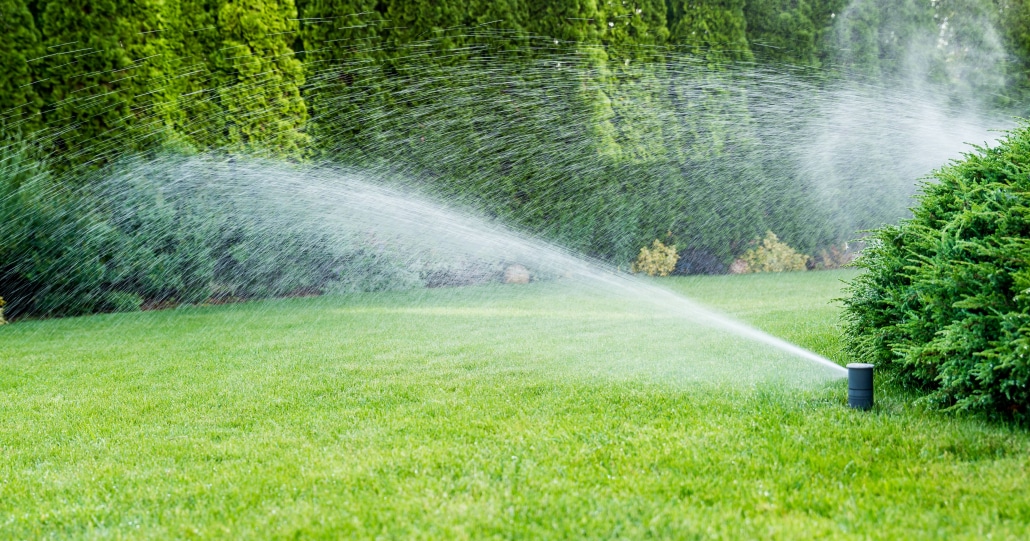
As the winter months approach it is completely reasonable to think that you forget about your sprinkler system. Unfortunately, this is not an option when it comes to winterizing. Just like how you look to winterize your swimming pool pipes, you should winterize your sprinkler system. While you ensure that the chimney or HVAC system is ready for winterization, don’t forget the sprinkler system. When to worry about sprinkler system freezing? Running the sprinkler system when it is 32 degrees Fahrenheit or below is cause for concern.

Let’s take a look below at the best ways to protect your sprinkler system in the winter months.

Working sprinkler system

Best Ways To Protect The Sprinkler System

Remembering to winterize your sprinkler system to protect the system is typically the furthest thing from your mind. Projects like cleaning your chimney or sealing your doors and windows before the winter months usually take priority. Should you forget to winterize your sprinkler system, this could prove to be costly. When it comes time to restart your system, you need to ensure everything is working properly. When to worry about your sprinkler system freezing is typically around the months before cold temperatures begin to arise. Here are some ways that you can avoid spending more money on your sprinkler system.

  • Water supply-shut off the water supply to the sprinkler system. This ensures that no running water is remaining in the pipes after they are blown out. Water will freeze and expand in the pipes if you leave water in them.
  • Unplug booster pump-not all systems have this, however, if yours does, simply unplug it from the outlet or disconnect the control box from it’s power source.
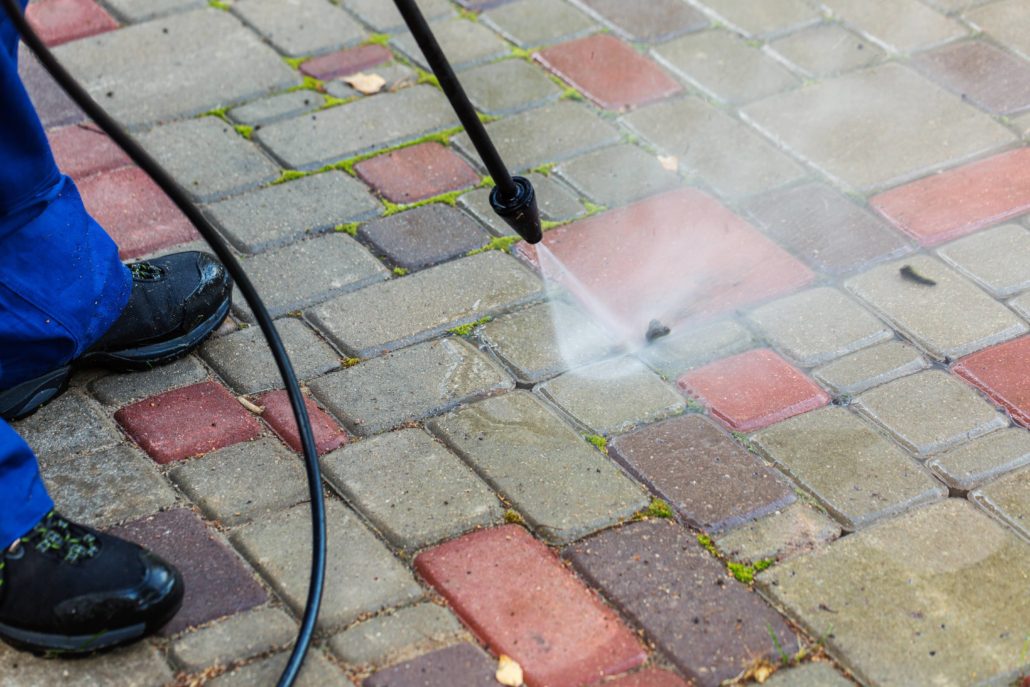
  • Relieve pressure-run the system for up to 2 minutes on any zone. This pushes out any pressure from the system. No water comes out, simply air pressure release.
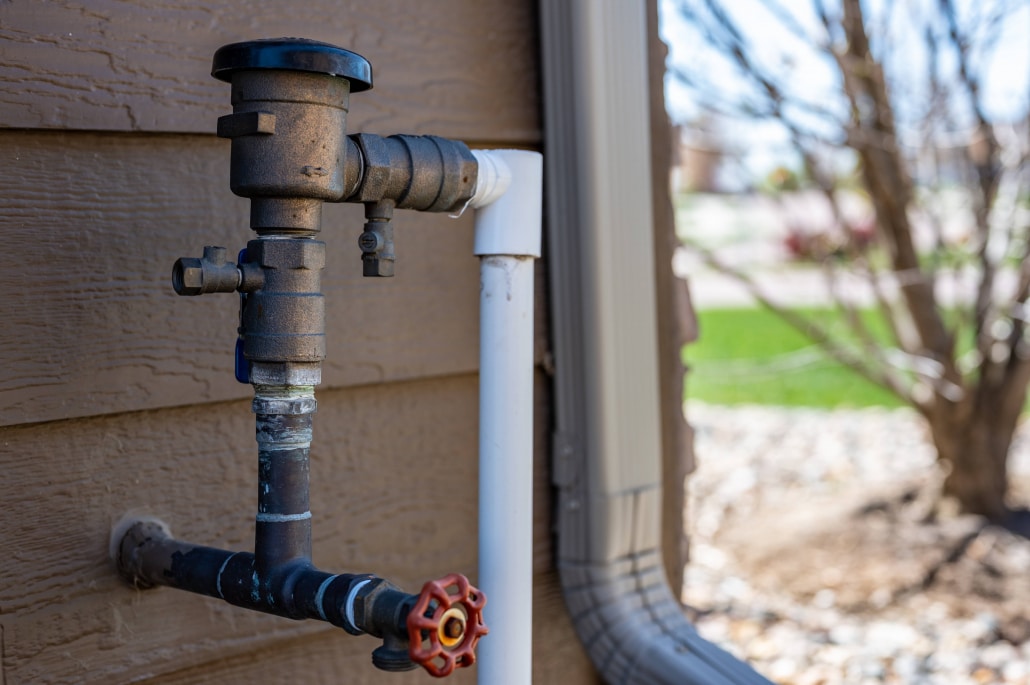
  • Outside pipe-open the outside pipe by turning the spigot that attaches to the outside pipes.
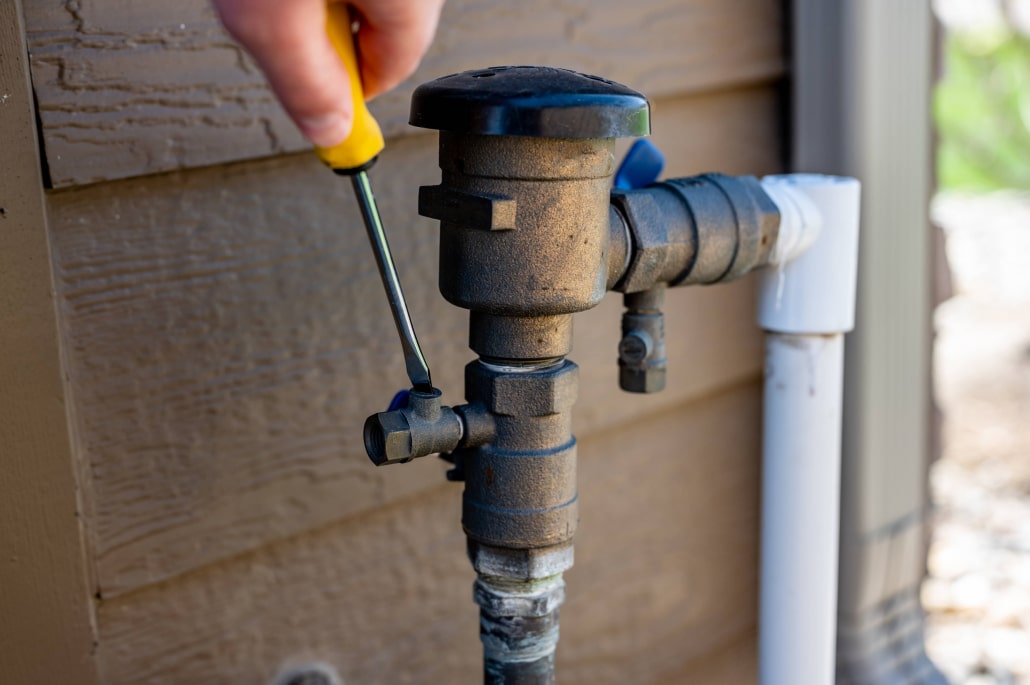
  • Open outside RPZ valves-using a flat head screw driver open the RPZ valves that are located on the outside of your system.

Calling out a professional winterization irrigation or sprinkler system company is the final step. They can blow out the lines of your system and ensure that no remaining water is left to freeze and expand in your pipes or sprinkler heads.

Sprinkler system spigot

How Much Does It Cost

Winterizing your sprinkler system costs vary depending on where you live and the time of year. The national average for blowing out your sprinkler system lines can range from $30 to $160 in costs. This cost covers all equipment maintenance and service. The national average depending on the size of the system is $55 to $85.

Other Recommended Maintenance

While you are exploring your options for winterizing your sprinkler system, ensure that all pipes are free from damage. Knowing this answer can also save money. Having a professional come out and inspect your sprinkler system before winterizing is key. You can also look into how to repair broken PVC pipes. This ensures any issues are handled in a timely manner.

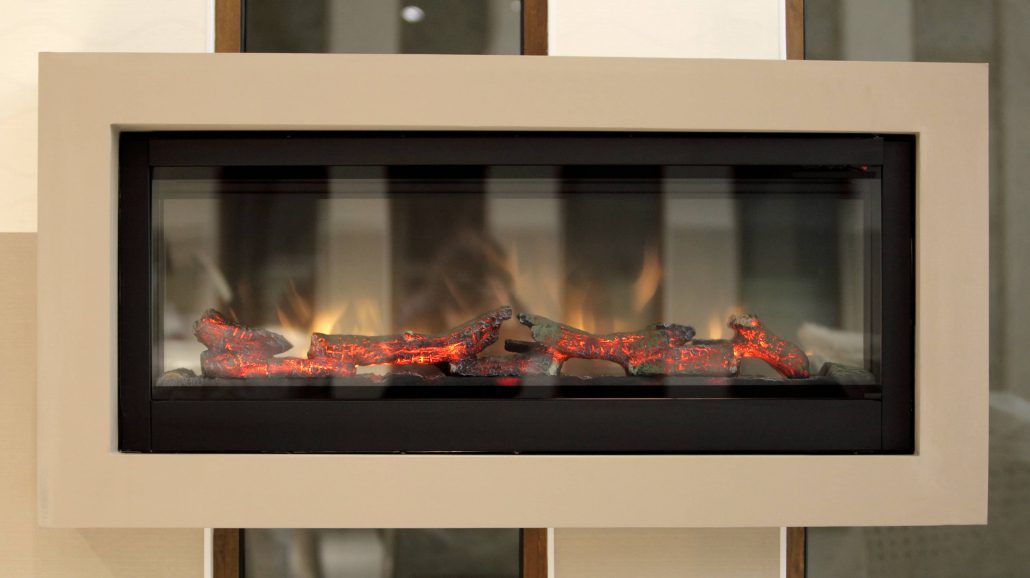
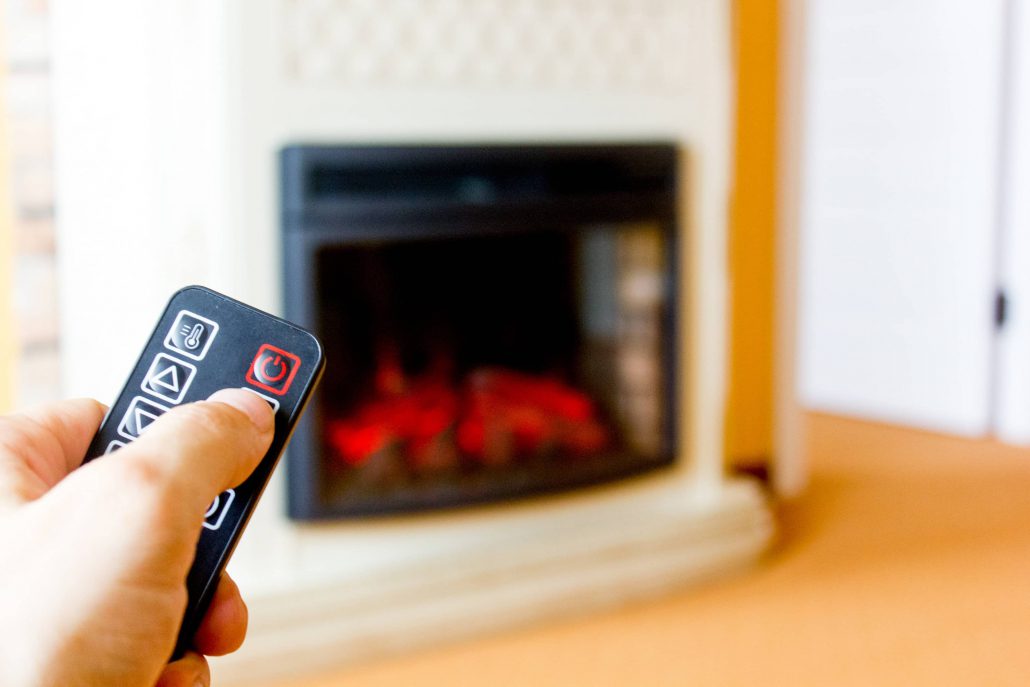
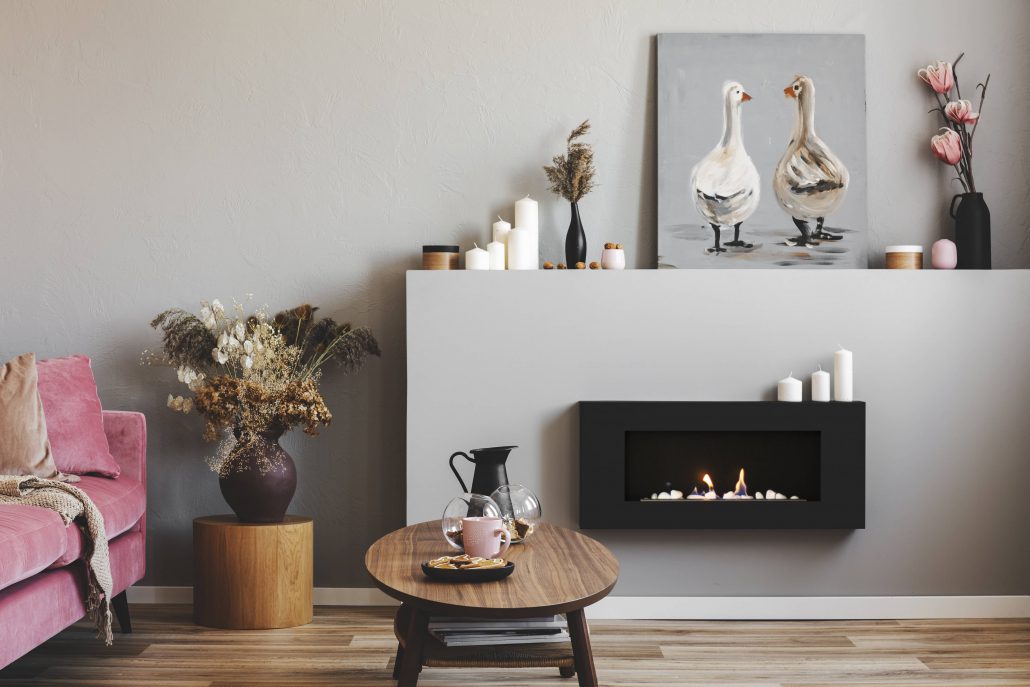
Since you are on the topic of winterizing projects. It is a great idea to look into your fireplace maintenance at this time. Maintaining your fireplace is important to ensure that you do not end up with major repairs. Hiring a professional to come and clean your chimney is a great idea. Completing all winterizing projects in the early Fall is key.

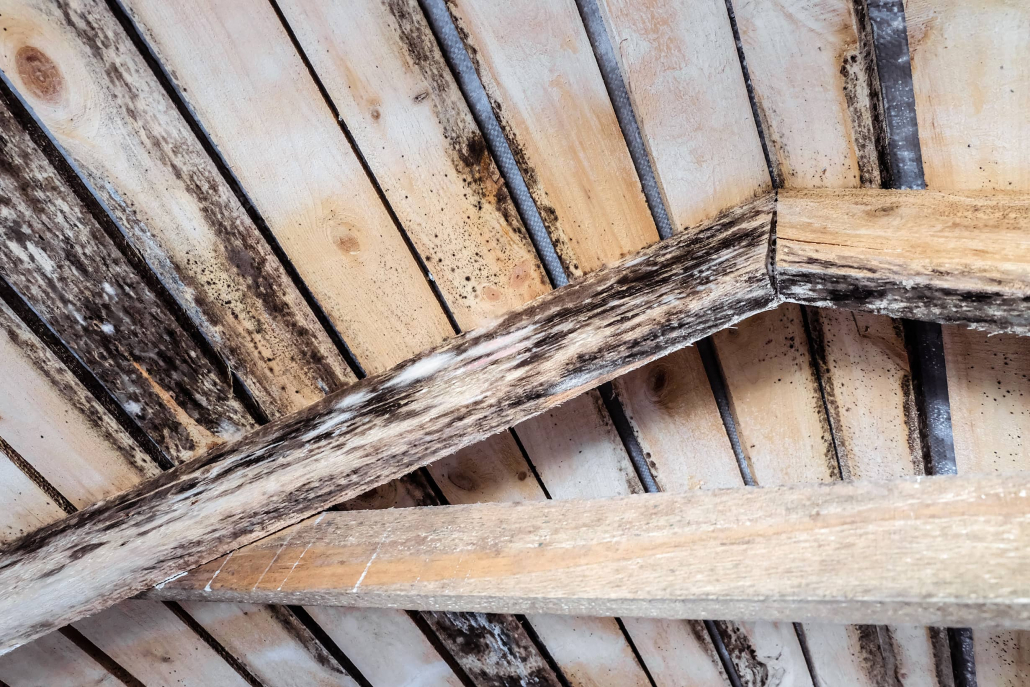
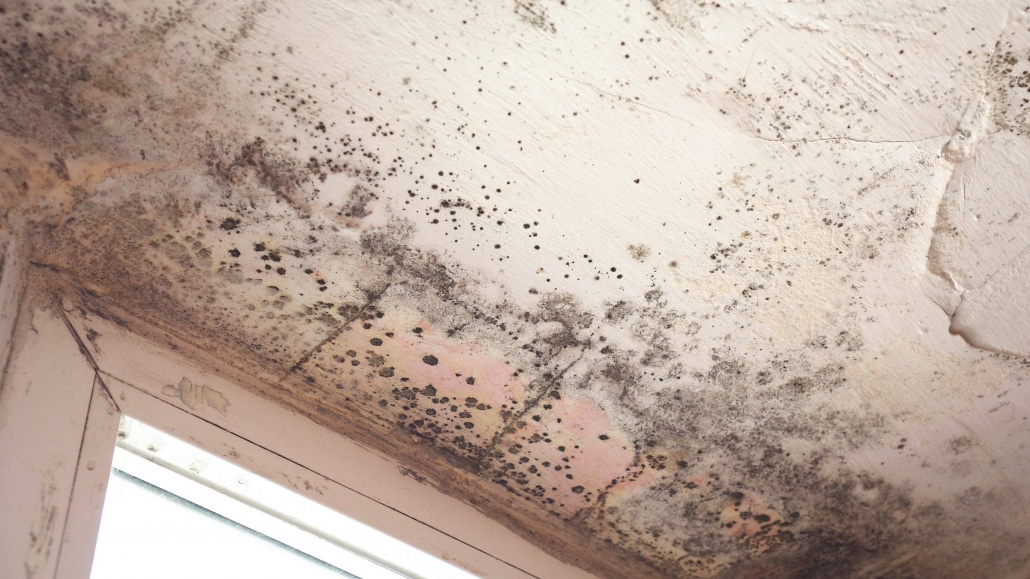
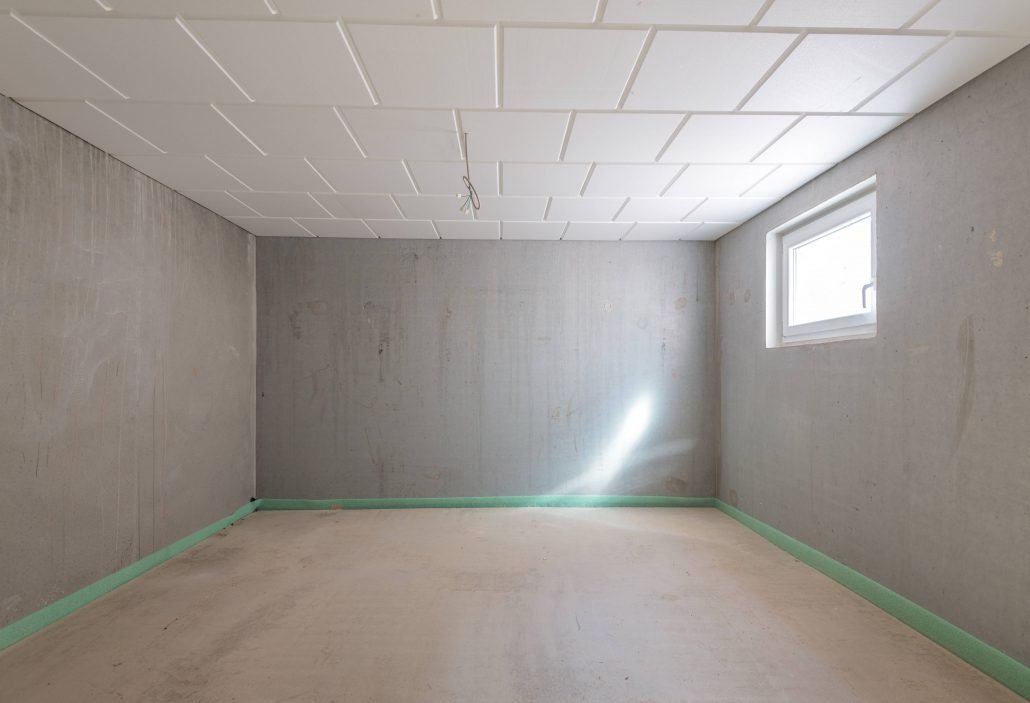
Finally, as the snow and rain appear more often in the winter months, consider waterproofing your basement. Understanding the importance of waterproofing your basement can save you a lot of money. It also saves you from the headache of the groundwater seeping into your basement. Allowing water intrusion can cause mold and mildew to build. These are not ideal circumstances. Water-proof your basement in the summer months so it is ready for the winter.

Sprinkler system shut off

When Do I Call A Professional

Calling on a professional irrigation or sprinkler system company is a great idea. In this case, they can provide you with the best service for maintaining your sprinkler system in the winter months. Winterizing the sprinkler system is not always an easy task for the homeowner. Getting your local irrigation or sprinkler system professional out to assist is highly recommended. The irrigation or sprinkler system company can look over your system and provide the recommended maintenance so you don’t worry about the sprinkler system freezing. This ensures the system is ready for use when the temperatures sustain above 32 degrees Fahrenheit.

Conclusion

Winterizing your irrigation/sprinkler system is a great necessity. Failing to get this project completed risks the possibility of having your system’s pipes burst. You might even see the sprinkler heads pop off. At the freezing point of 32 degrees, Fahrenheit water left in your sprinkler system can expand and burst the pipes. Call on Home Inspection Geeks to take a look at your winterizing needs. Home Inspection Geeks can take a look at your winterizing needs when we come out for a home inspection in the Cook, Lake, and DuPage Counties, IL.

December 13, 2021

How To Remove Mold From Attic Plywood

Home Maintenance

Inspecting for mold can be a tricky task. Getting into an attic space can be easy for some and difficult for others. Knowing what to look for when searching for mold in the attic is important. It is always best to call on professionals to assist you with this task. Keeping your family safe and healthy is the most important part. Mold removal is not something that every homeowner can do. Better yet, not every homeowner knows how to remove mold. How to remove mold from attic plywood? There is a process of mixing a chemical solution, spraying, and then scrubbing the unsightly mold.

Let’s take a look below at the process for cleaning mold off of attic plywood.

Mold on wood in the attic

What Is Mold

Mold is a type of fungi that contains spores. These spores find areas of high moisture content and show themselves in various colors of black, brown, white, orange, green, or purple. Most molds are harmless, however, it can be rather unhealthy to breathe them in. So, their removal is vital to your health and safety.

What Is Needed

In order to remove mold from your attic plywood, you need the following tools and items to be successful. Let’s take a look.

  • Box fan-this ventilates the attic space.
  • KN95 mask-this is the best face mask to wear so that you do not inhale mold spores while cleaning.
  • Old Clothes-you are going to throw out whatever clothing you wear while cleaning the mold spores.
  • HEPA filter wet/dry vacuum-you need this in order to safely vacuum up the loose mold spores as you clean the area.
  • RMR Mold/Stain remover-specialized chemical that cuts into the mold and safely removes it from the wood surface.
  • Protective plastic gloves-allow you to handle the scrub brush and keep your skin safe.
  • Scrub brush-needed to loosen the mold spores so that you can vacuum them off the surface of the wood.
  • Spray bottle-used to spray the specialized mold remover onto the mold.

How To Prevent Mold Growth

The easiest way to ensure that mold does not grow in your attic space is by making sure that moisture is not present in the attic. Inspect the following areas to ensure that nothing leaks in or allows moisture in.

  • Roof leaks-inspect your roof to ensure there are no leaks that cause dampness and moisture buildup.
  • Raised shingles-make sure that the shingles are secured keeping water from getting trapped and creating an increase in moisture.
  • Ventilation-proper ventilation in the attic allows air to flow evenly throughout and all moisture causing hot air to escape.
  • Air gaps-check to ensure that the attic is sealed and not allowing energy from the home to flow into it. Also, this can create a hotbed of damp heat and a breeding ground for mold.

Checking these areas and making sure that the attic is sealed as tight as it is supposed to be, can keep you from ever having a mold growth issue.

How Much Does It Cost

The cost to remove mold from the attic plywood will be expensive. The area of the attic and the space of the attic determine how much you will pay. Additionally, the national average cost ranges from $1,000 to $5,000 depending on those factors.

Other Recommended Maintenance

While you are up in the attic and looking into the removal of mold on your drywall, you are likely to need to remove mold from your trusses. Understanding how to accomplish this is key to keeping your home healthy and safe. Learning how to remove mold from your trusses is a topic that you will want to learn about.

Considering that you are up in the attic looking at mold removal, you might want to research how the mold has shown up. Parts of the roof might be damaged or exposed to the elements allowing moisture buildup, which in turn, can promote mold growth. Also, check the roof and all of its working parts for your answers. You might find that installing a roof scupper is something that you need to do. Roof scuppers can help the flow of water off your roof and ensure that pooling doesn’t occur.

Chances are that if you are searching for ways to clean mold out of your attic, you should also look into ways to clean mold out of your basement. Moisture levels in the home can cause mold growth in both the attic and the basement, so while you are working to clean the mold off of your attic plywood, this would be a great time to see if the mold has reached your basement.

Mold on the attic ceiling

When Do I Call A Professional

Calling on a professional is necessary when dealing with any type of mold. You want to ensure that all mold is removed properly and the area where the mold has taken over is cleaned and disinfected. Protecting your family and the investment of your home is the biggest priority here. If you are planning to convert your attic into an additional living space or even a space of storage, it is always best to call on an inspection team to ensure that the space is free of any possible mold.

Conclusion

Inspecting your attic can be a simple project. Most attics are readily built with plenty of crawl space and even the opportunity to convert it into a room. Before upgrading your living space, you should call for a home inspection to make sure that the attic is free of mold. Getting the home inspection saves you time and money as you invest in home upgrades. Give Home Inspection Geeks a call. Home Inspection Geeks can take a look at your moldy attic needs when we come out for a home inspection Cook, Lake, and DuPage Counties, IL.

November 30, 2021

How Do Electric Fireplaces Work

Fireplace

It is wintertime and you are sitting in your home wondering what can be done to warm your living space up even better than your furnace. Then it dawns on you that you can purchase an electric fireplace. This is an easy install and quick fix to your heating needs. They also are safer than purchasing a space heater. How do electric fireplaces work? They suck in cool air and heat the air with heating element coils. Then a fan system pushes out the hot air.

Let’s take a look at the advantages and basics involving an electric fireplace.

A decorative electric fireplace is easy to install and safer to use.
Decorative electric fireplace

Advantages Of An Electric Fireplace

There are a few advantages to an electric fireplace as opposed to a wood-burning one. Let’s take a look at those advantages.

Easy Installation

Simply put, you need an electrical outlet that is 120 volts for a standard unit and 240 volts for a larger unit.

Safer to Use

Electric fireplaces give off no gasses, fumes such as carbon monoxide, or other cancer-causing agents. Better choice than a traditional wood fireplace and gas fireplaces.

No Mess

There is no burning wood to clean up or soot to remove from the chimney. Also, there are no real flames and the ones created are for aesthetics. Instead of lighting a log or sparking a fire, you simply turn on the switch to the fireplace as if you were turning on a light or fan in your home.

Cost Effective

There is no product to purchase such as wood or gas. Your electric bill will not go up that much as the national average cost of running an electric fireplace is 8 to 9 cents per hour. You are likely to spend between $50 to $100 per year.

How Electric Fireplaces Work

An electric fireplace utilizes a fan and heating coil system. Cold air is drawn into the electric unit and then heated by a heating coil. Once the air is heated by the heating element to the settings selected by the homeowner, the heated air is then dispersed by a fan system. This keeps costs down and is relatively cheap to power. From an aesthetics perspective, you can change the flame to make it a realistic flame or something smaller.

An electric fireplace works with remote
Electric fireplace with remote

How Much Do They Cost

Believe it or not, the cost of an electric fireplace is rather in-expensive. Smaller units will cost you about $200 and can heat your small living space. Larger units can run you about $700 and these will heat an area of 400 square feet or greater. This is much cheaper than having a fireplace or woodstove installed at a range of $850 to $3,500 per unit.

Other Recommended Maintenance

While you are on the kick of a fireplace, it is a good time to also check into your other heating sources. Maintaining the furnace and gas appliances can only keep you warm and cozy in the cooler months. If the furnace stops working, it could be the circuit breaker, thermostat, filter, or pilot light to name a few. Call a professional to assist you in maintaining the furnace and your other gas appliances.

Adding an electric fireplace could be an option for you to add aesthetics to your living space. Some people buy electric fireplaces even when they have an actual built-in fireplace. Getting your fireplace checked is necessary maintenance. Make sure to read up on the necessary fireplace and chimney maintenance.

Lastly, you will want to check your fresh air intake vents. Making sure these are cleaned and free from blockage is necessary maintenance. Hire a professional to inspect your HVAC unit and fresh air intake vents.

Decorative electric fireplace in a home.
Decorative electric fireplace

When Do I Call A Professional

Call on a professional when you have purchased an electric fireplace and are unsure how to install it. A professional contractor will know the best location to place the electric fireplace and how to mount it on your wall. They also know where to plug in the fireplace. Hopefully, you won’t need to have an extra outlet installed. That will require you to hire a local electrical contractor and can increase your expenses.

Conclusion

Installing an electric fireplace can be a simple project. Most units are readily built with an outlet plug to keep things simple. Before upgrading your living space, you should call for a home inspection to make sure that an electric fireplace is a good investment for your home. Getting the home inspection saves you time and money as you invest in home upgrades. Give Home Inspection Geeks a call. Home Inspection Geeks can take a look at your heating needs when we come out for a home inspection in the Cook, Lake, and DuPage Counties, IL.

November 15, 2021

How Much Value Does An Egress Window Add

Basement

Imagine that you are in your home after a long day at the office and you cannot escape the family for some peace. What do you do? Where in your home can you escape? If you are lucky enough to live in an area where you have a basement, you immediately realize, that it might be time to convert the basement space into something more functional and user-friendly.

If you are considering turning your basement into a more livable space, you need to add an egress window. Egress windows are windows large enough to use in case of an emergency. How much value does an egress window add? It depends on the location but adding this window makes it an extra room so about an average of $20,000.

Egress windows are required if you convert the basement space into a bedroom or a finished basement so, not only does the egress window add value to your home, it ensures proper safety codes are followed.

Let’s take a look below at how this works for the homeowner.

Inside view of a basement egress window

What Are The Benefits

The benefits of adding an egress window to your basement are substantial. Not only does it allow you to market the basement space as a basement bedroom, finished office, or play space, but it also allows you to legally market these spaces. Like anything else, adding an egress window will add value to the home, however, the location of your home determines how much the value will be. The average cost of installation for an egress window could run you about $6,000. Consider, that as an investment, because marketing your home as having an extra bedroom could add an extra $20,000 on average to the value of the home.

Some added benefits to installing an egress window also include the following:

  • Makes the basement safer by adding an emergency exit option
  • Meets all legal requirements so that you can market the basement as an added bedroom
  • Provides more natural lighting and ventilation for the basement
  • The window is more secure, ensuring a safer basement
  • Creates a more comfortable space for work or online schooling
  • Can be installed almost anywhere in your basement
Egress window in the basement

Options for Egress Windows

Determining the type of egress window that you would like depends upon your current basement layout and your budget. Let’s take a look at the options for what egress windows cost:

  • Casement-these are hanging on one or more hinges and will swing out like a door. Typically, a great fit for most basements and the average cost is about $220-$500 for the window.
  • Horizontal or sliding-these open like your standard sliding glass doors. One pane slides open and thus makes this style larger by frame. It must be 4×4 square feet to meet code requirements. The average cost can be $150-$500 for the window.
  • Single-hung-these are considered the classic window style. The bottom window panel slides upwards to open. Due to the functionality, these windows are usually made to be large enough so that the bottom pane meets the opening requirements. The average cost can be $100-$500 for the window.
  • In-swing-these windows are similar to casement windows and will swing in to open and not out to open. The average cost can be $350-$700 for the window.

Cost of Egress Windows

The current national average for a complete installation of an egress window runs from $2,500 to $5,300. The price difference is based on the cost of materials and what your local contractor will charge you. In addition, typically the driving factor in the cost differentials is the size of the egress window and the style that you have chosen to install.

Other Recommended Maintenance

While you are exploring the options of adding an egress window to your basement, you can also look into whether or not to fix your basement drain from getting backed up. This would be the perfect time to test your drain functionality before converting your basement into a more user-friendly space.

Another great area of the basement to research before converting it into a great space involves waterproofing your basement. You won’t want to lay carpet and flooring in the basement without knowing that the basement is waterproofed.

Finally, the best way to ensure that you are enjoying your newly renovated basement space is by ensuring that the air quality in the basement is good. You wouldn’t want to be downstairs relaxing, sleeping, or watching tv if the air quality is off.

Basement sliding egress window

When Should I Call A Professional

Calling a professional contractor that is an expert in window installation is key. There are building codes and requirements for installing egress windows. You will want a professional contractor that has worked with your local building and state codes before. Also, this will save you a lot of time and money as you look to upgrade your basement.

Conclusion

Installing egress windows in a basement can be an arduous task and time-consuming. Before upgrading your basement and turning it into a livable space, you should call for a home inspection. Getting the home inspection saves you time and money as you invest in basement upgrades. Give Home Inspection Geeks a call. Home Inspection Geeks can take a look at your basement window needs when we come out for a home inspection in the Cook, Lake, and DuPage Counties, IL.

October 25, 2021

How To Clean Moss Off Brick

Home improvement

Well, it is a week before your big party and you are taking notes of everything that should be looking perfect for your guests. You step outside and take a look at the unsightly brick patio and realize that there is a lot of necessary cleaning. How do I clean moss off brick? You can hire a professional or you can use various environmentally friendly chemicals and a pressure washer.

Let’s take a look at the best way to manage moss on our brick home or patio.

Pressure washing brick

How to Clean Moss Off Brick

The most effective way to clean brick is by using household chemicals and water (bleach solution is also recommended but not eco-friendly). Mixing equal parts vinegar and equal parts of water is the safest and most eco-friendly option. You can add this mixture to the soap dispenser of your pressure or power washer and generously apply the mixture onto the brick surfaces. You will want to let the mixture sit and soak in for about 15 to 20 minutes. Once the mixture has a chance to soak in, you will take your pressure or power washer and start washing away the moss with high pressure.

The Best Way To Clean Other Surfaces

Believe it or not, moss can grow on a variety of solid surfaces. In most cases, you can keep a spray bottle with a bleach and water mixture and spray the areas affected as needed. Then use a scrub brush to remove the moss. This is very effective and easy to do. Ensure that anytime you are using a bleach product that it is away from children or pets. You wouldn’t want any toxic chemicals getting to them. Removal of moss from your hardscaping is best when done regularly. This will prevent the moss from taking over and creating a larger project for you. Pressure washing from time to time and using an eco-friendly vinegar and water mixture is a great way to maintain your hardscape.

A lot of moss on a brick wall

Top Tips For Keeping Moss Off Brick

Let’s take a look at the top tips that we can do to keep moss free and clear from our brick surfaces:

Sunlight

Keeping your brick patio exposed to sunlight is a great way to ensure moss will not grow there. Moss does not like the sunlight and will not grow in lighted areas. Moss prefers dark and damp places.

Irrigation

Keep an eye on your irrigation. If you have leaks and need to adjust the spray, do so accordingly. Irrigation can soak certain areas and promote moss growth at that time.

Boiling Water

This is a great eco-friendly way of combating moss growth on your hardscape. Pouring boiling water onto the moss will control the growth. In addition, you will need to follow that up with a good scrubbing to remove the growth.

Vinegar

As stated above, it is great to use half parts water and half parts vinegar to treat and kill the moss. After this mixture is applied, a good scrubbing or pressure washing is recommended to clean moss off the brick.

Power Washing

Power washing your hard surfaces every month will allow you to keep those areas looking clean and brand new. It is also recommended that you seal your pavers after you power wash them for long-lasting maintenance.

Baking Soda

Pour the baking soda directly onto the moss and let it sit overnight. Then, brush the moss areas that are treated to remove the baking soda and follow up with a proper scrubbing.

As A Last Resort

Bleach

If you use bleach, let it sit for 15 minutes. Bleach can only be used in a mixture with water and never poured directly onto the surface.

Commercial Moss Killer

These products are not safe in many aspects. The products should only be considered in extreme circumstances and used as an absolute last resort. 

Cost to Clean Moss Off Brick

The average cost to remove moss from brick is $0.58 to $1.00 per square foot. You will also pay a labor charge for a professional pressure washing business to come out to complete this project for you. This service can cost $45 to $65 per hour depending on the company. Some companies will also just charge a flat fee of $90-$120 just to pressure wash your patio, driveway, and walls.

Other Maintenance Needs

While you are working towards the removal of moss from your brick patio or walls, it is a great time to look at mold inside your home. Understanding how to stop mold growth in your home is very important. Preventative maintenance is key in this area of home maintenance.

Understanding where mold and moss can grow is also an important part of preventative home maintenance. Just because your brick is growing moss or mold does not mean that your block will be immune to either. Keep in mind that moss and mold like damp, cool places to intrude upon. Mold growing on the concrete block is an important topic to also understand.

Moss can also grow on a roof and this needs to be taken care of. However, you don’t want to use a power washer as it will damage the shingles.

Lastly, take a look at your roof drainage. Determine whether or not you have a clogged gutter system or if the roof scupper is disconnected and not working properly. If the roof runoff is not flowing to where it should, you could end up with pooling of water and the ability for moss to grow.

Moss on Block

When Do I Call A Professional

Removing moss from brick or block walls or patios is a project that can be easily done by the homeowner. However, if you do not own a pressure washer this project can be daunting. Anytime that you do not own the proper tools and equipment or simply do not have the time, it is best to call a professional. Mixing the wrong chemicals or accidentally using the wrong pressure rating can cause damage to your brick and even cause health issues. For those reasons, it is a great idea to call a professional to assist you with this project.

Conclusion

Many mosses are very successful at growing on a brick when it is damp and dark. You notice this happening especially on brick paver patios and brick walls when the moss is shielded from the sunlight. If you have a project that requires the removal of moss from your brick areas, it is always a good idea to consult a professional power washing company or get a home inspection from your local home inspection team. This allows you to get an idea of the moss in a concentrated area. Home Inspection Geeks can take a look at your exterior cleaning needs when we come out for a home inspection in the Cook, Lake, and DuPage Counties, IL.

October 13, 2021

What Is A Pier And Beam Foundation

Home improvement

When searching for a home have you ever asked wondered what type of foundation exists for the home that you would like to purchase? Seeing as how there are a few different types of foundations, this might be a great question to consider asking. Knowing if the home is a slab foundation or a pier and beam foundation can determine whether or not you want to purchase the home. What is a pier and beam foundation you ask? Well, it is an alternative to a slab or a basement foundation. Typically, it consists of crawl space underneath the home.

Let’s take a look at the pros and cons and what’s involved with a pier and beam foundation.

Sample concrete pier and beam structure

Pier And Beam Foundation Pros

  • The home is less likely to flood because of elevation.
  • In addition to the reduced flooding possibility, you have easier access to plumbing and electrical lines underneath the home. This is because a crawlspace is created by the elevated foundation.
  • You will also note that the pier and beam foundation repair is easier and can be less expensive as compared to a concrete slab foundation.
  • Lastly, a pier and beam home can be more easily relocated if necessary.
Concrete pier and beam foundation sample

Pier And Beam Foundation Cons

There are some obvious cons and not so obvious cons to a pier and beam foundation. Let’s take a look at the list:

  • Easier to have a pest or rodent infestation. They can nest under the home in the crawlspace.
  • Your floors will creek and make noises as there is less support underneath them. This is because there is more hollow space and no concrete slab.
  • You might run into a dampness issue. An under-layer is typically placed on the floor joists in between the beams and the floor itself. This will reduce dampness possibilities. Checking with a professional might be a good idea to see if you need to waterproof the basement.
  • The air rises so during cold months, you could see an increase in energy bills to keep the home warm.

All of these situations are highly likely depending on where you live and the weather conditions where you live.

How Much Will It Cost Me To Repair

Generally speaking, you are looking at a repair cost of $5,600 to $8,500 for damaged pier and beam foundations. This range is dependent upon the size of your home and the extent of the damage.

Slab Foundation

A slab foundation is different than a pier and beam. While the pier and beam foundation has a crawl space underneath, a slab foundation is made of concrete with no space. Also, a slab foundation is made of 4-6 inches of concrete and on top of a layer of sand for drainage.

Basement Foundation

This type of foundation allows for a basement in the home. Basement foundations are usually at least 7 feet high, the deepest of all foundations, and match the amount of square footage above it. The advantages are that it increases energy efficiency, a multi-purpose space, and families enjoy this living area in the home.

Other Maintenance Ideas

While you are having your crawlspace inspected, it is a great idea to have the crawlspace cleaned while the professional is under the home.

In addition to having your crawlspace cleaned, you will want to check the landscaping to keep water away from the house. Not sure what type of plants to put around the foundation of a house? Install plants that will keep water away from the home or remove plants that are accumulating under the home.

Conduct your HVAC maintenance so you can make sure that is functioning properly and not leaking water. If your home is older, the HVAC system could need replacing.  You will want to inspect the HVAC unit to determine the longevity of its remaining parts.

Pier and Beam foundation sample
Pier and Beam Foundation

When Should I Call A Professional

When it comes to the home foundation, consulting a licensed contractor and foundation repair company is important. Getting under your home’s crawlspace is not an easy task. If you need your flooring checked and to make sure that your crawlspace is free and clear of any issues, you will want a professional contractor to complete your inspection. In addition, there are various building codes for your state and you will want to ensure that those codes are followed. Here is the link for Illinois and if you live in another state, you can use the same site and just change the state.

Conclusion

It is highly recommended that you consult a licensed contractor to conduct any repairs or new installations needed on your pier and beam foundation system. This will save you time and money, as you might not know the state building code and more damage could be done. Lastly, they will be able to assess all of the potential damages and provide a great estimate as to the cost of repairs. Home Inspection Geeks in the Chicago, IL, and surrounding areas of Lake, Cook, and DuPage Counties can take a look at your crawlspace and pier and beam foundation during a home inspection.

September 27, 2021

What is a Roof Scupper

Roof

Imagine walking around in a city with huge buildings that have flat roofs. You will see these decorative downspouts or even side spouts on the buildings. They can be very decorative and fit the style of the architecture of the building. Let’s assume that you never asked yourself, what is that thing connected to the gutter system?

We can also assume that no one ever told you, that it was a roof scupper, which made you question, what is a roof scupper? A roof scupper is a drainage system for flat roofs that allows water to move through a gutter system. It is best to consult a licensed roofing professional when conducting roofing work. If you take a look at the image below you will see one of many examples of a roof scupper.

Let’s learn more about what a roof scupper is and its purpose.

How Effective Is a Roof Scupper

A roof scupper is very valuable to a flat roof drainage system and works in conjunction with your downspouts. Also, a roof scupper gives you a chance to have proper drainage on your flat roof. As long as the scupper is clear of debris, the water will drain nicely. Roof scuppers are vital pieces of a flat roof drainage system. It is important to check them for proper drainage regularly. If you live up north, you will want to make sure you get the snow off the roof and the roof scuppers are kept clear of ice. If not, the water will back up onto the roof and into the home.

Various Types Of Roof Scuppers

There are a few types of roof scuppers and they come in different shapes. The most standard roof scupper is a rectangular-shaped box. Here is a list of ones we found on Amazon (Note: We have not tested these products).

  • Open Scupper–three sided scupper with an opening at the top
  • Through Wall Scupper-usually a rectangular hole in the wall, connecting to a downspout
  • Round Scupper or Decorative-found in the sidewall of a building, allowing water to run off through a piping system

The Difference Between A Roof Scupper and A Drain

You will be surprised at the difference between a roof scupper and a roof drain. One would assume that they are very similar items in your roof drainage system.

A roof scupper is a part of your roof drainage system that allows water to run off the roof through a metal edge, parapet wall, or through the flat roof into the downspout. This will prevent the water from running into the interior of the building as it puddles up on the roof.

Roof drains are assemblies where water runoff transfers through the roof drain and into piping that runs out to the exterior of the building. Roof drains can be installed in the middle of the roof and connected to piping that will run through the attic and out to the sidewall of the building exterior.

Cost Of a Roof Scupper

A basic roof scupper can run you around $100-$150. However, there are additional materials you need to make the installation successful: Caulk to seal the joints and the potential for welding of the scupper to the downspouts of your gutter system.

Since there are so many moving parts to installing a roof scupper, it is best to consult a licensed roofing specialist. There are local roofing codes for each state and you will want to make sure you follow those roofing codes. These are the codes for Chicago and these are for DuPage County.

Installation of a roofing scupper will likely run you between $400-$800, depending on the time and materials needed for the job.

Let’s take a look at how to install a flat roof scupper drain.

Other Recommended Maintenance

Flat roofs can puddle after heavy rain. It is important to have the proper drainage system so that this doesn’t occur. Installing a roof scupper will allow for proper drainage off of your flat roof. However, if the drainage system backs up, you could end up with roof damage. Check the roof for clogged drainage and puddles.

Check the pipes on the roof and make sure the vent is clog-free, along with no birds or rodents making nests. Additionally, check to make sure are no humans blocking the vent or corrosion of the pipe.

When Do I Call A Professional

When it comes to roofing, you will want to consult a licensed roofing contractor. Getting up on a flat roof to install a roof scupper could prove to be more challenging than you think. In addition, there are various building and roofing codes for your state and you will want to ensure that those codes are followed. So, for the safety of you and the home, you will want to consult a licensed roofing contractor.

Conclusion

In many cases, it is easy to identify the need to repair a leaking flat roof. In this case, the installation of a roof scupper would be ideal. Additionally, making sure that the drainage system connects properly will ensure that no leaks will occur on your flat roof.

It is also highly recommended that you consult a licensed roofing contractor to conduct any repairs or new installations needed on your flat roof drainage system. This will save you time and money, as you might not know the state roofing code and more damage could be done.

Lastly, they will be able to assess all of the potential damages and provide a great estimate as to the cost of repairs. Home Inspection Geeks can take a look at your roofing needs when we come out for a home inspection in the Cook, Lake, and DuPage Counties, IL.

September 10, 2021

Are Oven Heating Elements Universal

Appliances

Imagine that you are baking your dinner for the night and the oven does not seem to be heating as quickly. It is the baking element in your oven. You wonder, are oven heating elements universal? The answer in most cases is yes but only within the manufacturing company and for specific models. Let’s take a look at baking and broiling heating elements.

What Is a Heating Element

Typically, an oven heating element comes in two types. You have a baking element and a broiler element. You will begin to notice that your baking element will likely need replacement faster than your broiler element.

  • Baking heating element-this is a found at the bottom of the oven and used the most out of the two heating elements.
  • Broiler heating element-located at the top of the oven and specializes in broiling your foods.

These elements are connected by wires in the back of the oven and those wires are connected to the power source plug. Their main purpose is to heat the oven based on your desired cooking needs.

Finding the Correct Oven Heating Element

Now that you know you need to replace the element, where do you go? Local hardware stores, parts stores, and Amazon. You can easily find a replacement element by using your oven serial and model numbers to locate your replacement part.

Does An Oven Heating Element Cost A Lot

Well, are you willing to learn how to change the element yourself? If so, the oven heating element will cost you anywhere from $20-$25.

However, if you are not secure in your professional approach to the project, you will end up paying a professional service person $220 for the

replacement job.

Voltage tester

What Tools Do I Need

You will need a few tools to assist you in this project. Luckily, the total project should not take you longer than 15 minutes. Here are the tools that you should have to complete the project:

  • Non-contact voltage tester
  • Screwdriver
  • Needle-nose pliers
  • Nut driver
  • Electrical (if needed)
  • Replacement Heating Element (Baking or Broiler)

How Do I Change My Oven Heating Elements

  1. The first step in any safety measure when working with an appliance is turning off the power. Do this by going to the electrical box and finding the breaker for the oven or kitchen.

2. Remove the screws associated with the heating element.

3. Gently pull the element out of its holes and watch the wires come through the holes from the back of the oven to about 1-inch of wire being exposed.

4. You will want to check the electricity on the wires with a non-contact voltage tester.

5. Once the voltage is confirmed that the power is off, you will gently remove the connectors from the wire end.

6. Once the wires are removed, you will want to ensure that the wires do not fall back into the holes.

7. Gently attach the wires to the back of the oven with your electrical tape.

8. Lastly, you will position the new heating element in the same position as the old one and reconnect the wires. Once the wires have been connected, you will gently slide them back into their holes and reattach the screws to the back of the oven.

Now that you have your tools and have read the instructions, let’s take a look at this video tutorial to see how it all comes together.

Other Maintenance

While you are working to check the heating elements in your oven, it is also recommended that you clean the oven at this time. Consider using a harmless home cleaner, rather than a toxic oven cleaner.

Since the oven is close to the sink, check the tap water to make sure it runs clear. Does the water happen to be cloudy? There are ways you can fix the cloudy water such as getting rid of the bubbles, using a water softener, and testing the water if you have a well to name a few.

Also, check your faucets for calcium buildup. This will also happen if you have hard water so purchasing a water softener can help in a few areas of the sink. You can also clean this area by using a white vinegar and water mixture and a few other supplies.

When To Call A Professional

It is always best to call a professional if you lack the tools and understanding to complete the project. Do not ever attempt something electrical if you are not comfortable working with the wires. It is always best to defer to a professional to assist you with this project.

Conclusion

Replacing an oven heating element can be complex. If you do not understand the steps in the project or are not comfortable with the directions, then you can always defer to your home inspection professionals. Home inspection geeks are here to assist you with all of your project needs. We service the Chicago, IL areas of Cook, DuPage, and Lake Counties.

August 27, 2021

How to Prevent Calcium Buildup on Faucets

Water

Imagine, you come home from a nice long weekend away, and you have invited some friends over to dine with you. You make it to the kitchen sink to wash your hands and begin dinner preparations. As you look at the faucet where the water is coming out to clean your hands, you notice a white chalky film on the faucet head.

Questions begin to arise and you begin to freak out. This faucet does not look clean at all. You are thinking to yourself, how to prevent calcium buildup on faucets? Well, installing a water softener system or spending time using non-toxic methods to remove the calcium buildup.

How Calcium Builds-up on Faucets

Well, all of this happens when you have a “hard” water source. So, regardless of your time away, the water will release minerals and calcium deposits that affix themselves to the faucet heads. Fortunately, prior to your guests arriving, there is a quick solution to the problem. If you have hard water and lime deposits, you can install a water softener system.

Simply put, the calcium builds up due to minerals in the water source. So, if you have well-water there is a high chance that you will have lime, copper, and calcium in your water source. If you do not have a “soft” water system connected to your water source, then you will likely notice a build-up around the water faucets in your business or home.

How To Remove The Calcium Buildup

The easiest ways to remove the calcium buildup from your faucets are typical, simple home remedies. Here are some of the following items needed so that you can remove the calcium buildup from your faucets.

  • Use a white vinegar in water mixture
  • Paper towels or a rag of sort
  • Plastic bag the size of a sandwich
  • Rubber bands
  • A sponge, textured cloth, or magic eraser

Using these items will allow for easy removal of your calcium build-up around the faucets in your home or business.

Use non-chemical products when you can to clean the calcium buildup.

Steps To Achieving A Clean Faucet

Always use non-chemical products when you can. They are better for the air you breathe and often do an amazing job!

Here is a list of steps to accomplish your goals.

1. Read the CLR bottle (or vinegar) and make sure it’s compatible with your faucet material. We also recommend spot testing the CLR before beginning.

2. Use gloves and fill your Ziploc with 1 part CLR (or Vinegar), 1 part water.

3. Secure it on your faucet spout (shower head) with a rubber band and leave it for at least 3 hours.

4. Use a sponge (Magic Eraser) or paper towel and rub the buildup off.

5. After step #4 it should look just like new!

Invest in a Water Softener System to Prevent Calcium Buildup on Faucets

Do you live in a place where municipal water or well water is high in minerals? What could you do to fix this? Well, the softer the water, the less likely it is that you will experience calcium build-up on your faucets. Water softeners remove minerals such as calcium salts from your water. Removal of these minerals softens the water and reduces the production of calcium and lime build-up around your faucets.

When you are cleaning the areas where a faucet is present, it is best to check where the water comes out of the faucet. You will see if lime or calcium is building up around that water spout and screen locations.

Check out this video on how to clean the calcium off your faucets.

Water softener system can get rid of the hard water and calcium buildup.

Problems Caused by Hard Water

As we have learned, it is difficult to prevent calcium buildup on faucets when you have hard water. It can lead to a lot of different problems so this is why having a water softener system is a good idea. Some of those problems are:

  1. Clothes look dirty and wear out faster
  2. Shower heads will clog
  3. Soaps scum on tubs and showers
  4. Damage to glass shower doors and plumbing fixtures
  5. Water pipes will clog

Maintenance in the Home

When you are taking a look at the calcium build-up, you will want to make sure you focus on a few other areas as well. One of those is to check to see if you have cloudy tap water. Cloudy tap water happens when you have hard water. Just like with the calcium build-up, you need a water softener. Also, if you have bubbles, you need to get rid of those and also test your well if you have one. You can also use a sediment filter to help make the water cleaner.

The hard water will also cause soap scum and water spots on the shower doors. Most people use a squeegee to get the water off, but it does not always work when you are dealing with hard water. You can also use baking soda, vinegar, borax, or lemon juice to clean the spots from the door.

We know that hard water can wreck havoc on the home so another area you will want to take a look at is the piping in your home. What if you think while looking around that you may have polybutylene pipes? Well, here is an indication:

  1. Stamped with the code “PB2110.”
  2. Flexible and sometimes curved.
  3. Not used for waste, drain or vent piping – only supply lines.
  4. Usually grey in color, but they can also be white, silver, black, or blue.

Knowing what type of plumbing you have in your home is important.

Non-toxic Ways to Clean the Calcium

A water softener system is not cheap and averages about $1500. However, if you don’t want to add one to your home, then there are ways you can clean the faucet heads with a simple less toxic solution such as baking soda. Many over-the-counter products produce a gas that can be harmful to the person applying the chemical. It is best to start with simple soap and water to clean the area. Moreover, you might consider a Mr. Clean “Magic Eraser” as well. Lastly, if none of the over-the-counter products work to your liking, you will want to call a professional to install a soft water system.

When Do I Call a Professional

You would think that a professional would be needed to help with preventing calcium buildup on faucets. As unfortunate as it might be, it is fairly easy to clean the deposits off of your faucets. We realize that you might not have time to clean regularly, and in many cases, the build-up happens quickly and to multiple locations. These locations could include the showerhead, the sink faucets, and the bathtub faucet.

Conclusion

After all is said and done, the worst issue with calcium build-up relates to water and minerals. Both are areas that you cannot control as a real estate owner. You get no say in how the municipality treats your water source or how the water from the aquifer/well is created. Your only hope in having a relative stress-free water faucet scenario is to install a water softener system into your water source. Home Inspection Geeks will take a look at your water and plumbing system during a home inspection in Chicago Metro Area.

August 11, 2021

Smoke Alarm Flashing Red

Safety in the Home

Smoke alarms are a necessity in a home and save up to 890 lives a year and reduce the risk of dying by fire up to 50% a year according to the New York State Department of Health. Additionally, the National Fire Protection Association recommends that there be a smoke alarm in each room that people sleep in, outside the room of each sleeping area, as well as every level on a home, finished attics and basements. This may seem like a lot, but saving lives is important. What happens if your smoke alarm is flashing red? If it flashes every 40-60 seconds, this means that it is functioning properly. However, some models it may be that it is not working. It is important to look at the manual for the ones you have in your home.

Let’s take a look at the other indicators so you know what to do to get it back to flashing red again (or whatever color is good for your make and model). We will also look at Carbon Monoxide detectors.

Combination smoke and carbon monoxide detector

Smoke Alarms Do More Than Detect Smoke

The smoke detectors that will work best in your home are ones that detect carbon monoxide and natural gas, as well as fire and smoke. This is because these are harmful to the residents of your home and need to be known when they are in the air. Here is information about the combination detector above.

However, you need to know what the different indicators (and unfortunately, the sounds) mean and stay on top of making sure the detectors are in working condition.

Flashing Red is Good on Many Models

Often when we see red lights on things like our car, or a red pen used by a teacher, we think the red is bad. However, on most smoke detectors, it is a good sign. Red flashing on some smoke alarms signals that all is well and it is working. Take a look around your home at the smoke detectors. What color do you see on the detector? If it is flashing red, check this box on your maintenance list that it is working properly and is ready to save your life if needed. Be sure to research your individual model or look at the manufacturer’s documents to tell for certain.

Chirping Every Minute

When the smoke detector is chirping every minute, this is a clear indicator that the battery levels are low and will need to be replaced. The cycle of chirping will occur every minute for the first hour of low battery operation. After the hour has concluded and the battery is still not changed, the smoke detector will then announce a low battery function.

When to Change Battery

First, you will need to determine the type of smoke detector that is present in your home. Once you have established the type, you can determine what battery operates your smoke detector. Most smoke detectors operate off a 9-volt battery. It is highly recommended that the batteries are changed once a year. Regardless of having no malfunctions during the year, it is best to change all of the 9-volt batteries in your system.

Continuous Green Color

When you check your smoke detectors to ensure they are working properly, and you see a continuous green light, this indicates that the unit is functioning off of the AC power unit. This isn’t a bad thing at all. Check the brand and model number on the back of the unit and look up the manual on line. This will allow you to find out what each color means.

Why You Need to Disconnect AC Before Changing the Battery

The importance of disconnecting the AC power revolves around electrician wiring. You should never assume that the wiring in your smoke detector system has been done perfectly. To avoid a potential shock situation when changing the battery, you simply disconnect the AC power.

Green Light Is Out

While you are checking your smoke detectors and you notice that your green light is out, you should check your circuit breaker to see if it has tripped. Having a green light out indicates an interruption in the power source. This could be due to the circuit breaker or the wiring of AC power.

How to Reset the Smoke Alarm

In order to reset the smoke alarm, you should first locate the actual issue within the device. It could be something as simple as changing the battery.

  1. Check the area near the alarm that has gone off. Determine that the area is safe and the alarm was triggered by a malfunction, rather than a burnt food item or actual fire in the area of the alarm.
  2. Next, locate the test button on the device and push it. This will give you a clear determination based on the color and sounds of the alarm. This is when you will determine if the batteries need replacement.
  3. Lastly, to reset the hardwired smoke alarm you will use the test button just like you would on a battery operated alarm.

Some Smoke Alarms Have Colors That Mean Something Else

Typically, a smoke alarm has a red and green light to allow you to understand the system is working properly. However, there are other models that will integrate a third light indicator to separate when a malfunction, power source, and a simple battery replacement might be needed.

It is important to do the following:

  • Check the manual
  • Research the model online
  • Decipher what each color might mean for that model: Red, Green, and even Yellow

Carbon Monoxide Detector

Having a working carbon monoxide detector in your home is very important and could save a life. Installing a carbon monoxide detector inside every bedroom and outside every sleeping area is a recommendation. Carbon monoxide can be present in the home in various ways and it is odorless and tasteless so you can’t see it.

Lastly, the carbon monoxide detector has a sticker that says “Move to Fresh Air” to remind you that once the alarm sounds at the very moment the CO levels become unsafe and you must get outside to fresh air. There are also combination smoke and carbon monoxide detectors which are your best choice for keeping the family safe.

Potential Contributors of Carbon Monoxide

Range, oven, stove, water heater, furnace, a running car in the garage, space heaters, portable generators, charcoal grill, and clothes dryers are all potential contributors of carbon monoxide in your home. Having carbon monoxide detectors in the home will allow you to know when the levels are unsafe and you must seek fresh air.

In the wintertime, many people run their furnaces. Keep an eye out for the following:

1.Yellow or flickering flame – this is usually a blue color so this is a sign that the unit may be burning carbon monoxide

2. Moisture around windows or walls – this is an indicator of a leaking furnace

3. Streaks of soot- black, brown or yellow soot stains may be indicating that carbon monoxide is leaking

4. Rust on the vent pipe – water and moisture may have leaked out, thus indicating a leak in the furnace

Any of these signs above may indicate that carbon monoxide is leaking from the furnace.

IF YOU SUSPECT THERE IS A CARBON MONOXIDE LEAK

  1. Get your family and pets out of the home as quickly as possible
  2. Call the HVAC company and gas company
  3. See a doctor to have the family’s health assessed. Carbon monoxide poisoning is treatable, but only if caught early.

Maintenance in the Home

There are a few things you can do to avoid fires in the home that will lead to the smoke alarm sounding.

  1. Check the electrical outlets – you want to make sure they are not overloaded. If a fire starts, turn off the power to the electrical current and get the family out of the home right away. If you have time, throw baking soda on top of the fire to help put it out. Call 911 from outside of the building in a safe place.
  2. Power surge – some power surges are external and happen because of mother nature or an animal. Others are internal and can be controlled. It is best to unplug any appliances you are not using in order to cut off the power going through the home. A power surge can start a fire in the home and you want to make sure you are taking precautions. Lastly, this is even more of a reason to make sure your smoke detectors are working.
  3. HVAC unit – pay attention to any sounds or smells coming from the HVAC unit. This may signal that you have a bad blower motor. The problem is, if it overheats, it can cause a fire. Listen carefully to the unit inside and outside the home. If you have concerns, call a professional and schedule maintenance once a year.
  4. Replace smoke detectors every 10 years – Most smoke detector manufacturers recommend you replace your smoke detectors every 10 years.

When to Call a Professional

When installing a carbon monoxide detector or a smoke detector it is highly recommended to consult a professional. You will need a licensed electrician to connect the proper wiring for your devices. In addition, you may want to interconnect the units and this will require the expertise of a licensed professional. Also contact a professional if you are having any issues with either type of detector and hopefully they can be of help.

Conclusion

Smoke detectors and/or carbon monoxide detectors save lives. These two alarm systems are built to warn you when there are fires or unhealthy conditions in the air. You must listen to the alarms that are communicating to you. Ignoring a faulty unit could cost lives in a home or place of business.

Checking your system once a month to ensure proper working conditions, as well as changing the batteries once every year is imperative to your safety. Also make sure you read the manual for the detectors that you have so you know what each color means. Home Inspection Geeks will check your electrical usage in the home and smoke detectors when conducting a home inspection.

July 26, 2021
Page 2 of 3123

Pages

  • About
  • Areas We Serve
  • Best Home Inspectors in Chicago, IL
  • Commercial Building Inspection Chicago, IL
  • Condo Inspections
  • Contact
  • COVID-19 Guidelines
  • Handy Geeks Quote
  • Handyman Services Chicago: Handy Geeks
  • Home
  • Multi-Unit Inspections
  • Our Blog
  • Preferred Contractors
  • Pricing
  • Privacy Policy
  • Radon Testing Chicago, IL
  • Sample Page
  • Schedule Your Inspection
  • Terms of Use
  • Testimonials
  • Thanks
  • The Best Home Inspectors in Aurora, IL
  • The Best Home Inspectors in Evanston, IL
  • The Best Home Inspectors in Naperville, IL
  • The Best Home Inspectors in Northbrook, IL
  • Your Inspection
  • Your Report

Categories

  • Appliances
  • Attic
  • Basement
  • Deck
  • Electrical
  • Fireplace
  • Home Buyers
  • Home improvement
  • Home Inspection
  • Home Maintenance
  • HVAC
  • mold
  • Plumbing
  • Podcast
  • Real Estate
  • Resources
  • Roof
  • Safety in the Home
  • Taking Care of Your Home
  • Uncategorized
  • Water
  • Water Heater
  • Winterization

Archive

  • May 2022
  • April 2022
  • March 2022
  • February 2022
  • January 2022
  • December 2021
  • November 2021
  • October 2021
  • September 2021
  • August 2021
  • July 2021
  • June 2021
  • May 2021
  • April 2021
  • March 2021
  • February 2021
  • January 2021
  • December 2020
  • November 2020
  • October 2020
  • September 2020
  • August 2020
  • July 2020
  • June 2020
  • May 2020
  • April 2020
  • March 2020
  • February 2020
  • January 2020
  • December 2019

Providing Home Inspection Services to Cook, Lake, and DuPage Counties

We provide Inspection services to the Chicago Metro Area. Certified home inspection services including Buyers Inspections, Pre-listing Inspections, New Construction Inspections, Commercial Inspections, Radon Testing, and Sewer Scope Inspections.

View Service Area

Privacy Policy

Terms of Use

773-242-9358
info@homeinspectiongeeks.com
Chicago, IL
Open Everyday 24 hours

Sitemap

© Copyright Home Inspection Geeks, Inc. - Hosted by WolfPack Advising
  • Facebook
  • Twitter
  • Yelp
Scroll to top